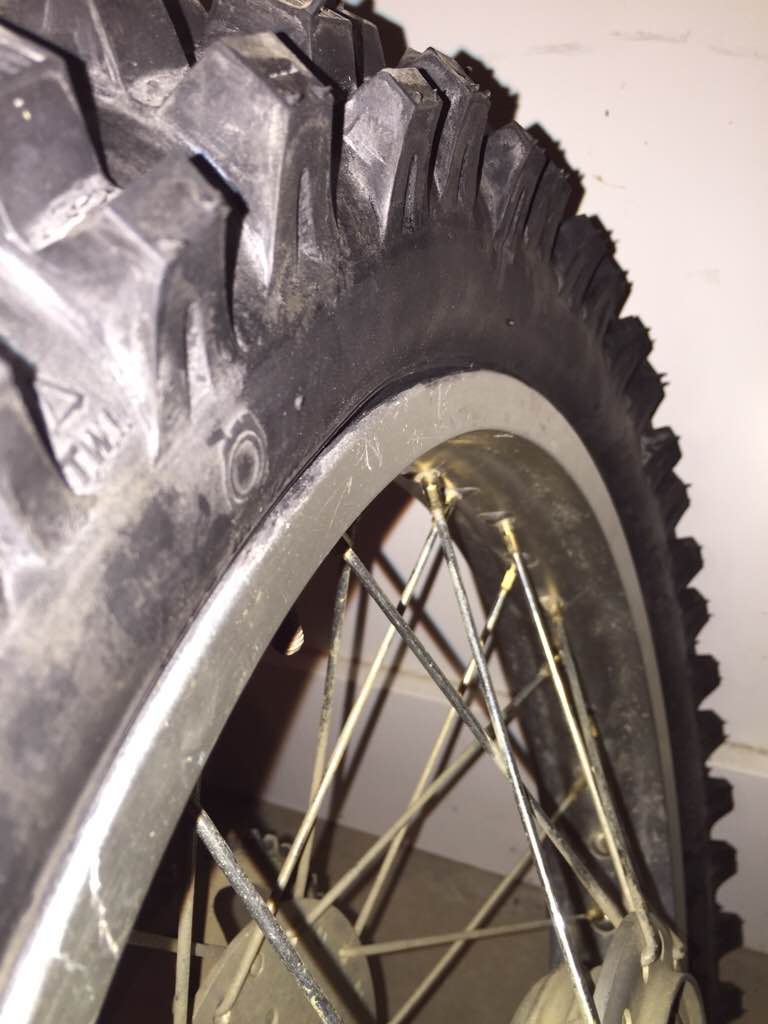
That frustrating hiss of air escaping as you struggle to inflate your motorcycle tire is all too familiar to riders who’ve faced the dreaded motorcycle tire bead not seating problem. You’ve carefully mounted the tire, positioned the tube, and started inflating—only to watch helplessly as the bead refuses to snap into place against the rim. This common yet maddening issue can turn a simple tire change into hours of wasted effort, but the good news is that most seating failures stem from predictable causes with proven solutions you can implement immediately in your garage.
When your motorcycle tire bead won’t seat properly, you’re dealing with one fundamental physics problem—the reinforced edge of the tire isn’t making complete contact with the rim’s beveled surface. This tiny gap allows air to escape before enough pressure builds to force the bead outward into its proper position. Understanding why this happens and applying the right combination of preparation, lubrication, and inflation techniques will resolve the vast majority of seating problems without requiring professional help.
This guide walks you through every effective method for getting those stubborn beads to snap into place—from simple lubrication tweaks to professional-grade solutions when all else fails—so you can get back on the road faster.
Why Motorcycle Tire Beads Fail to Seat Properly
Most motorcycle tire bead seating problems stem from multiple factors working against you simultaneously. Understanding these root causes helps you target your troubleshooting efforts effectively.
How Shipping Damage Creates Permanent Distortion
Tires ordered online frequently arrive with bead seating problems already built in from shipping compression. Manufacturers band front and rear tires together for efficient shipping, but this compression creates subtle distortions that persist after installation. The tire might look perfectly round on your workbench, but when mounted on the rim, those compressed sections refuse to expand far enough to engage the rim’s beveled edges. That millimeter gap allows continuous air escape during inflation attempts. Tires arriving visibly skewed from strapping typically require special intervention beyond standard mounting techniques.
Why Rim Contamination Blocks Proper Seating
Dirt, old bead lubricant residue, and damaged rim strips create invisible barriers between tire and rim. Even microscopic debris creates pathways for air escape during inflation. The rim’s bead seating surface must be absolutely clean for proper engagement. Additionally, rim lock positioning on certain motorcycle models can physically interfere with proper bead seating, requiring careful alignment during installation. Always inspect the entire bead seating area carefully before attempting inflation—any debris or damage deserves attention first.
Essential Preparation Steps Before Inflation Attempts
Proper preparation dramatically increases your success rate when facing a motorcycle tire bead not seating problem. These critical steps take just minutes but can save you hours of frustration.
Sunlight Softening Technique for Stiff Tires
Cold tire rubber behaves like stiff plastic—resistant to bending and reluctant to expand outward against the rim. Place your mounted tire assembly in direct sunlight for one to two hours before attempting inflation. This simple technique has rescued countless riders who struggled for hours with cold tires, as the warmth makes the rubber significantly more pliable. For colder environments, position the tire near a warm radiator or use a hair dryer on low heat to achieve similar results without risking heat damage.
Thorough Rim Cleaning Procedure
Before any mounting attempt, clean the rim bead seating surfaces thoroughly using wire wool or appropriate solvent. Remove all accumulated dirt, old lubricant, and oxidation that might prevent complete contact. Inspect the rim for damage to bead seat areas, including dents, bends, or corrosion that could interfere with proper tire engagement. Replace any damaged rim strips or spoke hole tapes that might cover the bead seating area. This fifteen-minute preparation step prevents countless failed seating attempts.
Best Lubricants for Motorcycle Tire Bead Seating
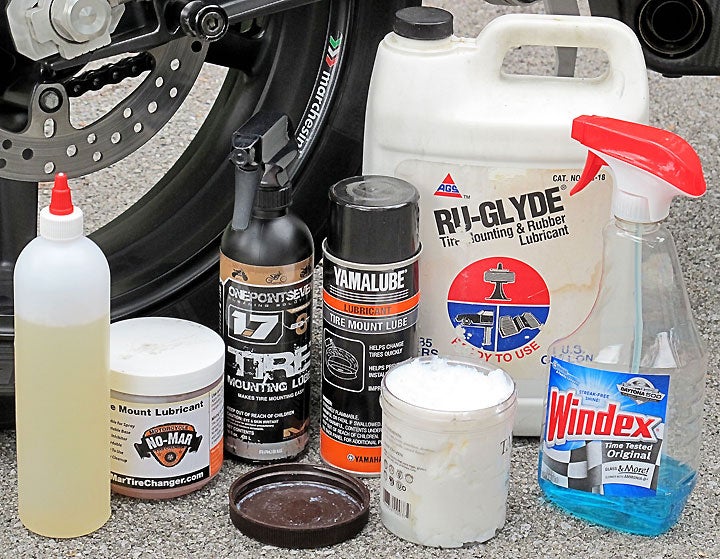
The right lubricant reduces friction between tire bead and rim, allowing beads to move into position more easily during inflation. The wrong lubricant can damage components or create dangerous tire slippage.
Top 3 Lubricant Options That Work
- Tire-specific mounting lubricants like No-Mar create sufficient lubrication without leaving residues that cause tire slippage during operation
- Murphy’s oil soap contains corrosion inhibitors that protect aluminum rims while providing ample lubrication
- Original Gojo hand cleaner (non-pumice formula) allows tires to slip onto rims with minimal tool assistance and cleans up easily
Dangerous Lubricants to Avoid
Dish soap presents significant risks to aluminum rims due to its alkaline composition. The chemical reaction causes aluminum oxide formation, which expands progressively and eventually pushes the tire bead away from the rim. Riders have experienced complete tire failure on long rides because dish soap corrosion created slow leaks that developed into catastrophic failures. Never use dish soap for bead seating on aluminum rims.
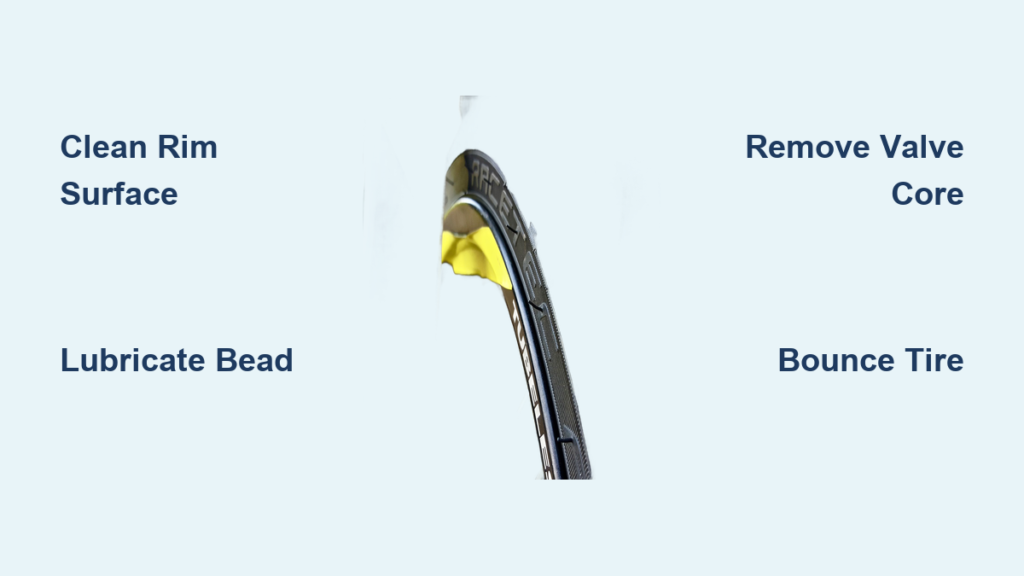
Valve Core Removal: The Game-Changer Technique
Removing the valve stem core before inflation dramatically increases air volume delivery—the single most effective technique for stubborn bead seating problems.
Step-by-Step Core Removal Method
- Completely deflate the tire and remove the valve core using a standard valve core tool
- Connect a quick-disconnect air chuck directly to the valve stem
- Ensure your compressor tank fills completely before attaching
- Apply air in short bursts rather than continuous flow
- Listen for the distinctive “pop” that confirms successful seating
- Reinstall the valve core and adjust to proper operating pressure
This technique works because the restricted flow through the standard Schrader valve opening prevents the rapid tire expansion necessary for bead seating. With the core removed, air blasts into the tire cavity instantly, creating the pressure surge needed to force beads outward against the rim.
Physical Manipulation Methods for Stubborn Beads
When inflation alone proves insufficient, these physical manipulation techniques help persuade stubborn beads into position.
Bouncing Technique for Complete Circumference Seating
Position the wheel vertically with the tire between your legs and bounce your weight on the assembly while maintaining air pressure. This distributes force around the tire’s circumference, encouraging beads to move into seating position. The combination of internal air pressure and external physical force often succeeds where pressure alone fails.
Strategic Hammering for Localized Problem Areas
Use a rubber mallet to strike the tire surface in the area directly opposite the unseated section while maintaining air pressure. The impact creates vibration and localized movement that helps the bead slide into proper position. Always work from the edges of the unseated section toward the center—not the reverse. Plastic hammers and rubber mallets prevent rim damage during this process.
Professional-Grade Solutions When All Else Fails
When home remedies don’t work, these professional solutions can save your tire change project.
Ratchet Strap Compression Method
Wrap ratchet straps or tie-downs around the tire circumference and gradually tighten while applying air pressure. The strap pressure compresses the tire center, pushing bead edges outward toward the rim flanges. This technique works particularly well when combined with lubrication and rapid air introduction. Begin with the strap loose enough to allow initial tire position, then gradually tighten while applying air.
When to Seek Professional Help
Most motorcycle tire shops will seat difficult beads for minimal fees—often around five dollars. Shops possess high-flow compressors capable of rapid pressure delivery that exceeds most home air systems. If you’ve tried multiple techniques without success after 30-45 minutes, professional assistance represents the most reliable and cost-effective solution. The explosive sound of successful bead seating frequently surprises customers accustomed to struggling with smaller air sources.
Critical Safety Precautions During Bead Seating
High-pressure air during bead seating creates genuine hazards requiring appropriate precautions—protecting yourself matters as much as protecting your equipment.
Pressure Limits You Must Respect
Never exceed pressures listed on tire sidewalls by more than 50% during seating attempts. Sidewall ratings represent maximum safe operating pressures—exceeding these limits creates risk of catastrophic failure. Rim failure under pressure produces shrapnel capable of causing severe injury or death. Maximum safe pressures during seating attempts should not exceed 75 to 80 PSI for most applications.
Essential Protective Gear
Wear eye protection during all inflation attempts to guard against potential debris should tube or tire failure occur. The explosive sound of beads seating can cause temporary hearing impairment—wear ear protection, especially when approaching pressures where seating becomes likely. Keep all body parts away from the bead area during inflation—the force of seating can trap fingers between tire bead and rim, causing severe injury.
Post-Seating Protocol for Safe Operation
Once your motorcycle tire bead finally seats, proper next steps ensure safety and longevity.
Immediate Pressure Adjustment
As soon as you hear that satisfying “pop” confirming successful seating, immediately reduce pressure to the manufacturer’s recommended operating specifications. Operating tires at seating pressures causes accelerated wear, reduced traction, and compromised handling. Most motorcycle tires require 28 to 36 PSI for street applications.
Critical Settling Period
Allow seated tires to rest for several hours before extended operation. This settling period ensures complete bead engagement and allows any minor air leaks to manifest before relying on the tire in critical situations. A tire that loses pressure overnight has a problem that requires attention before riding.
Quick Fix Checklist for Stubborn Bead Problems
When your motorcycle tire bead won’t seat, work through this systematic approach:
- Prepare: Clean all components thoroughly and apply appropriate lubricant liberally
- Position: Ensure the tube is correctly positioned without pinching
- Remove: Take out the valve core for rapid air delivery
- Inflate: Apply air in progressive bursts while bouncing the tire
- Inspect: Check bead position visually after each inflation attempt
- Increase: If initial attempts at 40-50 PSI fail, increase pressure in 10 PSI increments
- Manipulate: Combine pressure with physical manipulation using rubber mallets
- Compress: Apply ratchet strap pressure around the tire circumference if needed
Reserve extreme pressures above 80 PSI for last resorts, recognizing the safety implications. When all methods fail after reasonable effort, professional shop assistance offers the most reliable solution for minimal cost—getting you back on the road safely with no risk of personal injury from improvised extreme measures.