
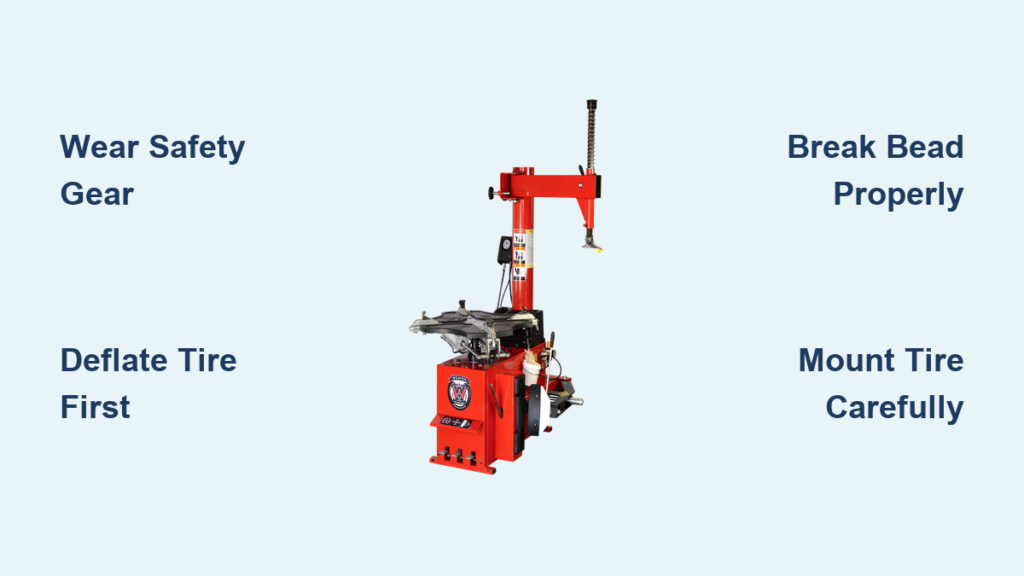
Tire changes don’t have to mean expensive trips to the shop when you know how to use a tire machine properly. Learning this essential automotive skill puts you in control of your vehicle maintenance while saving significant money over time. A tire machine—properly called a tire changer—handles the most physically demanding aspects of tire replacement: breaking the stubborn bead seal, removing the old tire from the rim, and mounting the new tire without damage. Whether you’re maintaining your daily driver or performance vehicle, mastering how to use a tire machine opens up new possibilities for your DIY automotive projects.
Modern tire changers have transformed what was once a back-breaking chore into a manageable task for home mechanics. These machines feature hydraulic assistance, precision bead breakers, and intuitive controls that handle the heavy lifting while you guide the process. Before attempting your first tire change, understanding the fundamentals of tire machine operation is crucial for both safety and achieving professional-quality results. This guide walks you through every step of the process with clear instructions that make learning how to use a tire machine straightforward and efficient.
Essential Safety Equipment for Tire Changing
Before touching any controls, gather the proper safety gear that protects against common tire machine hazards. Safety glasses are mandatory—during bead breaking, rubber fragments can shatter unexpectedly, and metal wheel weights occasionally break loose with dangerous force. Heavy-duty mechanic’s gloves protect your hands from sharp rim edges that commonly develop during normal use and from the abrasive compounds in tire mounting lubricants. Steel-toed work boots provide essential foot protection against rolling wheels or falling tires, which can weigh 50 pounds or more.
Your workspace setup directly impacts safety during tire changing operations. Concrete flooring provides stable footing and easy cleanup of rubber debris and lubricants. Ensure your work area has at least 10 feet of clearance around the machine for maneuvering heavy tires and accessing emergency shutoffs. Position a fire extinguisher within arm’s reach since some tire mounting compounds are flammable. Never wear loose clothing or jewelry that could get caught in rotating components, and keep long hair secured away from moving parts. Most importantly, never stand directly over the tire while inflating—always approach from the side in case of sudden bead seating.
Prepare Your Workspace and Equipment Properly
Setting up correctly prevents accidents and frustration during your tire changing process. Position your tire machine on a level concrete surface with at least three feet of clearance on all sides—this space allows safe maneuvering of heavy wheels and quick access to emergency stops. Secure heavier machines to the floor using anchor bolts as the forces during bead breaking can cause even 300-pound machines to shift unexpectedly. Test the machine’s rotation and bead breaker functions with no tire mounted to verify proper operation.
Gather all necessary tools before starting: water-based tire mounting lubricant (never petroleum-based), valve core tool, digital pressure gauge, air compressor with quick-disconnect fitting, and wheel weights for balancing. Inspect the tire machine’s turntable for smooth rotation, check the bead breaker arm for proper movement, and verify all clamps function correctly. Clean any built-up lubricant or rubber debris from the mounting head and turntable surface, as residue reduces grip and can cause wheels to slip during operation. Keep a shop towel nearby for wiping excess lubricant and a bucket of soapy water for checking air leaks after inflation.
Remove Wheel from Vehicle Safely
Loosen wheel lug nuts while the vehicle remains on the ground to prevent wheel spin. Break each lug loose in a star pattern using a 1/2-inch drive breaker bar—never an impact wrench at full power which can strip lug threads. Once all lugs are loose, raise the vehicle with a floor jack rated for your vehicle’s weight and support it securely on jack stands rated for at least twice the vehicle’s weight per stand. Remove lug nuts completely and carefully pull the wheel straight off the hub, supporting its full weight to avoid dropping it.
Take this opportunity to inspect brake components while the wheel is off. Check brake pad thickness against minimum specifications, examine rotors for scoring or warping, and verify no brake fluid leaks exist. Clean any corrosion from the hub surface with a wire brush to ensure proper wheel seating when reinstalling. Place the removed wheel on a wheel dolly or stable surface where it won’t roll, and note the position of any existing wheel weights for reference during rebalancing.
Deflate Tire Completely Before Operation
A pressurized tire creates dangerous conditions during bead breaking that can cause serious injury. Remove the valve cap and press the valve core with a removal tool until all air escapes rapidly. For tires with TPMS sensors, gently unscrew the valve core while supporting the sensor to prevent damage to the internal electronics. Press firmly on the tire sidewall at multiple points to release trapped air pockets, especially in low-profile tires where air can become trapped between the bead and rim.
Wait 3-5 minutes after initial deflation and recheck the valve stem—residual pressure sometimes remains in tire cavities. A properly deflated tire will feel loose around the rim with no resistance when pressing the sidewall inward. Never attempt bead breaking on a partially inflated tire, as sudden air release can cause the wheel to jump or the tire to explode from stored energy. If working with run-flat tires, be aware their reinforced sidewalls require extra force for bead breaking and may retain more internal air.
Break the Tire Bead Efficiently

Position the wheel on the turntable with the valve stem at 6 o’clock and secure it using the rim clamps. Most machines use either tabletop clamps that tighten from below or jaw-style clamps that grip the rim edges—adjust them to fit snugly without distorting the rim. Engage the bead breaker arm and position it against the tire sidewall approximately 1.5 inches above the rim edge. Apply steady pressure until you hear the distinctive “pop” signaling bead release.
Work systematically around the tire, moving the bead breaker in 4-6 inch increments to avoid creating weak spots in the bead. For stubborn beads on newer tires or run-flats, apply additional downward pressure on the turntable while breaking the bead. Flip the wheel and repeat the process for the opposite bead, ensuring complete release all the way around the rim. If the bead won’t break, check that your machine has sufficient hydraulic pressure and that the bead breaker pad isn’t worn smooth.
Remove Old Tire from Rim Without Damage
Rotate the wheel so the valve stem hole faces away from the mounting head to prevent damage. Hook the lower bead over the mounting head using a tire lever, then rotate the turntable clockwise while guiding the tire over the rim edge. Apply additional lubricant to stubborn sections where the tire resists removal. Work slowly and methodically—rushing this step can cause rim scratches or damage the mounting head.
For difficult tire removals, use two tire levers in tandem: position the first lever to hold the bead over the mounting head, then slide the second lever behind it to advance the removal process. As the tire comes free, support its weight to prevent sudden drops that could damage the machine. Once completely removed, inspect the rim for damage, corrosion, or embedded debris that could affect the new tire’s seal. Clean the rim thoroughly with a wire brush and degreaser before mounting the new tire.
Mount New Tire on Rim Correctly
Apply generous amounts of water-based mounting lubricant to both tire beads and rim surfaces, paying special attention to the rim edges and valve stem area. Position the new tire on the rim with the manufacturer’s rotation arrow (if present) facing forward. Begin working the lower bead onto the rim using tire levers, starting at the valve stem and progressing equally in both directions.
Use the mounting head as a pivot point while rotating the turntable to guide the bead over the rim edge. For the upper bead, which requires more force, apply additional lubricant and use slow, steady pressure. Never use excessive force that could damage the tire bead or rim—reapply lubricant if resistance increases. The final section of the upper bead often requires the most effort; use two tire levers in sequence to complete the mounting process without damaging components.
Inflate Tire Properly for Safe Operation
Install the valve core and begin inflation with short air bursts while monitoring the bead seating. Most tires require 35-45 PSI to initially seat the beads, though some low-profile performance tires may need up to 60 PSI. Listen for the distinctive double “pop” indicating both beads have sealed against the rim. Never exceed 40 PSI during initial seating unless specified by the tire manufacturer.
Once beads are seated, reduce pressure to the vehicle manufacturer’s recommended level (typically 32-35 PSI for passenger vehicles). Check pressure when tires are cold for accuracy, as driving increases pressure by 4-6 PSI. Spin the tire slowly to distribute lubricant evenly inside the tire. After inflation, check for air leaks by spraying soapy water around both bead areas—bubbles indicate leaks requiring additional seating pressure or lubricant.
Balance Wheel Correctly for Smooth Ride
Mount the wheel assembly on a balancer with the valve stem at 12 o’clock position. Secure it properly to prevent wobble during spinning. Modern balancers display exact weight amounts and positions needed—typically starting with 1/2 ounce weights for minor imbalance. Apply clip-on weights to the outer rim edge at the specified locations, hammering them securely in place.
For precision balancing, use adhesive weights on the inner rim surface for wheels with visible spokes. After initial weighting, spin the wheel again to verify balance—quality balancing should show less than 0.25 ounce imbalance. Road force balancers provide even more accurate results by simulating actual driving conditions. Properly balanced wheels eliminate vibration, reduce tire wear, and improve fuel efficiency.
Reinstall Wheel on Vehicle with Proper Torque
Hand-tighten lug nuts in a star pattern before lowering the vehicle to ensure even seating. Lower the vehicle completely before final tightening to prevent bearing damage. Use a digital torque wrench to tighten lug nuts to the manufacturer’s specification (usually 80-140 ft-lbs depending on vehicle). Check torque values in your owner’s manual—overtightening can warp brake rotors while undertightening risks wheel detachment.
Recheck lug torque after driving 50-100 miles to account for any settling of components. This second torque check prevents dangerous loosening during normal driving conditions. Properly torqued wheels ensure safe operation and prevent costly damage to wheel studs and brake components.
Maintain Your Tire Machine for Longevity
Clean rubber residue and lubricant buildup from the turntable after each use with a dedicated wheel cleaner. Lubricate moving parts monthly with machine-specific grease—never use automotive grease which can attract debris. Check hydraulic fluid levels quarterly and top off with manufacturer-specified fluid. Replace worn bead breaker pads immediately as smooth pads reduce effectiveness and can damage rims.
Store the machine covered when not in use to protect against dust and moisture. Schedule professional maintenance annually for hydraulic system checks and calibration. Properly maintained tire machines can last decades while delivering consistent, professional results for all your tire changing needs.


