
You’re cruising downhill when suddenly your front wheel wobbles violently. That terrifying shimmy could mean your bike tire has loosened dangerously—putting you at risk of losing control. Many riders mistakenly think “tightening the tire” means inflating it, but the real danger lies in a loose wheel axle. When your rim shifts during rides, it compromises braking, steering, and stability. This isn’t just about flat tires; a loose wheel can snap spokes or cause catastrophic failure. In this guide, you’ll learn exactly how to secure both quick-release and bolt-on axles using basic tools you likely already own. I’ll show you visual cues to spot dangerous looseness, step-by-step tightening sequences that prevent over-tightening, and pro tricks to keep your wheel locked for miles.
Most riders only notice wheel looseness after hearing alarming clicks or feeling instability. But by then, damage may already be done to your hub or frame. The good news? Securing your wheel takes less time than pumping a tire. Whether you’re dealing with a quick-release lever that won’t stay closed or stubborn axle nuts that refuse to hold, these field-tested methods work for road bikes, mountain bikes, and hybrids. Let’s get your wheel rock-solid before your next ride.
Why Your Bike Wheel Loosens During Rides (and Why It’s Dangerous)
Every bump and pedal stroke transmits vibration through your frame that gradually works wheel axles loose. This isn’t normal wear—it’s physics in action. As you ride, rotational forces pull the axle downward while braking forces yank it backward. Without proper tension, your wheel migrates within the dropouts, causing dangerous play. I’ve seen riders ignore early clicking sounds only to have wheels collapse mid-ride when axle nuts fully backed off.
How to Spot Critical Looseness Before Disaster Strikes
- The wiggle test: Grab your rim at 3 and 9 o’clock—any side-to-side movement beyond 1/16 inch means immediate action is needed
- The dropout gap: Lift the bike and check if space appears between the axle and dropout slot when weight shifts
- Brake rub symptoms: Sudden uneven pad contact after tightening indicates misalignment from looseness
3 Hidden Dangers of Riding with a Loose Wheel
- Rim warping: As the hub shifts, spokes go slack then snap tight, distorting your wheel
- Dropout damage: Aluminum frames develop cracks where axles grind against misaligned slots
- Catastrophic failure: Worst-case scenario—your wheel ejects sideways during hard braking
Essential Tools for Tightening Bike Wheel Axles (No Shop Required)

You don’t need expensive gear to secure wheels properly. I’ve fixed countless loose axles using just three items from my saddlebag:
- 15mm cone wrench (prevents axle rotation while tightening nuts)
- Quick-release lever tool (a folded business card works in emergencies)
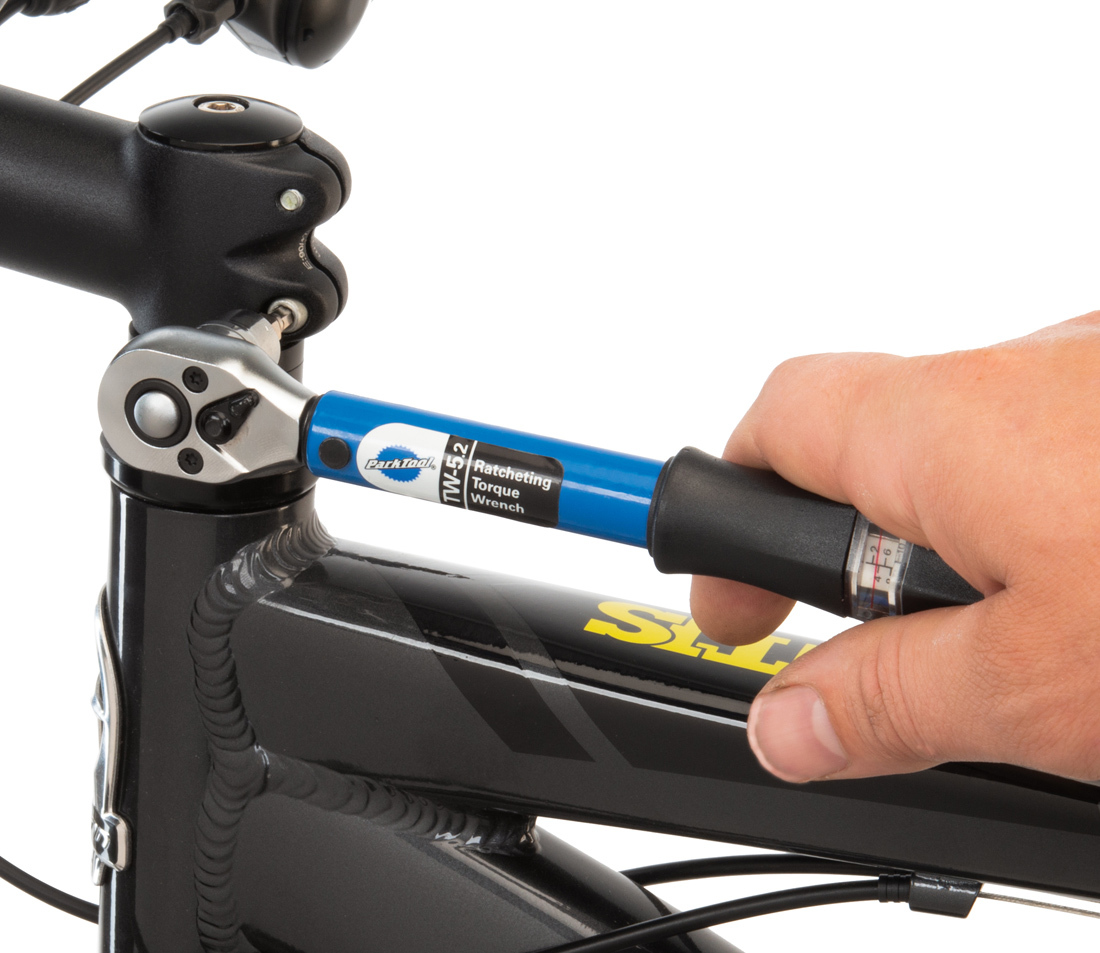
- Torque wrench (optional but critical for carbon frames—more on this later)
Why Standard Wrenches Cause More Harm Than Good
Using adjustable wrenches on axle nuts often rounds off flats or strips threads. Always match your tool size exactly to the nut—common mistakes include:
– Using 17mm on 15mm nuts (slipping causes bolt damage)
– Forgetting the cone wrench (spinning axle ruins internal bearings)
– Overtightening with pipe wrenches (cracks hollow axles)
Pro Tip: Slip an old inner tube over your wrench handles for instant grip in muddy conditions.
Quick-Release Skewer Tightening: The 3-Step Safety Method
Most riders think closing the lever fully is enough—but that’s how wheels eject mid-ride. Proper quick-release tightening requires precise tension calibration. Here’s how mechanics secure them in under 60 seconds:
Why Your Quick-Release Lever Won’t Stay Closed
If the lever slides open after closing, your cam mechanism lacks proper resistance. This usually means:
– Spring tension too low: Spacers inside the skewer need adjustment
– Worn cam surfaces: Grit has eroded the lever’s gripping teeth
– Misaligned dropouts: Fork/frame slots aren’t parallel (requires professional alignment)
Step-by-Step: Securing Quick-Release Wheels Without Fail
- Position the lever correctly: Angle it 90 degrees from the fork dropout (parallel to the ground)
- Test resistance: Close the lever until it meets firm resistance—you should leave a slight thumbprint indentation in your palm
- Final security check: With lever closed, try to rotate the wheel—zero movement means proper tension
Critical Warning: Never ride with lever parallel to fork legs—that’s the OPEN position!
Bolt-On Axle Tightening: Precision Torque Techniques
Bolt-on wheels demand exact tension to prevent loosening or damage. I’ve seen riders crank nuts “as tight as possible” only to shear axles on their first ride. Here’s the pro approach:
How to Tighten Axle Nuts Without Special Tools
- Prep the axle: Clean threads with a rag—grit prevents proper tightening
- Initial snugness: Hand-tighten both nuts until contact, then back off 1/8 turn
- Alternating pattern: Tighten left nut 1/4 turn, then right nut—repeat until snug (no wrench yet)
- Final torque: Use wrench for 1/8 turn increments on each side until resistance feels firm but not stiff
What “Snug But Not Stiff” Actually Feels Like
Grab both wrenches simultaneously and tighten until:
– You feel consistent resistance through 70% of lever travel
– Your knuckles don’t turn white applying pressure
– The wheel spins freely without wobble
Time Saver: Mark aligned nut flats with paint—future tightening takes seconds.
How to Verify Your Wheel Is Secure (The 2-Minute Field Test)
Don’t trust lever position or nut tightness alone. Perform these checks before every ride:
The 3-Point Security Verification
- Lift test: Hoist bike by seat—wheel should stay centered with zero clunking
- Brake spin: Lock front brake and rock bike forward—no axle movement in dropouts
- Ride test: At slow speed, stomp pedals hard—listen for any “tick” sounds from hub
Why Your Wheel Passed Tests But Still Loosens
If your wheel feels tight initially but loosens after 10 miles, you’ve got:
– Contaminated threads: Grease or dirt between nut and dropout
– Worn dropout slots: Aluminum slots develop rounded edges (file them smooth)
– Incorrect torque sequence: Always tighten drive-side first on rear wheels
3 Costly Mistakes That Cause Wheels to Loosen Repeatedly
Even experienced riders make these errors that sabotage wheel security:
Mistake #1: Ignoring Cone Adjustment
Loose cones inside the hub allow axle play that mimics wheel looseness. Before tightening axle nuts:
– Check for hub wobble by grabbing rim and pulling sideways
– If play exists, adjust cone nuts with 15mm wrench (1/8 turn increments)
– Recheck after 5 miles—cones often settle during initial rides
Mistake #2: Cross-Threading During Installation
Forcing nuts onto misaligned threads strips them instantly. Always:
– Start nuts by hand with zero resistance
– Feel for smooth, straight threading before using tools
– Back off immediately if resistance spikes
Mistake #3: Mixing Metric and Imperial Tools
Using 5/8″ wrench on 15mm nuts (common error) rounds corners. Verify measurements:
– 15mm = 0.59 inches (nearly 5/8″)
– 17mm = 0.67 inches (close to 11/16″)
Keep a labeled tool set—paint dots on handles for instant ID
Preventing Future Loosening: Maintenance Secrets Mechanics Swear By
Stop playing whack-a-mole with loose wheels. These preventative measures keep axles secure for months:
Threadlocker Application Done Right
- Use ONLY blue (medium-strength) Loctite 243—never red!
- Apply to last 3 threads of axle only—never inside dropout slots
- Wipe excess immediately with alcohol pad to prevent gunk buildup
Dropout Slot Maintenance Checklist
| Problem | Fix | Frequency |
|---|---|---|
| Grit buildup | Scrub with brass brush | Monthly |
| Rounded edges | File with mill bastard file | As needed |
| Paint chips | Coat with anti-seize compound | After cleaning |
Pro Tip: Apply a thin grease film to dropout slots—prevents corrosion while allowing nuts to seat fully.
When to Seek Professional Help for Wheel Security Issues
Some problems require more than a wrench. Visit a bike shop immediately if:
– You see hairline cracks near dropout slots (especially on aluminum frames)
– Quick-release levers won’t stay closed despite spring adjustment
– Axle nuts consistently loosen within 5 miles of tightening
Critical Red Flag: If your wheel centering shifts after tightening, your frame alignment is off—riding could cause sudden failure.
Final Note: A properly tightened bike wheel shouldn’t require constant re-securing. By following these methods, you’ll eliminate dangerous play while avoiding costly damage from overtightening. Remember: secure wheels mean confident braking and precise handling—especially on descents. Perform the 2-minute security check before every ride, and apply threadlocker during your next maintenance session for long-term reliability. If you experience recurring looseness despite correct technique, have your dropouts inspected professionally; frame damage is never worth risking. Stay safe and ride tight!


