That dreaded thump-thump sound while driving instantly transforms your ordinary commute into an automotive emergency. When your Volkswagen develops a flat tire, knowing exactly how to remove Volkswagen tire properly becomes critical for getting you safely back on the road. Unlike generic tire changes, Volkswagen vehicles feature specific jacking points and tools designed for your exact model that must be used correctly to avoid damage. This process requires careful attention to safety protocols and precise sequencing—loosening lug nuts before raising the vehicle, using factory-specified jacking points, and understanding temporary spare limitations.
Most drivers panic when faced with a flat tire, but Volkswagen owners have an advantage: your vehicle comes equipped with purpose-built tools and reinforced jacking points specifically engineered for safe tire removal. Following the correct procedure not only gets you moving again but prevents costly damage to your vehicle’s frame or wheel assembly. This guide walks you through every critical step of removing your Volkswagen tire safely and efficiently, ensuring you handle this common roadside emergency with confidence.
Locate and Verify Your Volkswagen Tire Change Kit
Your Volkswagen’s factory-supplied tire change kit contains precisely engineered components that work seamlessly with your vehicle’s design. Check your trunk area immediately to confirm you have the spare tire, model-specific car jack, and properly sized lug wrench—all stored in their designated compartments. These aren’t generic tools; they’re calibrated for your Volkswagen’s weight distribution and wheel specifications, making them essential for safe tire removal.
Beyond the factory kit, build your personal emergency toolkit with critical additions: wheel wedges to prevent rolling, a high-lumen flashlight for nighttime changes, heavy-duty work gloves for grip and protection, and a small container to hold lug nuts securely. Many experienced Volkswagen owners also keep a tire pressure gauge in their kit to monitor spare tire inflation—a frequently overlooked but crucial safety measure. Store everything in a dedicated trunk organizer so you can access tools immediately when needed.
Before an emergency strikes, verify your spare tire’s condition by checking its inflation pressure (typically 60 PSI for temporary spares) and inspecting for dry rot or cracks in the sidewall. Test your jack’s operation by raising it partially to ensure smooth movement, and confirm your lug wrench fits snugly on the wheel nuts without wobbling. This pre-emptive check prevents discovering damaged or missing equipment when you’re already dealing with a flat tire.
Find the Safest Possible Location for Tire Removal
Pulling over to change a Volkswagen tire requires strategic positioning that maximizes safety while maintaining accessibility. Move completely off the roadway onto a level shoulder, parking lot, or driveway where you have ample space to work around all sides of your vehicle. Never attempt tire removal while partially blocking traffic lanes—this puts you at extreme risk from passing vehicles. If you’re on a highway, continue driving carefully to the next exit or service area if possible, as these locations provide significantly more working space.
Activate your hazard lights immediately upon stopping to alert approaching drivers that your vehicle is stationary. Position yourself facing traffic while working to maintain awareness of your surroundings, and if available, place reflective triangles or flares 50-100 feet behind your Volkswagen to create an additional warning buffer. These visual cues give other drivers precious extra seconds to react, especially important during nighttime or low-visibility conditions when changing a tire.
Avoid soft ground, slopes, or uneven surfaces that compromise stability during the jacking process. Even a slight incline can cause your Volkswagen to shift unexpectedly when raised, potentially toppling the jack. If you must change a tire on slightly uneven ground, position the flat tire on the downhill side to minimize rolling potential once the vehicle is lifted. Always prioritize safety over convenience—driving slowly on a flat tire for an extra quarter-mile to reach better terrain is preferable to working in a dangerous location.
Apply Critical Safety Measures Before Touching Tools

Engage your parking brake firmly before beginning any tire removal procedure—this simple action prevents your Volkswagen from rolling during the change. Shift automatic transmissions into Park or manual transmissions into first gear (or reverse if facing downhill) for maximum security. These transmission settings create additional mechanical resistance against unintended movement, working in concert with your parking brake to keep the vehicle stationary.
Place wheel wedges against the tires opposite the flat to create physical barriers against rolling. For front tire changes, wedge the rear tires; for rear tire changes, wedge the front tires. Press the wedges firmly against the tread to ensure they won’t shift when the vehicle’s weight redistributes during jacking. Many Volkswagen owners use sturdy pieces of wood or specialized rubber wedges that won’t damage tire surfaces while providing reliable grip on various road surfaces.
Never skip these safety steps even when changing a tire in your own driveway. Ground conditions can change subtly as you work—pavement may have hidden slopes, and soil can compress under the vehicle’s weight. Taking 60 seconds to properly secure your Volkswagen establishes the foundation for a safe tire removal process that protects both you and your vehicle from preventable accidents.
Break Lug Nut Torque While Tire Remains Grounded
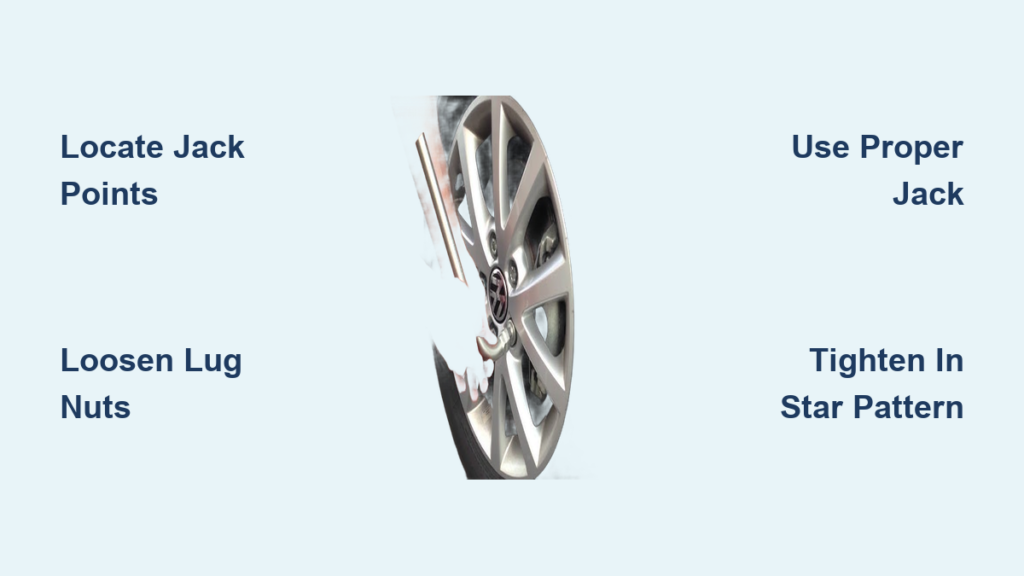
Begin loosening lug nuts while your Volkswagen tire still bears full vehicle weight to prevent wheel spinning. Using your factory lug wrench, turn each nut counter-clockwise approximately one-quarter turn before raising the vehicle. Work in a star pattern—loosen one nut, then the one directly opposite—rather than proceeding sequentially around the wheel. This alternating approach prevents uneven pressure that could bind the wheel to the hub.
Apply steady downward pressure on the wrench rather than sudden jerks that might damage nut corners. If lug nuts resist movement, stand on the wrench handle for additional leverage while ensuring your feet have secure footing. For stubborn nuts, position the wrench horizontally and gently tap the end with a rubber mallet to break corrosion bonds—never use excessive force that could round nut corners.
Leave lug nuts partially threaded after initial loosening; complete removal happens only after the vehicle is safely raised. This precaution prevents the wheel from dropping unexpectedly if you need to lower the vehicle temporarily. Keep track of each nut’s position as you work, as some Volkswagen models use tapered lug nuts that must be reinstalled in specific orientations for proper wheel seating.
Position Jack at Volkswagen-Specific Lifting Points
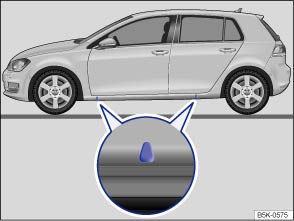
Consult your owner’s manual to identify the precise reinforced jacking points for your Volkswagen model—these vary significantly between vehicles. Modern Volkswagens feature marked lift points along the frame rails beneath the door sills, typically indicated by small notches or rubber pads. Never position the jack under plastic body panels, suspension components, or random frame sections, as this can cause severe structural damage.
Center the jack base on firm, level ground and position the lifting saddle precisely against the reinforced jacking point. Raise the jack slowly while monitoring for stability—any wobbling indicates improper alignment that requires immediate correction. Continue lifting until the flat tire clears the ground by approximately six inches, providing sufficient clearance for complete tire removal without the wheel contacting the pavement.
Never place any body part beneath a raised Volkswagen during this process. The jack supports tremendous weight, and even minor instability could cause catastrophic failure. If you notice the vehicle shifting or the jack tilting, lower immediately and reposition—taking extra time ensures your safety throughout the tire removal process.
Detach Flat Tire from Wheel Hub Safely
With the vehicle properly elevated and lug nuts fully removed, grasp the tire at the 3 and 9 o’clock positions and pull it straight toward you to disengage from the wheel hub. If the tire resists removal, check that all lug nuts are completely off and gently twist the tire side-to-side to break any corrosion bond between the wheel and hub. Never strike the tire with hammers or pry bars, as this can damage wheel studs or hub surfaces.
Inspect the exposed wheel hub for debris, excessive corrosion, or damaged wheel studs before installing your spare. Wipe the hub surface clean with a cloth to ensure proper seating of the replacement tire. Verify that all wheel studs extend sufficiently to accept lug nuts—typically at least half their length should remain visible beyond the spare tire’s mounting surface.
Place the flat tire flat on the ground beneath your working area where it won’t roll away. This positioning keeps it accessible for later storage while preventing it from becoming a tripping hazard during the remainder of the tire change process.
Install Replacement Tire with Correct Alignment
Position the spare tire by aligning its mounting holes with the wheel studs, taking care to match any hub-centering pins on your Volkswagen’s hub. Push the spare firmly onto the hub until it seats completely flush against the mounting surface—you should feel or hear a distinct “seat” when properly positioned. Improper alignment creates dangerous vibration issues that become apparent only when driving.
Begin threading lug nuts by hand to ensure straight engagement with the wheel studs. Cross-threading—forcing nuts onto misaligned studs—damages both components and creates unsafe mounting conditions. If resistance occurs, back off the nut and restart the threading process rather than forcing it into position.
Tighten each lug nut just enough to hold the spare securely while the vehicle remains raised. Do not perform final tightening at this stage, as the wheel needs to seat fully against the hub only when bearing the vehicle’s weight during the lowering process.
Complete Lug Nut Tightening with Proper Sequence

Lower your Volkswagen until the spare tire bears full vehicle weight but keep the jack partially supporting the vehicle. This intermediate position allows you to perform the critical final tightening of lug nuts while the wheel is properly seated against the hub. Use your lug wrench to tighten nuts in a star pattern, moving diagonally across the wheel to distribute pressure evenly.
Apply firm, steady pressure to each nut, completing multiple passes in the star pattern until all are fully tightened. Proper torque prevents wheel wobble and ensures safe driving—most Volkswagens require approximately 80-100 ft-lbs of torque, achievable with standard lug wrenches through proper technique. Never tighten nuts in sequential order, as this creates uneven pressure that can warp brake rotors or cause wheel misalignment.
After lowering completely and removing the jack, perform a final manual check of all lug nuts to confirm they remain tight. Drive slowly for the first mile, then stop to recheck lug nut tightness—a common safety practice that accounts for initial settling of the wheel assembly.
Verify Safety Before Driving on Temporary Spare
Walk around your Volkswagen to confirm the spare tire sits flush against the hub without visible gaps or wobbling. Spin the tire manually to check for unusual resistance or scraping sounds that might indicate improper mounting. Inspect underneath the vehicle to ensure no tools or equipment were left beneath the chassis during the tire change process.
Secure the flat tire in your trunk using cargo straps or within the designated spare tire well, ensuring it cannot shift during driving. Store all tools properly in their factory locations—leaving items loose in the cargo area creates dangerous projectiles during sudden stops. Double-check that your hazard lights are deactivated before pulling back into traffic.
Remember that most Volkswagen temporary spares (donuts) have strict limitations: maximum 50 mph speed and 50-mile distance. These restrictions exist because temporary spares lack the structural integrity of standard tires. Plan your route directly to a tire service center, avoiding highways and rough roads that could compromise the spare’s limited capabilities.