
If you’re searching for “how to remove sprockets from a bike tire,” you’ve likely encountered confusion—because sprockets don’t actually attach to tires. This common misconception stems from unfamiliarity with bicycle terminology. Sprockets belong to your bike’s drivetrain system: front chainrings connect to your crankset, while rear cassette sprockets mount directly onto the hub. Tires simply provide the contact point with the road and contain no sprockets whatsoever. Understanding this distinction is critical before attempting any removal procedure.
Your search for tire sprocket removal probably indicates you’re trying to maintain, repair, or repurpose drivetrain components. Whether you’re upgrading your cassette, replacing worn chainrings, or salvaging sprockets for a custom project, this guide provides the exact techniques needed. You’ll learn specialized methods for both front chainring and rear cassette sprocket removal, including handling Shimano Hyperglide pinned connections that resist standard disassembly.
This comprehensive walkthrough covers every tool requirement, preparation step, and removal technique while addressing the specific challenges of working with modern pinned cassette designs. By the end, you’ll confidently extract sprockets for replacement, maintenance, or creative repurposing—without damaging your valuable components.
Essential Tools for Proper Sprocket Extraction

Attempting sprocket removal without the right equipment guarantees frustration and risks component damage. Unlike tire work, sprocket extraction demands specialized tools designed to handle high-torque fasteners while preventing rotation during loosening.
Chain Whip and Lockring Tool Setup
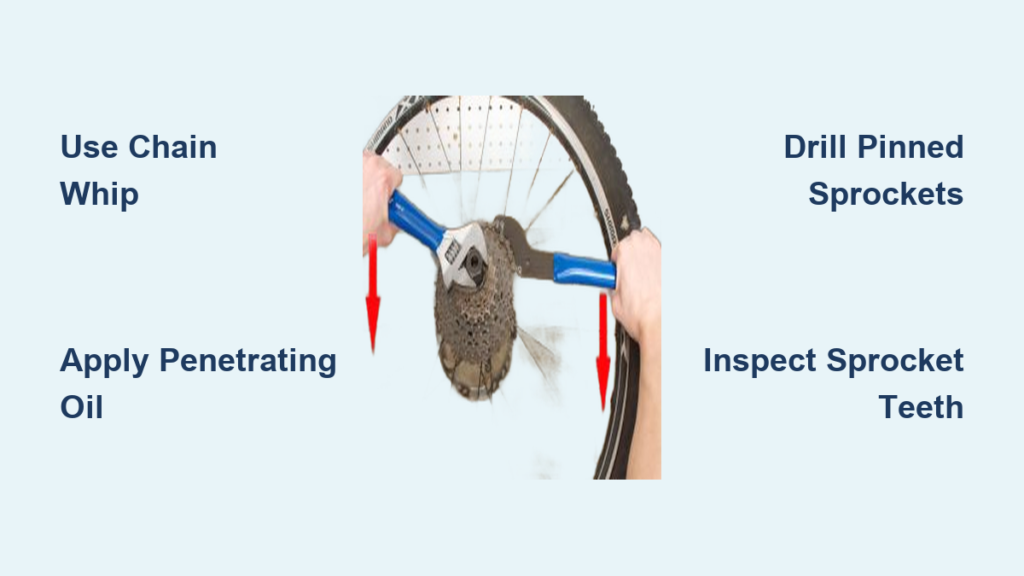
Your chain whip becomes indispensable when removing rear cassette sprockets. This tool features a heavy-duty chain that wraps around sprocket teeth, creating sufficient friction to prevent rotation when you apply force to stubborn lockrings. Pair it with a cassette lockring tool that matches your hub manufacturer—Shimano, SRAM, and Campagnolo each use different spline patterns requiring specific tools. For front chainring work, a sprocket wrench or appropriately sized socket (typically 8mm or 10mm) fits the bolt heads securing chainrings to the crankset.
Penetrating Oil and Safety Gear Must-Haves
Corrosion turns simple maintenance into a battle against seized components. Apply penetrating oil like WD-40 to all fastener threads and allow 10 minutes for it to work—this waiting period proves crucial for bikes exposed to moisture or neglected for extended periods. Keep clean rags nearby to wipe surfaces and remove old grease during the process. When drilling or grinding pinned sprockets, safety glasses become non-negotiable; metal shavings can cause serious eye injury during these more aggressive removal techniques.
Prepare Your Bike for Drivetrain Component Removal
Skipping proper preparation leads to stripped bolts, damaged components, or unnecessary frustration during sprocket extraction. Taking 5-10 minutes to set up correctly makes the actual work significantly smoother and safer.
Position your bicycle in a workstand with the drivetrain facing you for optimal access to both front chainrings and rear cassette. Shift the chain to the smallest rear cog and front chainring to minimize drivetrain tension. For front chainring work, removing the rear wheel often provides better clearance, especially in tight spaces where tool maneuverability matters. If you’re working with severely corroded components, apply penetrating oil the night before—this extended soaking time dramatically improves extraction success rates on seized fasteners.
Remove Front Chainring Sprockets from Crankset
Front chainrings attach directly to the crankset through multiple bolts that thread into the crank arm. The removal process requires preventing crankset rotation while you systematically loosen each fastener.
Apply penetrating oil to all sprocket bolts and wait the full recommended time. Use your sprocket wrench to begin loosening bolts counterclockwise—start with just enough force to break initial resistance without fully removing them. If bolts prove exceptionally tight, use a separate wrench to hold the sprocket steady while you work on each fastener individually. Once partially loosened, wrap the chain whip around the front sprocket teeth to prevent rotation during final loosening.
With the chain whip providing resistance, completely remove each bolt. Gently pull the sprocket away from the crankset—if resistance persists despite all bolts being loose, don’t force it. Tap the sprocket lightly with a rubber mallet in a circular pattern around its circumference to break any remaining seal. Alternatively, insert a brass drift punch into a mounting hole and tap it with a mallet; brass prevents marring aluminum surfaces while providing controlled force.
Extract Rear Cassette Sprockets from Hub

Rear cassette removal differs fundamentally from front chainring work. Cassettes mount onto the hub using a lockring, and individual sprockets connect through various fastening methods depending on the manufacturer.
Remove the quick-release skewer or through-axle from the rear wheel to access the cassette lockring. Insert your cassette lockring tool into the lockring splines and attach a large adjustable wrench. Hold the wheel steady and turn the tool counterclockwise to loosen the lockring—this often requires significant force. With the lockring removed, the cassette slides off the hub splines as a complete unit.
Note the exact order and orientation of each sprocket and spacer before removal. Taking photographs during disassembly provides a visual reference that prevents confusion during reinstallation. Individual sprockets may come off as a complete unit or separate into pieces depending on your cassette design.
Separate Shimano Hyperglide Pinned Sprockets
Shimano Hyperglide cassettes use precision-pinned construction where individual sprockets connect through small metal pins designed for permanent assembly. These pins aren’t meant for standard maintenance, making disassembly a specialized procedure.
Drilling Through Pin Connections Safely
Use a small drill bit (typically 1/8 inch) and work at low speed with minimal pressure. Position the cassette securely in a vise with protective padding to prevent damage. Drill slowly through each pin head, periodically clearing metal shavings and checking progress. This method requires patience but produces clean results with minimal risk to surrounding components. Take breaks to prevent heat buildup that could damage hardened steel teeth.
Grinding Method for Faster Pin Removal
An angle grinder provides a faster alternative for removing pinning material. Secure the cassette firmly and wear safety glasses to protect against flying metal shavings. Carefully grind away the pin material from each connection point, working methodically around the cassette assembly. This technique generates more heat than drilling but experienced users often prefer it for speed. Keep the grinder moving to prevent localized overheating that might warp sprockets.
Clean and Inspect Removed Sprockets Thoroughly
After successful removal, proper cleaning and inspection ensures you understand each component’s condition before deciding on reuse or replacement.
Clean the crankset mounting interface thoroughly using appropriate degreaser, removing all dirt, old grease, and debris accumulated around the spline interface. For cassette components, clean each sprocket individually, paying special attention to tooth profiles where chain contact creates the most wear. Inspect crank arms carefully for cracking, excessive wear, or deformation in the splines and bolt threads—these stress points show problems first.
Examine sprocket teeth for wear patterns—hooked, shark-fin, or severely worn teeth indicate the sprocket has exceeded its service life. Count teeth on each sprocket if you plan to reinstall them or need specifications for replacement parts. Document any unusual wear patterns, as these often indicate underlying drivetrain problems requiring attention beyond simple sprocket replacement.
Avoid Critical Sprocket Removal Mistakes
Even with proper tools and preparation, common errors can damage components or create safety hazards during sprocket extraction.
Never attempt rear cassette removal without a chain whip—you’ll simply spin the cassette uselessly while applying force. Avoid using excessive heat on aluminum components, as this can weaken the metal structure. When drilling pins, don’t rush the process; high-speed drilling without proper cooling damages sprocket teeth through heat transfer. Never force a stuck sprocket off the hub—this often damages the delicate splines on both components.
Reinstall Sprockets with Proper Technique
Proper reinstallation ensures reliable long-term performance and prevents premature wear or component failure. Inspect all sprocket bolts before reuse—bolts showing signs of stretching, deformation, or corrosion should be replaced. When installing new bolts, use thread locker compound such as Loctite on the threads to prevent loosening from vibration.
Follow manufacturer torque specifications precisely: over-tightening strips threads in aluminum components, while under-tightening allows bolts to loosen during use. Ensure proper alignment and chain routing before finalizing the installation. Verify the chain runs smoothly across sprockets without binding, skipping, or excessive noise. Double-check all fasteners are tightened to specification before riding.
Extend Drivetrain Component Lifespan After Sprocket Work
Regular maintenance extends sprocket service life significantly after removal and reinstallation. Keep your drivetrain clean and properly lubricated—accumulated grime accelerates wear on both sprockets and chains. Inspect your chain regularly with a wear gauge; running a worn chain destroys sprockets exponentially faster than normal wear. Replace chains before they stretch beyond specification, as this simple habit can triple sprocket service life.
Monitor your shifting performance as an early warning system—poor shifting often indicates sprocket wear before visible tooth damage appears. Address minor problems immediately to prevent cascading failures requiring complete drivetrain replacement. With proper care and maintenance after sprocket work, your components will provide thousands of additional miles of reliable service.


