
That flat tire on the side of the road is stressful enough without struggling to access your spare. Many GMC Yukon owners freeze when they realize they need to lower the spare tire because the hoist mechanism beneath their vehicle seems mysterious and complicated. Unlike traditional underbody-mounted spares with simple nuts and bolts, the Yukon’s cable-driven hoist system requires specific knowledge to operate correctly. This comprehensive guide provides the exact steps for how to remove spare tire GMC Yukon models use, including specific techniques for dealing with seized mechanisms, locked cylinders, and engaged safety latches that commonly prevent tire access.
Understanding your Yukon’s spare tire system is crucial because forcing the mechanism incorrectly can cause expensive damage to the hoist assembly. The factory-designed process uses a specialized tool and simple turning motion that takes less than five minutes when done correctly. Whether you’re facing an emergency roadside situation or simply need to inspect your spare tire for damage or air pressure, knowing how to remove spare tire GMC Yukon models require will save you time, frustration, and potentially costly service calls.
Essential Tools for Proper Spare Tire Removal
Before attempting to remove your spare tire, locate the specialized tool designed specifically for your GMC Yukon’s hoist system. This long metal rod, typically stored with your jack and lug wrench behind the third-row seats or in the cargo area, features a small hook at one end that engages with the hoist mechanism. The factory tool measures approximately 24 inches long and has a distinctive L-shaped hook that fits precisely into the hoist slot—substituting with random metal rods or pipes often leads to stripped mechanisms and expensive repairs.
If you’ve misplaced the original tool, visit your local GMC dealership or reputable auto parts store for an exact replacement. Third-party alternatives exist, but OEM parts ensure proper fitment and prevent damage to the hoist assembly. For Yukon models with a spare tire lock (common on Denali trims), your vehicle’s ignition key is equally essential—without it, you cannot access the hoist mechanism. Keep both tools together in your vehicle at all times rather than storing them in your garage, as you’ll need them precisely when you’re stranded with a flat tire.
Critical Safety Steps Before Working Under Your Yukon
Safety must come first when working beneath your GMC Yukon, especially with the vehicle’s considerable weight. For all-wheel-drive models (which most Yukons are), place wheel chocks against the front tires to prevent any potential rolling—your factory jack kit includes dedicated chocks designed specifically for this purpose. Never skip this step, as even a slight movement could cause serious injury when you’re positioned beneath the rear of the vehicle.
Use only hand tools for the removal process—air-powered drills or impact wrenches can apply excessive force that damages the delicate hoist mechanism beyond repair. The manual process requires minimal physical effort but demands patience and attention to the mechanism’s feedback. If you need extended time beneath the vehicle, position jack stands properly rather than relying on the factory bottle jack for support. Remember that the spare tire well provides limited clearance, so work efficiently while maintaining proper body positioning to avoid injury.
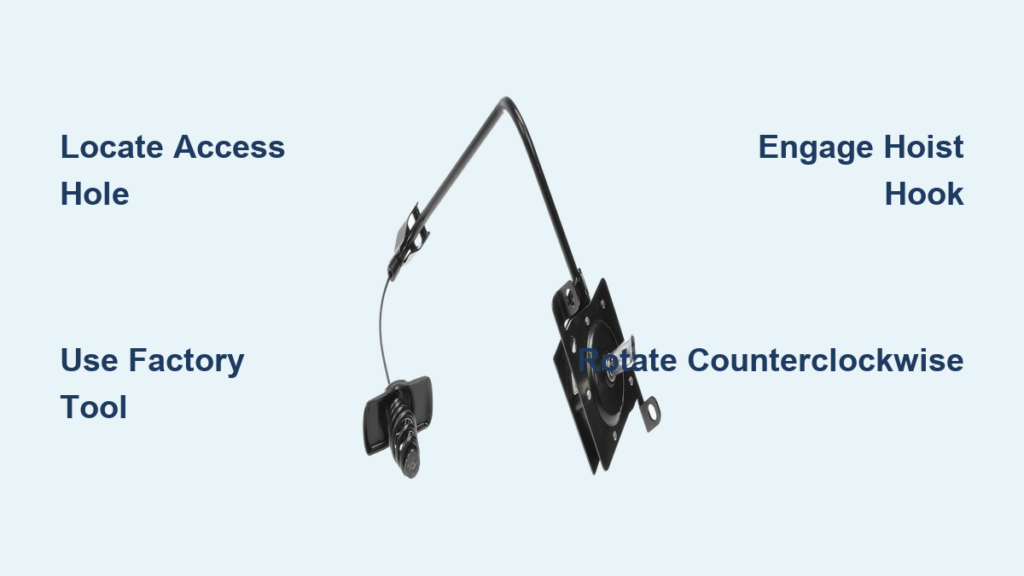
Find the Hoist Access Point on Your Yukon Model
Locating the hoist access point is your first physical step in how to remove spare tire GMC Yukon models store beneath the vehicle. For 2007-2020 Yukons, look for a small circular opening approximately 1.5 inches in diameter positioned in the center of the rear bumper, just above the license plate area. On newer 2021+ models, the access point may be slightly recessed and covered by a plastic plug that snaps into place.
Yukon models equipped with the spare tire lock feature require an extra step before accessing the hoist mechanism. Insert your ignition key into the lock cylinder (located directly above the access hole) and turn it counterclockwise to release the cover. Remove the lock cylinder completely to expose the keyhole where you’ll insert the removal rod. If you’re working with an older Yukon that has accumulated road grime, use a flashlight to clearly see the access point and clear any debris with a soft brush before proceeding—forcing the rod into a clogged opening can damage the mechanism.
Properly Engage the Hoist Mechanism for Safe Operation

Engaging the removal rod with the hoist mechanism correctly separates those who successfully remove their spare tire from those who damage their hoist system. Insert the hooked end of the rod through the access opening while standing behind your Yukon, then crouch down to guide the rod tip into the hoist shaft opening beneath the vehicle. The hook must catch securely inside the hoist slot before applying any turning force—this connection is what transmits your rotational energy to the mechanism.
You’ll know you’ve achieved proper engagement when the rod resists being pulled straight back out and produces a subtle metallic click as the hook settles into position. If the rod slips out when you apply gentle downward pressure, reposition it slightly and try again—forcing a poorly engaged rod can bend the hook or damage the hoist slot. For Yukon owners with limited mobility, try this technique: rest your elbow on your knee for stability while guiding the rod with your other hand, which provides better control during the engagement process.
Step-by-Step Process to Lower Your Spare Tire
With the rod properly engaged, rotate the hoist shaft counterclockwise (lefty-loosey) to lower the spare tire toward the ground. Maintain a smooth, consistent rotation rather than jerking the rod, as this allows the cable to unwind evenly from the hoist drum. Most Yukon owners find that approximately 15-20 full rotations will completely lower the tire to the ground, though this varies slightly by model year.
As the tire descends, watch for these visual indicators that the process is working correctly: the cable should feed smoothly through the mechanism without kinking, and the tire should lower evenly without tilting to one side. If you encounter resistance after the first few rotations, stop immediately—forcing the mechanism could snap the cable. Instead, rotate the rod clockwise one full turn to relieve tension, then try counterclockwise rotation again with slightly more force. Once the tire reaches the ground, pull it straight out from beneath the vehicle while supporting its weight, as the cable will detach automatically when fully extended.
Troubleshoot a Seized Hoist Mechanism Effectively

When the hoist mechanism won’t budge despite proper rod engagement, corrosion is almost always the culprit—especially on Yukons where the spare has never been lowered. Position yourself beneath the rear of the vehicle with a flashlight to locate the hoist assembly, then spray penetrating oil (like PB Blaster or Liquid Wrench) directly onto the cable drum and moving parts. Let the lubricant penetrate for at least 15 minutes before attempting to rotate the mechanism again.
For stubborn cases, try this advanced technique: rotate the rod clockwise until you hear a distinct click (indicating the secondary latch has engaged), then immediately rotate counterclockwise to lower the tire. This back-and-forth motion often breaks free corrosion that prevents normal operation. If you have a helper available, have them gently tap the hoist assembly with a rubber mallet while you work the rod—this vibration can help loosen seized components without causing damage.
Release an Engaged Secondary Latch Without Damage
Many Yukon owners mistakenly believe their hoist mechanism is broken when actually the secondary safety latch has engaged. This condition presents as a taut cable with the tire refusing to descend more than a few inches. To release it properly, first rotate the hoist shaft clockwise until you hear two distinct clicks (this tightens the cable and resets the latch), then rotate counterclockwise approximately three to four full turns before attempting to lower the tire again.
If the tire still won’t descend, repeat the sequence but rotate counterclockwise five to six turns instead. The secondary latch requires precise cable tension to release properly—too little rotation won’t create enough slack, while too much might cause the tire to drop suddenly. Once released, you’ll feel the cable suddenly become loose as the tire begins to lower smoothly. Always perform this sequence slowly and deliberately to avoid damaging the delicate latch mechanism.
Emergency Cable Cutting Procedure as Last Resort
When all other methods fail and you urgently need your spare tire, cutting the cable becomes necessary—though this requires immediate hoist assembly replacement afterward. Position yourself safely beneath the vehicle with quality metal cutters (bolt cutters work best), then carefully cut through the cable just above where it attaches to the spare tire carrier. Expect the tire to drop approximately 6-8 inches when the cable severs, so position your body clear of the falling path.
After retrieving your spare tire, visit a GMC dealership or auto parts store for a replacement hoist assembly (part number 15865115, approximately $167). Installing the new unit requires basic mechanical skills but follows a straightforward process: unbolt the old assembly, thread the new cable through the mounting bracket, and secure the new unit with the provided hardware. Crucially, operate the new hoist mechanism several times before storing it to ensure proper function—this prevents future seizure issues.
Prevent Future Hoist Problems with Simple Maintenance
The best approach to how to remove spare tire GMC Yukon models involves is preventing problems before they occur. Operate your spare tire hoist mechanism at least twice yearly by lowering and raising the tire completely—this takes less than five minutes but keeps internal components lubricated and functional. During each operation, inspect the cable for fraying, the tire for damage, and the mechanism for corrosion.
Before long-term vehicle storage or during winter months in salt-prone regions, apply a light coat of silicone-based lubricant to the hoist mechanism and cable. Unlike petroleum-based lubricants, silicone won’t attract dirt or degrade rubber components. Store your removal tool in an easily accessible location within the vehicle, and consider adding a small flashlight to your emergency kit—many roadside spare tire emergencies happen after dark when visibility is poor. By following these simple maintenance steps, you’ll ensure your spare tire system remains reliable for years to come, ready when you actually need it most.


