
Driving on properly inflated tires isn’t just about performance—it’s about safety, savings, and extending the life of your vehicle’s most critical contact point with the road. Knowing exactly how to put tire pressure correctly can save you hundreds of dollars annually in fuel costs while preventing dangerous blowouts. Under-inflated tires increase rolling resistance, forcing your engine to work harder and reducing fuel efficiency by up to 3% for every 1 psi below the recommended level. This comprehensive guide reveals the exact methods professionals use to maintain optimal tire pressure year-round, including the critical details most drivers miss when they simply “top off” at the gas station.
Many drivers mistakenly believe that putting tire pressure into their tires means inflating to the maximum number printed on the sidewall or guessing based on appearance. The reality is far more precise—your vehicle’s specific requirements depend on weight distribution, tire size, and driving conditions. By mastering how to put tire pressure correctly, you’ll enjoy better handling, improved braking distances, and tires that last thousands of miles longer. This guide covers every aspect of proper inflation, from finding your exact specifications to adjusting for seasonal changes and troubleshooting common problems.
Locate Your Exact Pressure Specifications
Using generic pressure numbers is the fastest way to compromise your vehicle’s performance and safety. Every make and model requires specific inflation levels based on its weight, suspension design, and tire specifications.
Find the Door Jamb Placard for Manufacturer’s Exact Requirements
Open your driver’s side door and examine the vertical edge where the latch connects. You’ll find a sticker labeled “Tire and Loading Information” that specifies the exact cold tire pressure for front and rear tires. This number—typically between 28-36 psi for passenger vehicles—is scientifically determined by engineers to optimize handling, fuel economy, and tire wear for your specific vehicle. Never rely on the maximum pressure printed on the tire sidewall, as this represents the tire’s capacity under maximum load, not your vehicle’s ideal operating pressure.
Verify with Your Owner’s Manual for Special Conditions
While the door jamb placard provides standard pressure specifications, your owner’s manual contains additional guidance for special situations. Check the index under “Tires” or “Inflation Pressure” for recommendations when carrying heavy loads, towing, or driving in extreme conditions. Some vehicles specify different pressures for front and rear tires to compensate for weight distribution, particularly in performance cars or trucks. If you’ve upgraded your tire size beyond factory specifications, the manual may also provide conversion guidance.
Check Current Pressure Accurately Before Adding Air
Adding air without first checking your current pressure is like filling a glass without looking—it’s impossible to know when you’ve reached the right level. Proper measurement requires specific techniques to avoid common errors.
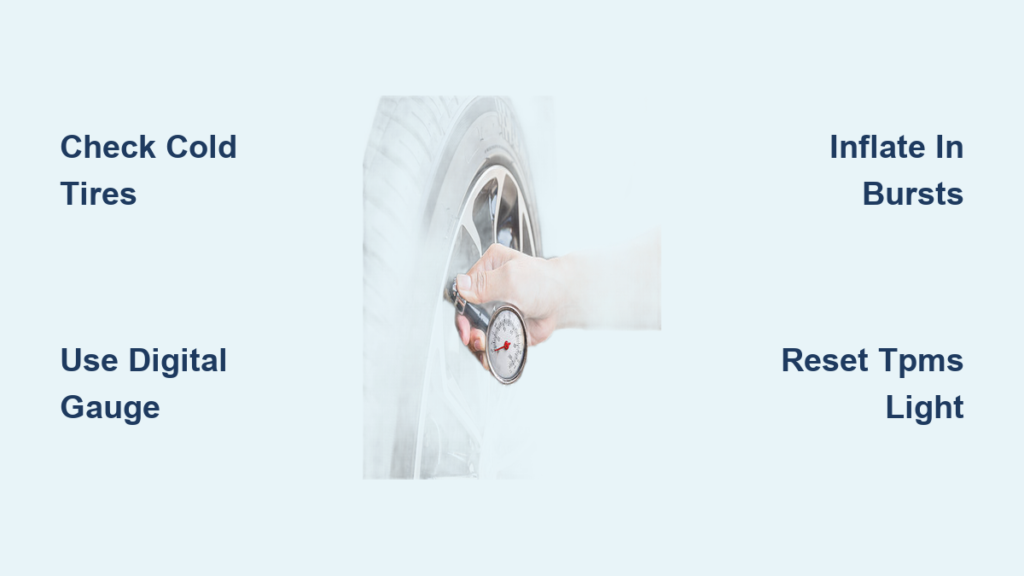
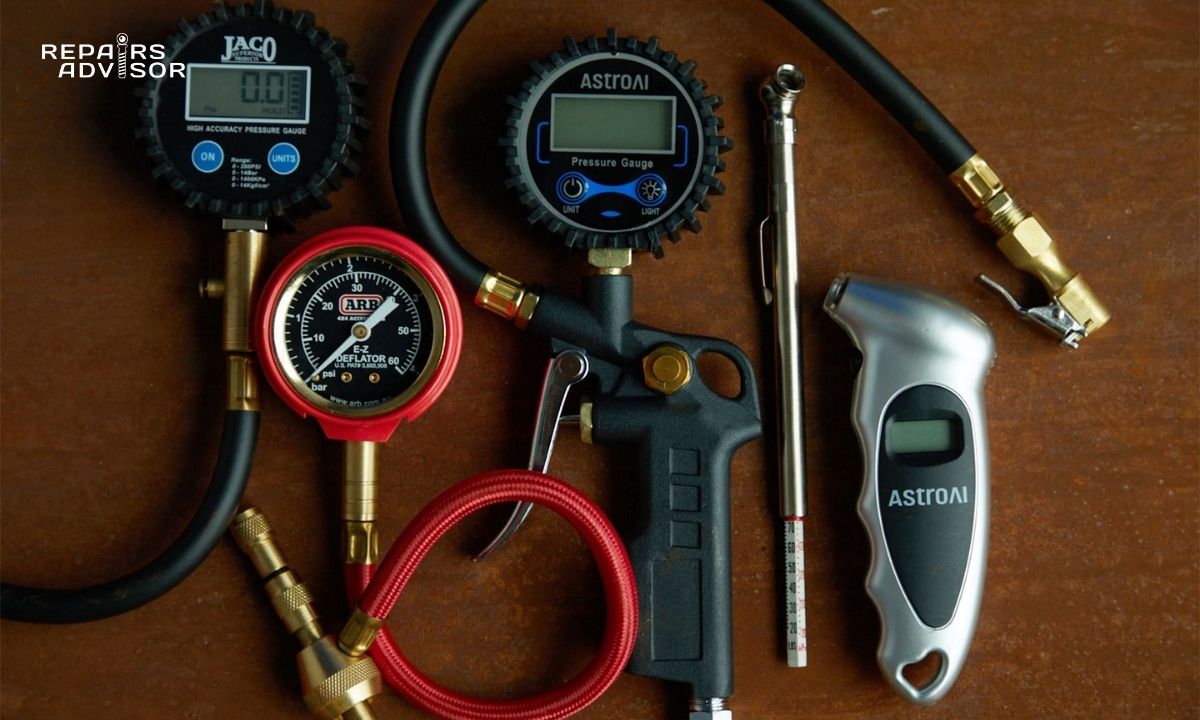
Use a Digital Gauge Instead of Relying on Gas Station Equipment
Gas station air pumps often have poorly maintained gauges that can be off by 5-10 psi. Invest in a quality digital tire pressure gauge (around $15-$25) that provides precise readings regardless of lighting conditions. Digital gauges eliminate the parallax error common with analog dials and typically offer accuracy within 1% of actual pressure. Test your gauge periodically against a known accurate reference to ensure it remains reliable.
Measure When Tires Are Cold for True Baseline Readings
Tire pressure increases approximately 1 psi for every 10°F temperature rise during driving. For accurate measurements, check pressure when tires are “cold”—meaning the vehicle has been parked for at least three hours or driven less than one mile. If you must check after driving, note that readings will be higher than true cold pressure; subtract 2-4 psi as an estimate, but schedule a proper cold check as soon as possible.
Gather the Right Inflation Equipment
Having appropriate tools transforms how to put tire pressure from a frustrating chore into a quick, precise task that takes less than five minutes.
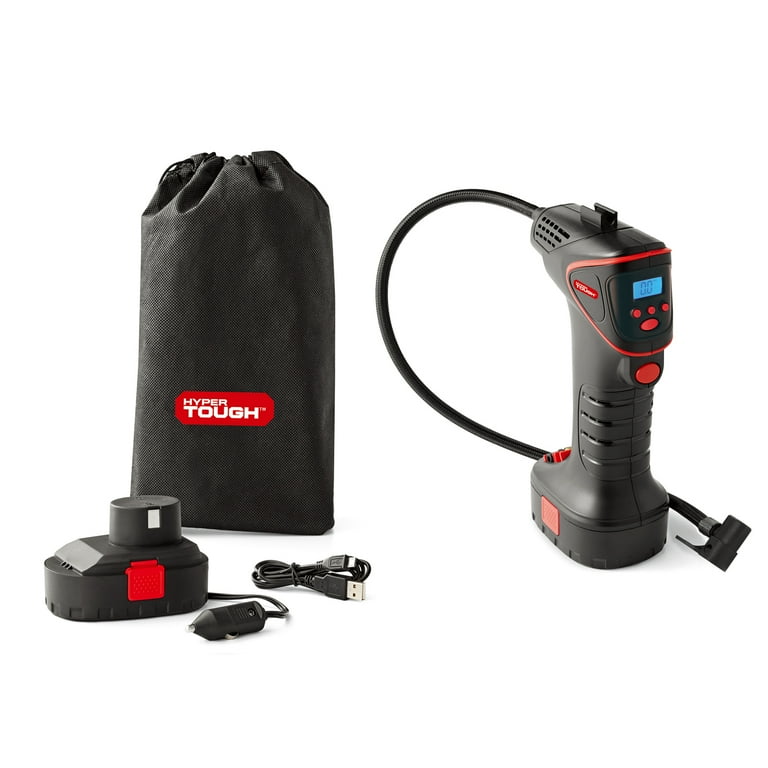
Choose a Quality Portable Air Compressor with Accurate Gauge
While gas stations provide free air, a personal 12V portable air compressor (around $30-$60) offers significant advantages. Look for models with built-in digital pressure gauges and automatic shut-off features that stop inflation when reaching your target pressure. These units plug into your vehicle’s cigarette lighter and typically inflate a tire from 20 to 35 psi in 2-3 minutes. Higher-end models include LED work lights for nighttime use and preset pressure memory functions.
Keep Valve Stem Caps Securely in Place
Those small plastic caps serve a critical purpose beyond aesthetics—they provide a secondary seal against dirt and moisture that can cause slow leaks. Always replace caps immediately after checking or inflating tires, and keep spares in your glove compartment. Missing caps account for approximately 15% of slow leaks reported to tire service centers.
Inflate Tires Using Professional Techniques
Following these precise steps ensures you achieve accurate pressure without overshooting your target or wasting time.
Step 1: Record Current Pressure for All Tires — Check each tire with your digital gauge and note readings. Significant differences between tires may indicate slow leaks requiring attention.
Step 2: Add Air in Short Bursts with Constant Verification — Connect your air source and add air in 3-5 second increments, checking pressure after each addition. This prevents overshooting your target pressure, which requires bleeding air and starting over.
Step 3: Fine-Tune to Exact Specification — When approaching your target pressure (within 2-3 psi), add air in one-second bursts and check frequently. The final adjustment often requires only a fraction of a second of airflow.
Step 4: Recheck After Settling — Wait 30 seconds after final inflation, then verify pressure once more. Air compresses slightly when first added and may settle to a marginally lower reading.
Adjust for Seasonal Temperature Changes

Temperature fluctuations significantly impact tire pressure, requiring seasonal adjustments as part of proper maintenance.
Winter Pressure Management
Tire pressure drops approximately 1-2 psi for every 10°F temperature decline. During winter months, check pressure weekly as temperatures fluctuate dramatically between day and night. Never inflate to higher than the recommended pressure to compensate for cold temperatures—instead, check and adjust when tires are truly cold (early morning) for accurate readings.
Summer Heat Considerations
In summer, tires gain 3-6 psi during the hottest parts of the day compared to morning readings. If checking pressure in afternoon heat, inflate to your recommended pressure based on a morning baseline, knowing pressure will increase naturally as temperatures rise. Never release air from hot tires to match a lower number—this will leave you dangerously under-inflated once temperatures cool.
Respond Correctly to TPMS Warning Lights
Your vehicle’s Tire Pressure Monitoring System provides critical alerts but requires proper understanding to interpret correctly.
Understand What Triggers the Warning Light
The TPMS light illuminates when pressure falls 25% below the recommended level—meaning your tires have been significantly under-inflated for some time. On a tire requiring 32 psi, the light comes on around 24 psi, which represents serious under-inflation. The light may also activate during sudden temperature drops, such as cold mornings following warm days.
Properly Reset the System After Inflation
After correcting pressure to specifications, drive for several minutes to allow the system to register the change. If the light remains on, consult your owner’s manual for the specific reset procedure, which often involves pressing a button sequence or using the vehicle’s information display. Persistent lights after proper inflation may indicate a faulty sensor requiring professional diagnosis.
Avoid These Common Inflation Mistakes
Even experienced drivers make critical errors when putting tire pressure into their vehicles.
Relying on gas station gauges — These often-read high, leading to dangerous over-inflation. Always use your personal gauge for verification.
Adjusting based on appearance — Tires can look properly inflated while being 5-10 psi off specification. Visual inspection alone is never sufficient.
Neglecting the spare tire — Check your spare monthly at the recommended pressure (typically 60 psi for temporary spares). A flat spare discovered during an emergency creates dangerous roadside situations.
Establish a Long-Term Maintenance Routine
Making tire pressure checks part of your regular vehicle care prevents gradual pressure loss that affects all tires over time.
Check all five tires (including the spare) at least once monthly or before any trip over 100 miles. Many drivers schedule this for the first of each month or when refueling on specific days. Keep a simple log noting date, mileage, and pressure readings for each tire—this helps identify slow leaks early and tracks seasonal adjustments. If any tire consistently loses pressure faster than others, have it professionally inspected for punctures or bead leaks before continuing regular use.
Properly inflated tires provide better traction, shorter stopping distances, and significantly improved safety in all driving conditions. By following these precise methods for how to put tire pressure correctly, you’ll maximize your vehicle’s performance while extending tire life and improving fuel economy. Take just five minutes each week to maintain optimal pressure—your safety, wallet, and driving experience will thank you for years to come.


