
Ever felt that heart-stopping moment when your car slides sideways on an icy patch, even with winter tires? Installing tungsten-carbide studs transforms ordinary winter tires into true ice conquerors, giving you mechanical grip that rubber alone can’t provide. Learning how to put studs in a tire is a game-changer for drivers in regions where winter roads turn into skating rinks. This afternoon project requires patience and the right technique, but most DIYers can complete a full set of four tires with basic tools and careful attention. Before you begin, understand that successful stud installation depends on selecting the correct stud length, following a proper pattern, and ensuring each stud seats securely against your tire’s inner wall.
This guide delivers everything you need to transform your winter tires into ice-gripping machines—from choosing the right studs and gathering essential tools to executing a clean installation and caring for your studded tires throughout the winter season. You’ll gain confidence knowing exactly what to do when temperatures drop and roads freeze solid.
Select the Correct Stud Type for Your Vehicle

Standard flange-head studs remain the most reliable choice for passenger vehicles, featuring a flat head that locks securely against your tire’s inner wall. These cost-effective options (typically $0.15-$0.50 each) range from 9mm to 12mm in length, with most cars requiring 10mm-11mm studs. If you’re installing 100 studs per tire (8-10 per linear foot of tread), budget $15-$50 per tire for quality tungsten-carbide studs.
Hollow-core studs offer a weight advantage that performance drivers appreciate, reducing rotating mass while maintaining ice-penetrating capability. The hollow chamber creates a wedging action that some claim improves ice traction, though they cost 20-30% more than standard options. Multi-flange studs provide superior retention for trucks and SUVs with their additional locking barbs—essential if you regularly haul heavy loads on icy roads.
How Many Studs Do You Really Need?
Most passenger vehicles require 80-120 studs per tire depending on size. Measure your tire’s circumference and multiply by 8-10 to determine the exact count needed (studs per linear foot). Always purchase 10-15% extra—some studs inevitably get damaged during installation or fail to seat properly. For a typical sedan tire with 80-inch circumference, you’ll need approximately 90 studs, so buy 100 to be safe.
Gather Essential Stud Installation Tools

Your stud installation tool is the make-or-break component of this project. Quality tools ($15-$50) feature spring-loaded jaws that grip the stud firmly and release automatically once the flange seats against the inner tire wall. Avoid cheap plastic tools that slip and damage stud heads—invest in steel construction with comfortable grips for this repetitive task.
Must-Have Accessories for Smooth Installation
- Rubber mallet: Delivers consistent force without damaging tools or tires
- Tread depth gauge: Confirms adequate rubber thickness (minimum 8/32 inch)
- Soapy water solution: Lubricates stud passage through rubber (1 tsp dish soap per cup water)
- Chalk markers: Precisely marks stud positions before installation
- Work gloves: Protects hands during repetitive tapping motions
Skip the common mistake of using a metal hammer directly on the installation tool—it transfers damaging shock to both the tool and tire structure. The rubber mallet applies just enough force while absorbing harmful vibrations.
Prepare Your Tires Properly Before Studding
Remove tires from your vehicle for optimal access and even stud distribution—this critical step takes 15 minutes per tire but prevents uneven patterns caused by working around suspension components. Thoroughly clean tread grooves with a stiff brush and warm water to remove embedded stones, dirt, and old rubber particles that interfere with proper stud seating.
Critical Tread Depth Check
Measure tread depth at multiple points across each tire using your gauge. Tires must have at least 8/32 inch depth at stud locations to securely retain studs throughout winter. Mark areas with insufficient depth using chalk—these spots won’t hold studs properly and should be avoided during installation. New or nearly-new tires provide the best stud retention, while tires with 6/32 inch or less depth should be replaced rather than studded.
Determine the Perfect Stud Length
Selecting incorrect stud length causes either poor traction or premature stud failure. The ideal stud protrudes 1mm-1.5mm from your tread surface when fully seated. For most passenger tires with 9/32-12/32 inch tread depth, 10mm-11mm studs work perfectly. Measure a small section of your tire’s tread to confirm:
- Insert a thin wire through the tread to the inner liner
- Mark where the wire exits the outer surface
- Measure from mark to wire end inside the tire
- Choose studs 1mm shorter than this measurement
Studs that protrude more than 2mm wear rapidly and damage road surfaces, while studs protruding less than 0.5mm provide minimal ice penetration. When in doubt, choose slightly longer studs—they’ll wear to optimal length during the break-in period.
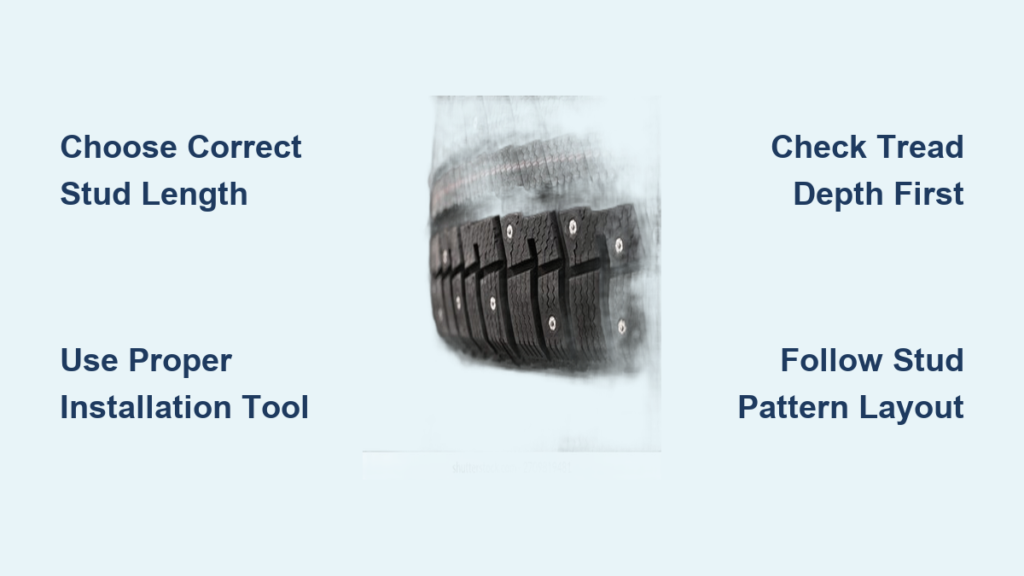
Create an Effective Stud Pattern Layout

Professional installers use alternating patterns that concentrate studs where traction matters most. Start by marking every other tread groove around the tire with chalk. Then, within each marked groove, place studs at 1.5-inch intervals (8-10 per linear foot). Avoid placing studs within 1 inch of the tire’s shoulder where sidewall flex is greatest.
Pattern Mistakes to Avoid
- ❌ Over-studding: More than 10 studs per linear foot causes irregular wear
- ❌ Shoulder clustering: Studs near edges work loose due to sidewall flex
- ❌ Random placement: Creates uneven traction and vibration at speed
- ✅ Center concentration: More studs in the center third improves braking
Step back every 10-15 studs to verify your spacing remains consistent. Uneven patterns create vibration and reduce overall traction effectiveness. Proper distribution ensures smooth operation while maximizing ice-gripping capability.
Install Studs Using the Correct Technique
Load a stud into your installation tool with the flange end first—most tools have a visual indicator showing proper orientation. Position the tool perpendicular to the tire surface at your first marked location, ensuring the stud aligns with the tread groove. Apply firm downward pressure while tapping the tool with your rubber mallet using consistent, medium-force strikes.
What to Expect During Installation
- Initial resistance: Significant force required for first 1/4 inch
- Mid-penetration: Resistance decreases as stud moves through rubber
- Final seating: Noticeable increase in resistance as flange contacts inner wall
Continue tapping until you feel the tool “bottom out” against the inner tire surface—this typically takes 8-12 moderate taps per stud. Release the tool according to manufacturer instructions (usually a simple pull-back motion), and the stud should remain securely seated. Work systematically around the tire, reapplying soapy water to the tool jaws every 10-15 studs to maintain smooth operation.
Verify Each Stud’s Installation Quality
After completing all studs, perform this critical three-point check before mounting tires:
- Visual inspection: Each stud’s carbide tip should protrude 1-1.5mm from tread surface
- Inner wall check: Flange heads must sit flush against inner tire surface (no gaps)
- Stability test: No stud should move when pressed firmly with your thumb
Any stud failing these checks must be removed and reinstalled—loose studs become dangerous projectiles during driving. Use your installation tool to gently extract improperly seated studs by reversing the installation process.
Complete the Essential Break-In Period
Newly studded tires require 50-100 miles of gentle driving to properly seat. During this period:
- Drive at moderate speeds (under 45 mph)
- Avoid hard acceleration from stops
- Use gentle, progressive braking
- Take corners carefully without abrupt steering
This break-in period allows the rubber around each stud to compress and form a secure, permanent seat. Listen for clicking or tapping sounds that indicate loose studs needing attention. After completing the break-in, your tires will deliver maximum ice traction with consistent stud performance.
Know Your Local Stud Regulations Before Driving
Many states restrict studded tire use to specific dates (typically October 1 through April 30), while others prohibit them entirely. Check your state’s Department of Transportation website before installation—violations can result in $50-$200 fines per tire. Some jurisdictions require special permits or limit stud protrusion to 0.04 inches (1mm).
If your area bans studded tires, consider Three-Peak Mountain Snowflake-rated winter tires instead—they provide excellent cold-weather traction without metal studs. These modern compounds remain flexible below freezing and offer 80-90% of studded tire performance on most winter surfaces.
Maintain Your Studded Tires for Maximum Seasonal Life
Inspect studs monthly during winter use, checking for loose or missing units. Replace any studs with damaged carbide tips immediately—uneven stud heights create vibration and reduce overall traction. When rotating tires, account for different wear patterns between front and rear positions by moving front tires straight back rather than crossing them.
Store studded tires upright in a cool, dark place during summer months—never stack them horizontally as this deforms the rubber. Keep them away from ozone sources like electric motors that accelerate rubber deterioration. Properly maintained studded tires typically last 3-5 winter seasons before stud retention weakens significantly.
With this knowledge in hand, you’re ready to transform your winter tires into true ice conquerors. Following these precise steps ensures maximum traction when it matters most—keeping you and your passengers safe during the coldest months of the year.


