
Changing a tire is one of the most essential vehicle maintenance skills every driver should master. Knowing how to mount a car tire properly can save you hundreds of dollars in service fees while giving you independence when roadside assistance isn’t available. This comprehensive guide walks you through each critical step of mounting a car tire safely and correctly—whether you’re replacing a flat, rotating seasonal tires, or installing new rubber. With the right preparation and technique, you can complete this task in your driveway without professional help.
Before you begin, understand that mounting a car tire involves working with heavy components under pressure. Taking proper safety precautions protects both you and your vehicle throughout the process. The right tools, patience, and attention to detail—especially when seating tire beads correctly and torquing lug nuts—make the difference between a successful tire change and potential safety hazards. By following this guide, you’ll gain confidence to handle tire mounting efficiently and safely every time.
Essential Tools and Equipment Checklist
Having the right tools ready before starting prevents frustration and ensures a smooth tire mounting experience. Your vehicle likely came with a basic lug wrench and scissor jack stored in the trunk or under the rear seat, but these factory tools often lack sufficient leverage for stubborn lug nuts. Upgrade to a cross-style lug wrench with a longer handle for better mechanical advantage when breaking loose tight fasteners.
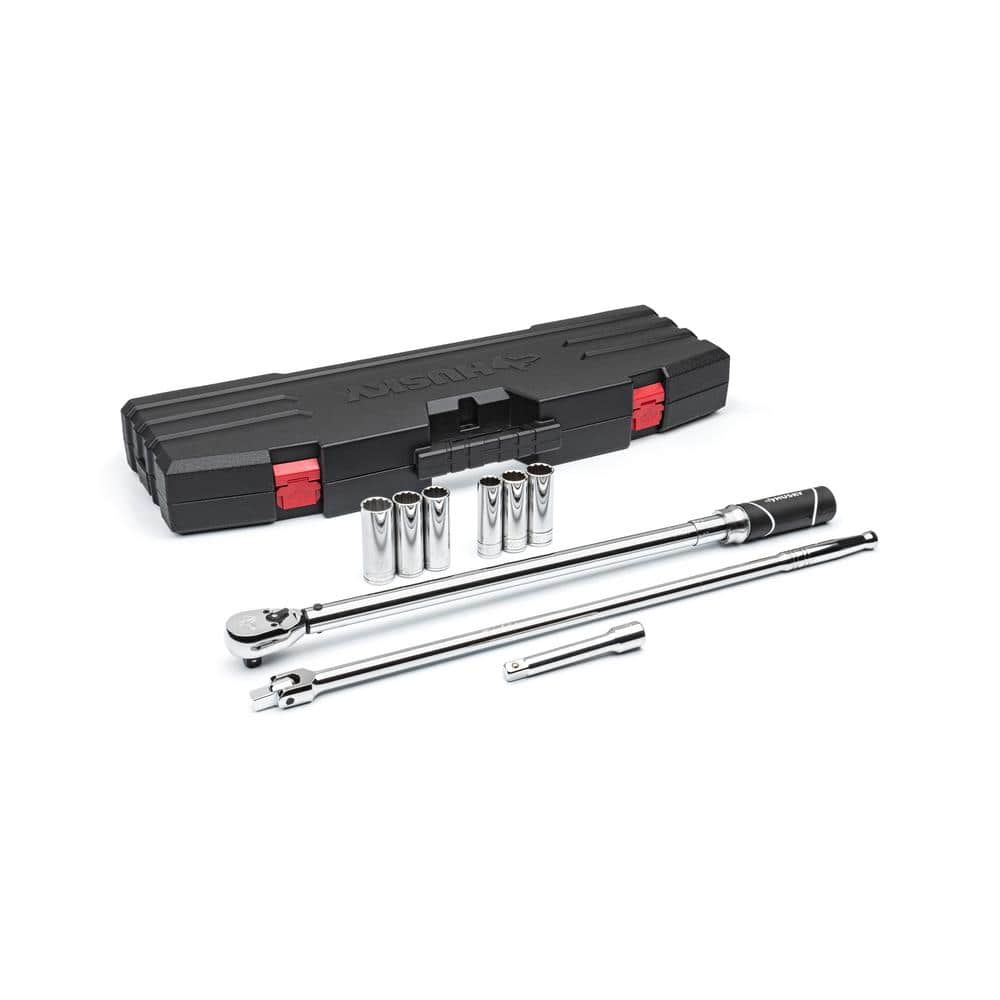
Beyond the basics, several specialized tools dramatically improve your success rate. A valve core tool allows complete tire deflation before mounting, while tire lubricant or homemade soapy water solution helps beads slide onto the rim smoothly. For vehicles with low-profile tires or stiff sidewalls, a bead breaker tool separates stubborn tire beads from the rim. Most critically, a calibrated torque wrench ensures you tighten lug nuts to manufacturer specifications—typically 80-100 foot-pounds for passenger vehicles—preventing warped brake rotors or wheel detachment. Never skip the torque wrench; improperly tightened lug nuts cause thousands of wheel-related accidents annually.
Critical Safety Preparations You Can’t Skip
Working beneath a vehicle demands strict adherence to safety protocols that protect both you and your car. Always park on a flat, level surface with ample space to work around all sides of your vehicle. Engage the parking brake fully and place wheel chocks against the tires opposite the one you’re changing—this prevents accidental rolling while you work. Never rely solely on a hydraulic jack to support the vehicle; always use properly rated jack stands before placing any body parts beneath the vehicle.
Inspect all equipment before beginning work. Check jack stands for cracks or damage, verify your jack operates smoothly without leaks, and ensure your lug wrench fits snugly on your vehicle’s lug nuts. Wear safety glasses to protect against flying debris and consider heavy-duty work gloves for better grip on greasy components. Remove watches or jewelry that could catch on moving parts, and keep children and pets well away from your work area. These simple precautions prevent accidents and create a safer working environment throughout the tire mounting process.
Loosen Lug Nuts Before Raising the Vehicle
One of the most common beginner mistakes is attempting to loosen lug nuts after lifting the vehicle. This approach fails because the wheel spins freely when off the ground. Instead, always begin with the vehicle firmly on the ground—this provides the resistance needed to break loose stubborn lug nuts.
Loosen each lug nut by turning counterclockwise approximately one-quarter to one-half turn using a star pattern (skip every other nut). This prevents wheel warping from uneven pressure. Never remove lug nuts completely at this stage; simply break them loose enough for hand removal once the wheel is off. If nuts prove exceptionally tight, apply penetrating oil and wait 5-10 minutes before trying again. A breaker bar extension pipe provides crucial leverage for stubborn nuts without damaging lug studs—just remember to remove it before final tightening.
Proper Vehicle Lifting and Support Techniques
Position your jack precisely at the manufacturer’s designated lift points—typically reinforced frame sections or specific pinch weld markers shown in your owner’s manual. Never jack from suspension components, the differential, or the vehicle’s floor pan, as this can cause catastrophic damage or instability. Pump the jack handle steadily until the tire clears the ground by 3-4 inches—enough room to safely remove the wheel.
Immediately place properly rated jack stands beneath the vehicle at load-bearing points after lifting. Lower the vehicle slowly onto the stands, then verify stability by gently shaking the vehicle. If it wobbles, readjust the stands before proceeding. Never work beneath a vehicle supported only by a jack—the risk of failure, while low, isn’t worth taking. With the vehicle securely supported, you can safely remove the wheel and prepare for mounting.
Complete Wheel Removal and Hub Inspection
With lug nuts loosened and the vehicle secured, finish removing all lug nuts and set them aside where they won’t roll away. Carefully pull the wheel straight off the hub while supporting its weight with both hands. If the wheel sticks due to rust or corrosion, tap the tire sidewall (not the rim) with a rubber mallet to break the seal—never strike with a metal hammer.
Thoroughly inspect the hub surface before mounting the new tire. Clean rust and debris from the mounting surface using a wire brush, and check hub bolts for stripped threads. If your vehicle uses hub-centric rings, ensure these are present and undamaged. A clean, smooth mounting surface prevents dangerous vibrations while driving. Position the new tire near your work area with the valve stem facing outward for easy access during inflation.
Tire and Rim Preparation Steps
Before mounting, inspect both tire and rim for damage or defects. Verify the tire size matches your vehicle’s specifications—incorrect sizing creates serious handling issues. Remove the valve core to allow complete deflation if the tire arrived inflated, then generously apply tire lubricant to both inner and outer tire beads plus the rim contact surfaces.
This lubrication dramatically reduces mounting force and prevents bead damage. For stiff sidewalls or low-profile tires, additional lubrication and a bead breaker tool may be necessary. Work the lubricant around the entire circumference by pressing on the sidewalls to distribute it evenly—skimping here causes difficult mounting and potential bead damage.
Mounting the Tire Onto the Rim Correctly
Position the rim on a stable surface with the valve stem hole accessible. Place the lower tire bead into the rim’s center channel by stepping on the tire sidewall while working around the circumference. This requires significant effort with stiff tires—work methodically to avoid fatigue.
Once the lower bead is seated, work the upper bead over the rim’s outer edge starting at the valve stem area. Use your hands or plastic tire irons to hook the bead over the rim lip, working in both directions. The final portion typically requires the most force; a bead breaker tool or second person’s assistance helps overcome resistance. Never use screwdrivers or metal tools that can damage the rim—always use proper tire mounting tools designed for this purpose.
Proper Bead Seating and Inflation Process
Correct bead seating is critical for safe tire operation. Reinsert the valve core and begin inflating using an air compressor. Listen for distinct popping sounds as each bead seats against the rim—lower bead first, then upper bead. Continue inflating until both beads seat completely, checking for even seating around the entire circumference.
For stubborn beads, apply soapy water to reduce friction or tap the tire sidewall with a rubber mallet while maintaining air pressure. Never exceed the tire’s maximum inflation pressure listed on the sidewall, and never stand directly in front of the tire during inflation. Once beads are seated, inflate to your vehicle manufacturer’s recommended pressure—typically found inside the driver’s door jamb.
Precise Lug Nut Torquing Method
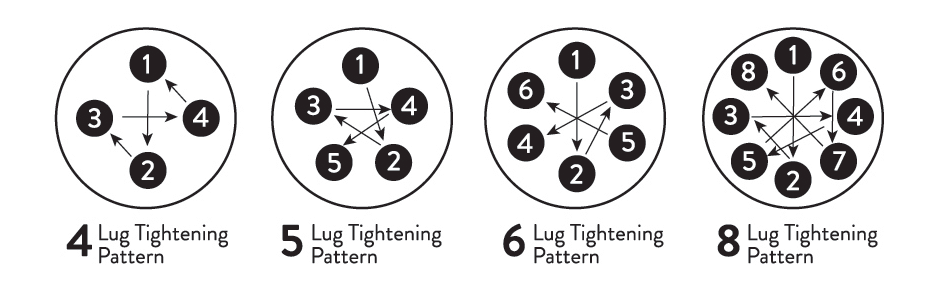
With the tire mounted and inflated, position the wheel onto the hub and hand-tighten all lug nuts. Snug them in a star pattern using even pressure to prevent warping. After lowering the vehicle, use your torque wrench to tighten to manufacturer specifications—typically 80-100 foot-pounds for most vehicles.
Drive approximately 50 miles, then recheck lug nut torque with your wrench. Initial driving causes studs to seat slightly, potentially reducing clamping force. This follow-up check is essential for safe operation, especially if you frequently drive on rough roads or tow heavy loads. Properly torqued lug nuts prevent wheel detachment accidents that cause serious injuries annually.
Final Safety Checks and Maintenance Schedule
Before considering your job complete, verify tire pressure matches specifications using an accurate digital gauge. Check for valve stem leaks by applying soapy water and watching for bubbles. Inspect the tire’s overall appearance for proper seating and sidewall condition without bulges or damage.
Establish a regular maintenance routine to extend tire life and ensure safety. Check tire pressure monthly (including your spare) and adjust for seasonal temperature changes—tires lose about 1 PSI for every 10°F temperature drop. Rotate tires every 5,000-8,000 miles to promote even wear. Regularly inspect for uneven wear patterns that indicate alignment or suspension problems needing professional attention. Proper tire maintenance improves fuel economy, extends tire life by thousands of miles, and most importantly, keeps you and your passengers safe on the road.


