
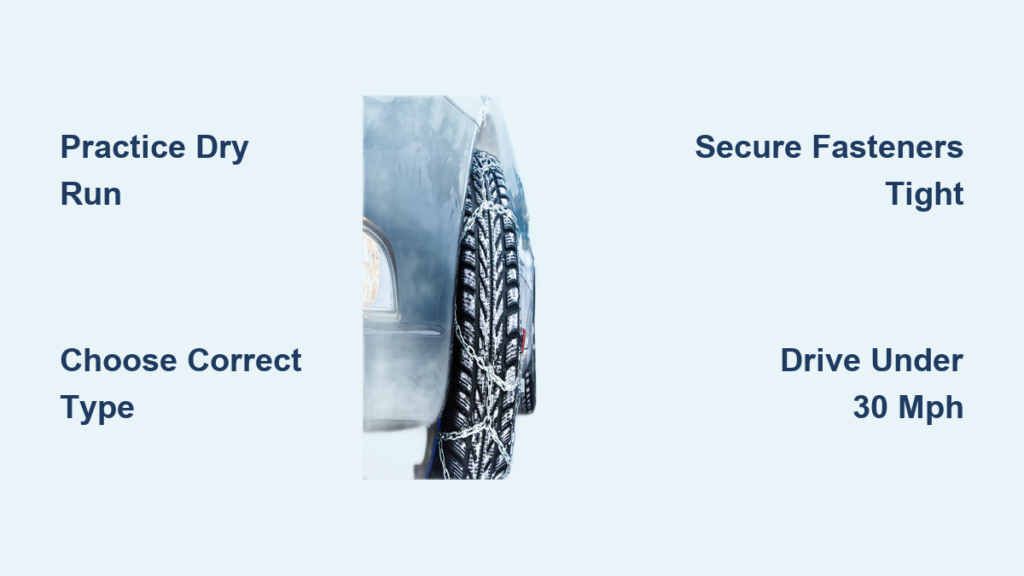
Snow-covered roads turn routine commutes into hazardous journeys, making it essential to know how to install car tire chains properly before winter weather strikes. These metal or cable systems provide critical traction on icy surfaces by biting into snow and ice where regular tires would simply slip. Mastering the installation process ensures you can safely navigate mountain passes and snowy highways when conditions deteriorate. This guide delivers everything you need to confidently install, drive with, and maintain tire chains—transforming winter driving from a stressful ordeal into a manageable task.
Learning how to install car tire chains during dry conditions prevents dangerous roadside emergencies when snow is falling and temperatures are dropping. The process requires precision to avoid damaging your vehicle while maximizing traction where it matters most. With practice, you’ll install chains efficiently even with cold hands and limited visibility, keeping you and your passengers safe during winter travel.
Practice Chain Installation Before Winter Hits
Installing chains during actual winter conditions creates unnecessary stress when you should focus on safety. Taking time to practice installation in your garage or driveway ensures you understand every step before facing poor visibility, falling snow, and freezing temperatures.
Benefits of Dry-Run Installation Practice
Practicing chain installation on dry pavement helps you confirm proper fitment for your specific tire size and vehicle configuration. You’ll discover whether your wheel wells provide adequate clearance and identify potential challenges before encountering them roadside. This preparation proves invaluable when you need to install chains on a snowy highway shoulder with traffic passing nearby and darkness approaching—conditions where fumbling with unfamiliar equipment could lead to dangerous situations.
Get Professional Fitting Assistance
Many tire retailers like Les Schwab offer free fitting services to ensure your chains match your vehicle’s specifications. Take advantage of these resources to verify proper sizing and receive hands-on guidance with your specific chain system. Understanding whether you have quick-fit, traditional, or V-bar chains makes actual roadside installation significantly smoother when winter weather demands them.
Gather Essential Tools for Chain Installation
Having the right equipment transforms a potentially frustrating chain installation into a manageable task. Preparing your winter emergency kit well before snow season ensures you have everything needed when conditions deteriorate.
Build Your Winter Roadside Safety Kit
Before winter arrives, assemble a dedicated kit that includes waterproof gloves, a headlamp, warm layers, and a small brush for clearing snow from tires. Store this kit with your chains in your vehicle throughout winter. Waterproof gloves keep your hands functional despite cold and wet conditions, while a headlamp provides crucial visibility during low-light installations. Many chain sets include a plastic instruction mat that serves as a barrier between you and the snow, keeping you drier during the installation process.
Choose the Right Tire Chains for Your Vehicle

Selecting appropriate tire chains involves understanding the different types available and matching them to your specific driving needs and vehicle requirements. The right choice ensures optimal traction without causing damage to your vehicle.
Match Chain Type to Driving Conditions
Two-link chains feature tighter spacing between cross chains, providing superior grip on ice and hard-packed snow—ideal for severe winter conditions. Four-link chains offer a more economical option with wider spacing, suitable for light snow conditions. V-bar chains feature protruding V-shaped metal bars that excel on ice and steep terrain, while cable systems provide easier installation with less vehicle clearance requirements.
Verify Correct Sizing and Compatibility
Ensure chains match your specific tire size exactly by checking your vehicle’s sidewall markings. Consult your owner’s manual to confirm chain compatibility, as some vehicles with limited wheel well clearance cannot accommodate standard chains. For all-wheel drive vehicles, chains typically go on all four tires when 4WD is engaged, while front-wheel drive vehicles require chains on the front tires only.
Find a Safe Installation Location During Snowstorms
When tire chains become necessary, selecting an appropriate location protects both you and your vehicle. Safety must remain the priority throughout the installation process.
Position Your Vehicle Correctly
Pull completely off the roadway onto a safe shoulder away from traffic before beginning installation. Turn on hazard lights to alert approaching drivers and apply the parking brake to prevent vehicle movement. Choose level ground when possible and ensure the engine is turned off during installation. The ideal location provides adequate space to work around your vehicle and offers good visibility to approaching traffic.
Position Chains on Your Tires Correctly
Proper positioning ensures the chains provide maximum traction and remain securely in place during driving. This phase requires attention to detail to achieve correct placement before securing the fasteners.
Lay Out and Untangle Chains Completely
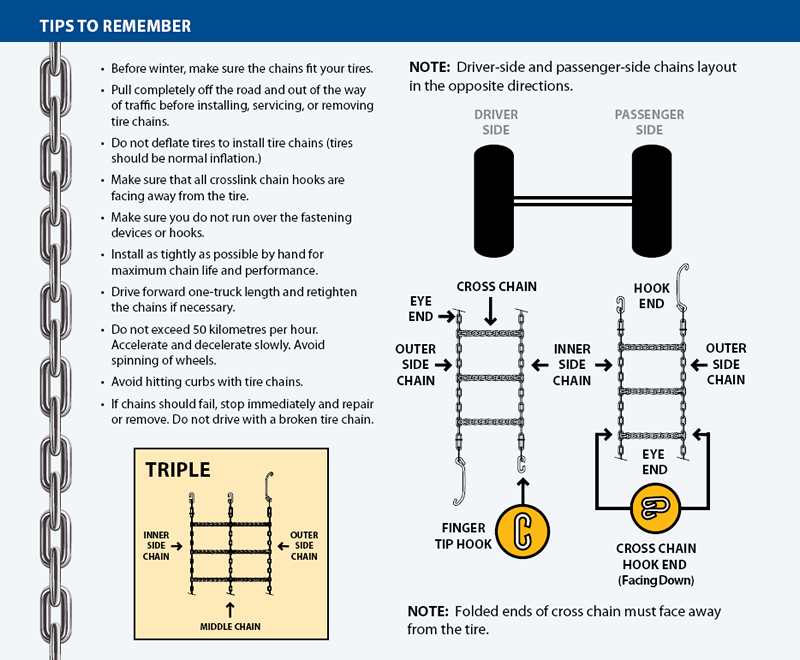
Open the chain bag and remove instructions along with the first chain. Lay chains flat on the ground with cross chains facing downward and untangle completely. For quick-fit systems, hold chains with yellow end in your left hand and blue end in your right hand, ensuring metal hooks face away from you to prevent wheel damage.
Position Chains on Drive Wheels
For front-wheel drive vehicles, begin with front tires. Lay chains behind the tire and push them toward the tire with the yellow cable end entering from the right side first. Once centered, pull both ends up over the top of the tire until chains contact your axle or wheel hub—this indicates proper positioning.
Secure All Fasteners to Prevent Chain Slippage
Connecting all fasteners correctly ensures the chains remain tight and effective throughout your drive. Each connection point plays a crucial role in maintaining proper chain tension.
Connect Primary and Secondary Fasteners
Connect yellow and blue cable ends on top of the tire to create the primary longitudinal cable. Locate the red hook opposite the cable connection and attach it to the first available gold link on the opposite side. Pull this section over the top of the tire to access the bottom tension system.
Tighten Bottom Tension System
Pull the red draw chain through the chain guide, pulling firmly with both hands (never using the bungee section). As you pull, a chain link will lock into the notch on the red chain guide. Secure the bungee end through one or both red loops and attach to a gold-side chain opposite the loops.
Verify Proper Chain Alignment
After connecting all fasteners, check for a diamond-shaped pattern in the chain links against the tire surface. The center rail should run down the middle of the tire tread. If misaligned, adjust before driving. Install chains on the second tire using identical procedures, then drive forward 15 feet before re-tightening all connections.
Drive Safely with Chains at Proper Speed Limits
Operating your vehicle correctly while chains are mounted protects both you and your equipment. Understanding speed restrictions prevents damage and maximizes safety.
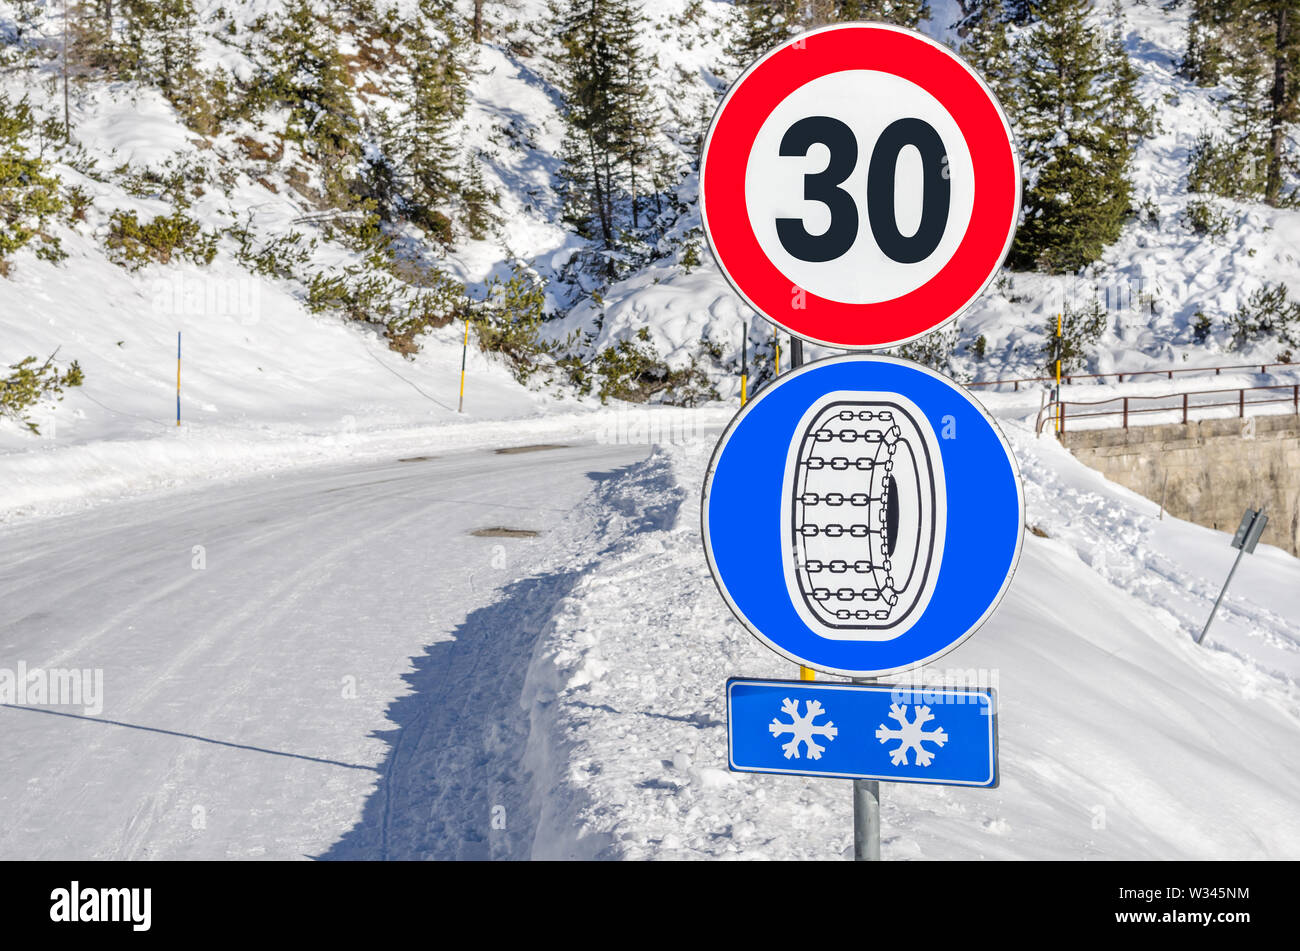
Observe Critical Speed Limits
Never exceed 25-30 miles per hour when driving with tire chains installed. Speeding beyond this limit can damage both chains and your vehicle significantly. Always obey posted speed limits in chain control areas, which may be lower than the general maximum.
Adjust Driving Techniques Immediately
Listen carefully for unusual sounds—slapping or metal-on-metal contact indicates a problem requiring immediate attention. Avoid sudden movements: never slam brakes, avoid hard acceleration, don’t turn sharply, and start/stop gradually. Leave extra space between vehicles as stopping distances increase substantially on snowy roads.
Remove Chains Immediately on Bare Pavement
Proper removal prevents damage to both your chains and road surfaces. Following the correct procedure ensures safe transition back to normal driving conditions.
Follow Safe Removal Sequence
When encountering bare pavement, pull over safely and begin by unhooking the bungee from the tensioner guide. Unlatch the red hook securing the chain, then disconnect the blue and yellow cable connection. Lift chains off the tires and drive forward slightly before collecting them from the ground.
Maintain Chains After Winter Driving
Proper post-use care extends chain life significantly and ensures reliability for future winter trips.
Clean and Dry Chains Thoroughly
After each use, lay chains in a dry area to completely air dry before storage. Packing wet chains promotes rust that weakens metal and shortens lifespan. Inspect for wear, particularly if driven on asphalt accidentally, and replace chains with flat spots or broken links.
Store Chains Properly for Longevity
Before seasonal storage, clean chains to remove road salt and debris. Spray with water-based lubricant like WD-40 to prevent rust. Hang chains in a dry area if possible, and store instructions in a waterproof sleeve with the chains.
Troubleshoot Common Chain Installation Problems
Even with preparation, issues can arise during chain installation. Understanding common problems helps you address challenges quickly.
Fix Persistent Looseness Issues
If chains remain loose after re-tightening, verify correct sizing for your tires. Use the tightest position on available gold chain links for the red hook attachment. Extra hanging links are acceptable as long as the main chain section is snug against the tire.
Resolve Wheel Well Clearance Problems
If chains rub against wheel wells or suspension components, you may need SAE Class S chains designed for vehicles with limited clearance. Clearance issues can cause damage to both chains and your vehicle, creating safety hazards during driving.
Knowing how to install car tire chains properly transforms winter driving from a stressful challenge into a manageable task. Practice installation before winter hits, gather essential tools, select the right chains for your vehicle, and master the installation procedure. Drive within recommended speed limits, adjust your techniques for chain-equipped driving, and maintain your chains after each use. These steps ensure reliable winter traction when you need it most, keeping you safe on snow-covered roads throughout the season.


