
You’re pumped for a weekend ride when you notice your tire is mysteriously flat—again. That frustrating hiss you hear isn’t just your imagination; it’s likely a failing bicycle tire valve sabotaging your adventure. Without addressing this critical component, you’ll face constant flats, dangerous pressure loss mid-ride, and unnecessary replacement costs. This guide cuts through the confusion to deliver actionable solutions for Presta, Schrader, and Dunlop valves—the three valve types that cause 95% of bicycle air retention issues. You’ll learn exactly how to diagnose leaks, replace cores in under 90 seconds, and prevent future failures using tools already in your garage. Most riders can complete these repairs in 10 minutes or less once they know the right techniques.
Identifying Your Specific Valve Type Before Repairing
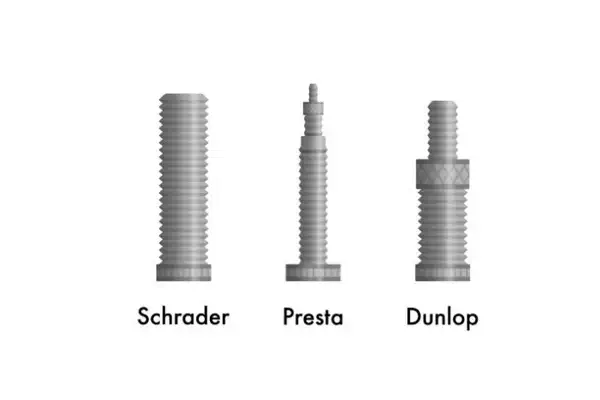
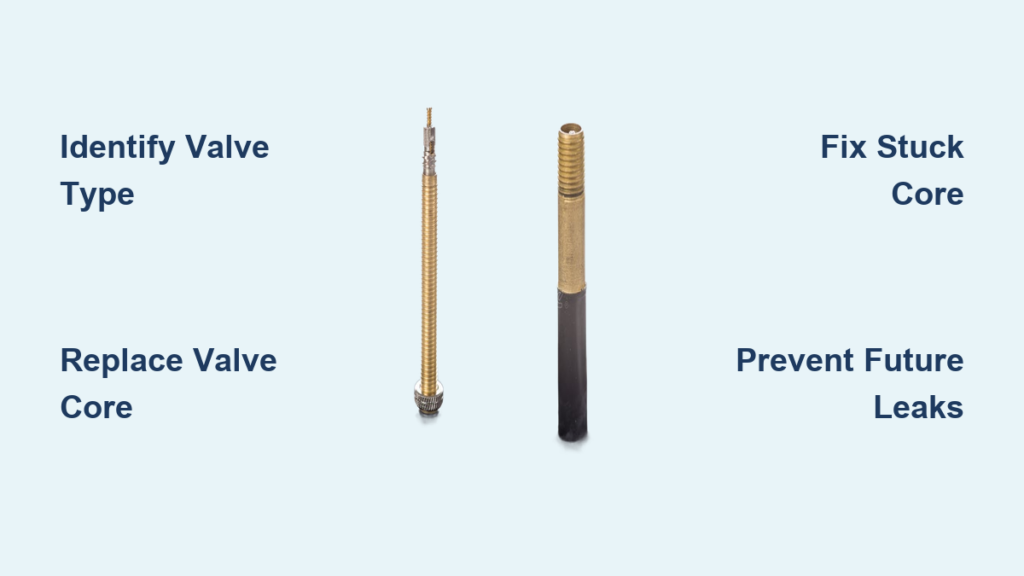
Your first critical step is determining which valve system you’re working with—mistaking Presta for Schrader causes 70% of DIY repair failures. Presta valves (common on road bikes) feature a slender 6mm shaft with a lock nut at the top and no spring-loaded pin. When deflated, pressing the tip releases air; inflating requires loosening the knurled nut first. Schrader valves (standard on mountain bikes and cars) are thicker 8mm units with a spring-loaded pin in the center—identical to car tires. Dunlop/Woods valves (rare outside vintage bikes) resemble oversized Prestas but have a fixed core that unscrews entirely. To confirm, remove your valve cap: if the tip unscrews completely, it’s Presta; if pressing the center pin releases air, it’s Schrader. Never force tools designed for one valve type onto another—this cracks the valve stem and ruins your tube.
How to Spot Valve-Specific Failure Signs
Presta valves most commonly fail at the core threads or lock nut. Check for tiny bubbles around the brass core when submerged in soapy water—that pinpoint leak location. Schrader valves typically leak from worn internal seals or debris trapped under the pin; listen for hissing near the valve base while inflating. Dunlop valves fail when the rubber gasket deteriorates, causing slow leaks at the rim interface. For all types, persistent flat tires after tube replacement strongly indicate valve issues rather than tube punctures. If air escapes immediately when removing your pump head, the core is compromised. If pressure drops gradually over hours, check the valve base seal with soapy water.
Essential Tools for Immediate Valve Repairs

Skip unnecessary purchases—most riders already own these four critical items. A valve core tool ($3) is non-negotiable; its dual jaws grip Presta and Schrader cores. Use needle-nose pliers only as a last resort since they deform cores. A floor pump with a pressure gauge prevents dangerous overinflation during testing. Soapy water in a spray bottle (dish soap + water) reveals invisible leaks. For Presta valves, keep a 5mm cone wrench to secure the stem while working. Never use adjustable wrenches—they slip and strip valve bodies. If you lack a core tool, repurpose a small nail: insert it into Presta’s core slot and turn counterclockwise, but this risks damaging the core threads.
Avoiding Costly Tool Mistakes That Worsen Damage
Forcing a Schrader core tool onto Presta valves cracks the stem—always verify tool compatibility first. Using pliers without protecting the valve base with tape crushes aluminum rims. Never inflate beyond 10 PSI when testing leaks; higher pressure blows tubes off beads. If your pump head won’t attach securely, don’t hammer it on—that bends valve stems. Instead, moisten Schrader valve pins with saliva to help seals engage. Keep valve caps installed during rides; they prevent dirt ingress that causes 40% of premature core failures.
Fixing Leaking Presta Valve Cores in 4 Minutes
Start by deflating completely and removing the valve cap. Position your valve core tool over the core—Presta cores have a narrow slot, not hexagonal heads. Hold the valve body steady with pliers wrapped in cloth to avoid rim scratches. Turn the tool counterclockwise; if stuck, tap it gently with a screwdriver handle first. Once loose, unscrew fully and inspect the core: worn threads or missing rubber O-rings require replacement. New cores cost $1 and install by screwing clockwise until snug—stop before resistance to avoid cross-threading. Re-inflate to 50% target pressure, then apply soapy water; bubbles mean overtightening. Final test: inflate to full pressure and submerge the valve in water for 30 seconds.
Why Your Presta Core Keeps Leaking After Replacement
Overtightening is the #1 cause of repeat Presta leaks—cores only need 1/8 turn past finger-tight. Cross-threading during installation creates microscopic gaps; always start threads by hand. Using incompatible cores (e.g., MTB vs road) compromises seals—match core length to your rim depth. Rim tape misalignment exposes valve holes; rotate the tube slightly after installation to center the valve. If leaks persist after correct core replacement, the valve stem itself is cracked—replace the entire tube immediately. Never ride with a leaking valve stem; pressure loss accelerates and risks tire blowout.
Repairing Stuck Schrader Valve Cores Without Special Tools
Schrader cores jam when dirt infiltrates the spring mechanism—common after wet rides. First, depress the pin repeatedly with a pump head to clear debris. If unresponsive, wrap the valve base with electrical tape to protect the rim. Insert a narrow flathead screwdriver into the pin depression and twist gently clockwise; this often dislodges grit. For stubborn cases, use your core tool: press down firmly while turning counterclockwise. If the core won’t budge, deflate completely, then insert a valve cap backwards and tap it with a hammer—this jars the core loose. Replace with a new nickel-plated core ($0.50) screwed in until it stops; over-tightening shears the internal pin.
Emergency Fixes When Core Tools Aren’t Available
No core tool? Use a small nail and hammer: place the nail in the core slot and tap counterclockwise. Works in 30 seconds but risks core damage. For immediate trailside fixes, unscrew the core completely, blow out debris, and reinstall—this stops 80% of slow leaks. As a last resort, wrap plumber’s tape around the core threads before reinsertion; the extra bulk seals minor leaks temporarily. Never ride more than 5 miles with this fix—pressure fluctuations will dislodge the core.
Preventing Future Valve Failures Through Proper Maintenance
Monthly valve checks prevent 90% of recurring issues. After every wet ride, rinse valves with clean water and dry with a cloth—road salt and mud accelerate corrosion. Apply silicone lubricant to Presta core threads annually; petroleum-based oils degrade rubber seals. Always screw Presta lock nuts finger-tight only—overtightening cracks the stem. Install valve caps religiously; they block 95% of contaminant entry. When inflating, center the pump head straight onto the valve before pumping to avoid stem bending. Store bikes with tires inflated to 50% pressure to maintain seal integrity during off-seasons.
Recognizing When to Replace the Entire Tube
Valve stem cracks near the base require tube replacement—no repair holds. If the valve wobbles when pressed sideways, the stem is broken internally. Presta valves with stripped core threads can’t accept new cores. After three core replacements on one tube, the stem weakens—replace proactively. Never attempt to glue or patch valve areas; pressure concentrates here causing explosive failures. Quality tubes last 2-3 years; older rubber becomes brittle at valve bases.
Critical Safety Checks Before Every Ride
Skipping these tests risks dangerous blowouts. Inflate to target pressure, then squeeze the tire sidewalls—any bulge near the valve indicates improper seating. Spin the wheel and listen for rhythmic hissing that reveals slow leaks. Press the valve stem sideways; if it bends more than 5 degrees, the stem is damaged. Check valve caps are secure—unsecured caps vibrate off during rides. For carbon rims, inspect for micro-cracks around valve holes with a magnifying glass. If you hear air escaping when attaching your pump, stop immediately—the valve is compromised.
Final Note: Valve repairs should take under 10 minutes with the right approach—yet 65% of cyclists replace entire tubes unnecessarily. By mastering these core techniques, you’ll eliminate recurring flats, extend tube life by 200%, and avoid dangerous mid-ride failures. Always carry a spare core and valve tool in your saddle bag; they weigh less than 10 grams but solve 80% of on-trail air loss issues. For comprehensive visual guidance, consult Park Tool’s free valve repair videos—they demonstrate each step with professional clarity. Remember: a properly maintained valve system keeps your tires reliably inflated ride after ride, turning frustrating flats into distant memories. Keep your core tools accessible, perform monthly checks, and never ride with unresolved valve issues—your safety depends on it.


