
Nothing disrupts your day like discovering a flat wheelchair tire when you’re ready to go. Whether you’re dealing with a sudden pneumatic tire puncture, worn solid rubber, or damaged foam cushioning, knowing how to fix a wheelchair tire yourself means getting back on the move without waiting for professional service. Most common tire issues can be resolved with basic tools and minimal mechanical skills. This guide provides precise, step-by-step instructions for every tire repair scenario you might encounter, helping you restore reliable mobility quickly and safely.
Regular use subjects wheelchair tires to constant stress from pavement debris, weather conditions, and daily friction. Learning proper repair techniques prevents unnecessary replacements and extends your tires’ lifespan significantly. The methods described here work for most standard manual wheelchair models, though specific details may vary slightly by manufacturer.
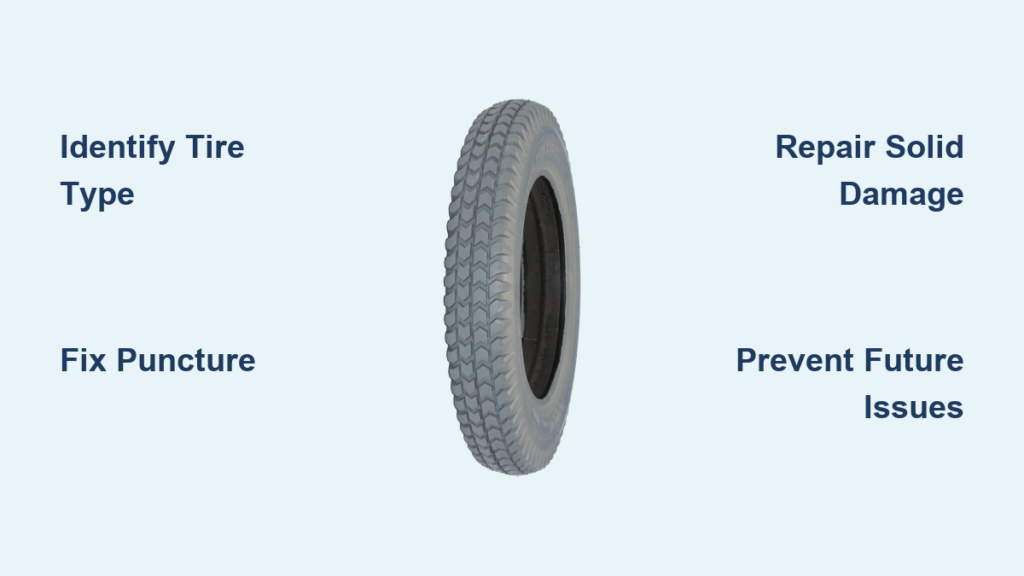
Identify Your Wheelchair Tire Type Before Repair
Knowing your tire type is critical before attempting any repair—each requires different tools and techniques. Misidentifying your tire leads to wasted effort and potential damage to your wheelchair.
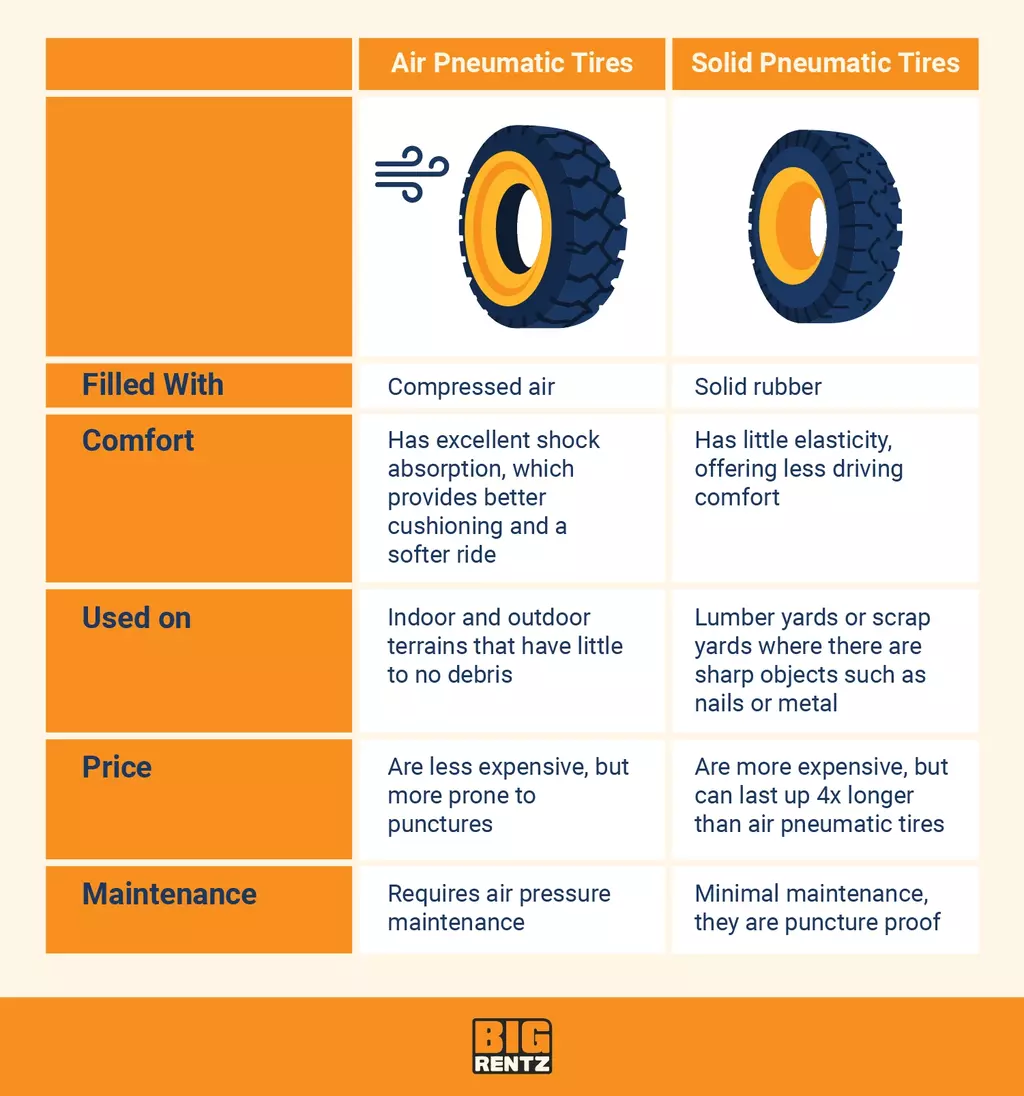
Pneumatic tires feature an air chamber like bicycle tires with a visible valve stem for inflation. They have molded tread patterns and feel slightly soft when pressed. When punctured, they lose air with an audible hiss. These tires provide the smoothest ride by absorbing shock from uneven surfaces and are common on lightweight, active-use wheelchairs.
Solid rubber tires are completely solid throughout with no internal cavity. They feel firm and unyielding when pressed and never go flat. While they cost more initially, they eliminate puncture concerns entirely. Solid rubber tires ride rougher than pneumatic options and add weight to your wheelchair, making them ideal for indoor use or users prioritizing low maintenance.
Foam-filled tires combine aspects of both types, using foam polymer instead of air in a traditional tire casing. They provide some cushioning while remaining flat-proof. The foam can deteriorate over time, compressing permanently and reducing shock absorption. These tires feel consistently firm with no valve stem but maintain a tire-like appearance rather than solid construction.
Gather the Right Repair Tools for Your Tire Type
Assembling the correct tools before starting prevents mid-repair frustration and ensures reliable results. The required supplies vary significantly based on your tire type.
For pneumatic tire repairs, collect:
– Tire lever set or plastic spatula for rim removal
– Bicycle-specific patch kit with rubber patches and vulcanizing cement
– Hand pump with pressure gauge (50-100 PSI range)
– Talcum powder or rubber lubricant for easier installation
– Valve core tool (if replacing inner tube)
Use patch kits designed for bicycle or wheelchair tires—they include properly sized patches and cement that creates permanent bonds. Avoid household adhesives, which fail to seal reliably and may damage your tire.
For solid rubber and foam-filled tire repairs, prepare:
– Utility knife or sharp scissors for trimming damaged material
– Rubber cement or contact adhesive for securing repairs
– Replacement foam insert (if cushioning has degraded)
– Fine-grit sandpaper for smoothing rough edges
– Work gloves to protect your hands during manipulation
Regardless of tire type, keep these general supplies handy: clean rags for removing dirt and debris, and your wheelchair’s user manual for specific torque recommendations.
Diagnose Your Specific Tire Problem Accurately

Correct diagnosis ensures you apply the right fix the first time. Wheelchair tire issues generally fall into these categories:
Puncture damage in pneumatic tires causes gradual or sudden air loss. Look for frequent need for reinflation, visible debris in the tread, hissing sounds, or a noticeably soft wheel that makes propulsion difficult. Small punctures may temporarily seal with sealant products but eventually require proper patch repair. Large cuts, sidewall damage, or bead area damage typically need replacement.
Tread wear affects all tire types over time. Check for visible wear patterns, reduced tread depth, uneven wear suggesting alignment issues, or exposed casing in pneumatic tires. Worn tread increases rolling resistance and reduces traction.
Dry rot and cracking develops from sun exposure, ozone, or extreme temperatures. Visible cracks in the tire surface, especially around tread grooves and sidewalls, indicate this irreversible damage. Dry-rotted tires lose flexibility and risk sudden failure.
Bead damage occurs where the tire contacts the wheel rim. In pneumatic tires, compromised beads cause persistent air leaks resistant to normal patching. Solid rubber tires with bead separation show visible gaps between tire and wheel or feel loose when manipulated.
Fix a Flat Pneumatic Tire in 7 Steps
Repairing a flat pneumatic wheelchair tire takes 30-60 minutes with basic tools. Follow this systematic process for reliable results.
Remove the wheel by locating the quick-release button or lever on the hub, pressing it, and sliding the wheel straight off the axle. For threaded axles, use the appropriate wrench to loosen the axle nut.
Deflate the tire completely by pressing the valve core inward. For Schrader valves, use a small screwdriver; for Presta valves, unscrew the top nut first. Flatten the tire by pressing from multiple angles to ensure all air escapes.
Remove the tire from the rim using tire levers. Insert one lever between the tire bead and rim edge, hooking the bead over the rim lip. Work around the wheel systematically until one bead clears the rim. Push the opposite bead into the rim center channel, then lift the first bead completely off.
Locate the puncture by inflating the inner tube slightly and listening for escaping air, or by submerging it in water to watch for bubbles. Mark the puncture location with a pen.
Prepare and apply the patch by cleaning the area around the puncture with rubber solution, then applying vulcanizing cement. Let it dry until tacky (2-5 minutes), then center the patch over the puncture. Press firmly from center outward to expel air bubbles, holding pressure for at least 30 seconds.
Reinstall the inner tube by partially seating one tire bead, inserting the inflated tube, then working the second bead onto the rim starting opposite the valve stem. This prevents pinching the tube between bead and rim.
Inflate to proper pressure (typically 50-100 PSI as marked on tire sidewall), checking that both beads seat evenly. Reinstall the wheel, ensuring quick-release mechanisms engage fully or axle nuts are properly torqued.
Repair Solid and Foam-Filled Tires Effectively

Solid rubber and foam-filled tires require different approaches since they lack inner tubes.
For minor surface damage in solid rubber tires (small cuts, nicks, or surface cracking), clean the area thoroughly with isopropyl alcohol. Apply rubber cement into the crack with a toothpick, let cure 5-10 minutes, then apply a rubber patch if available. This works best for damage not extending through the entire tire thickness.
Foam-filled tire repairs focus on the foam insert. Small foam tears can be repaired by applying contact adhesive to both tear surfaces and pressing them together firmly. For compressed foam that’s lost resilience, replacement is necessary—deteriorated foam cannot be effectively restored.
For significant damage in solid rubber tires (large cuts exceeding an inch, separated sections, or through-tire damage), replacement is safer than repair. Attempting structural repairs creates weak points that can fail suddenly.
Tire replacement requires cutting away the old tire with a utility knife, cleaning adhesive residue from the rim, applying contact adhesive to both surfaces, pressing the new tire firmly onto the rim, and allowing 24 hours for full cure before use.
Prevent Future Tire Damage with Proactive Maintenance
Extend tire lifespan significantly with these simple practices:
Inspect tires weekly for embedded debris, wear patterns, and damage. Remove stones, glass, or other debris caught in tread grooves before they work deeper into the tire structure.
Maintain proper inflation in pneumatic tires. Under-inflation causes excessive sidewall flex that degrades tire structure, while over-inflation increases impact damage risk. Check pressure monthly with a reliable gauge.
Store your wheelchair properly when not in use. Prolonged sun exposure accelerates rubber degradation. Store indoors or use a wheelchair cover when parked outside. Avoid heat sources and ozone-generating equipment.
Rotate pneumatic tires periodically to equalize wear patterns between front and rear wheels. Swap positions every few months, noting directional tires cannot be swapped between sides without remounting.
Address minor damage promptly before it worsens. A five-minute patch job today prevents a stranded situation tomorrow.
Knowing how to fix a wheelchair tire properly keeps your mobility equipment reliable and safe. By understanding tire types, recognizing problems early, and applying appropriate repair techniques, you handle most tire issues independently. Regular inspection and proper inflation prevent the majority of common problems, while knowing when professional help is needed ensures safety in complex situations. With these skills, you can confidently maintain your wheelchair tires and address issues as they arise, keeping your wheelchair ready for daily use. Remember that while DIY repairs save time and money, safety always comes first—when in doubt about a repair’s integrity, consult a professional before using your wheelchair.


