
Nothing ruins a perfect ride faster than a sudden flat tire, but knowing how to fix a tire tube transforms you from stranded cyclist to self-sufficient rider. Whether you’re commuting through city streets or exploring remote trails, a punctured tube doesn’t need to end your journey prematurely. With basic tools and proper technique, you can repair most bicycle tire tubes in under 30 minutes and continue your ride with confidence.
This guide provides the exact steps professional cyclists use to repair tubes reliably, whether you’re working in your garage or roadside. You’ll learn how to pinpoint leaks precisely, prepare surfaces correctly for lasting adhesion, and avoid common mistakes that cause repairs to fail. Master these skills, and you’ll save hundreds of dollars annually while gaining independence from bike shops.
Gather Your Essential Repair Toolkit
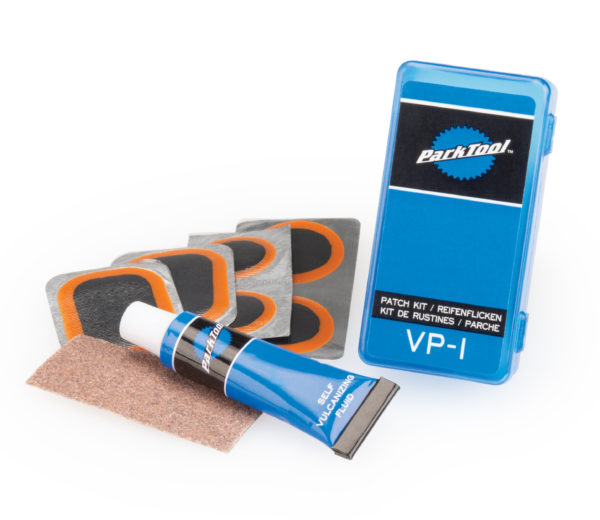
Before attempting any tube repair, assemble these critical components to ensure success. A quality patch kit forms the foundation of your repair arsenal, containing rubber patches, vulcanizing glue, and sandpaper for surface preparation. Top-tier kits cost between five and fifteen dollars and include enough materials for dozens of repairs, making them the most cost-effective cycling investment you’ll ever make.
Tire levers prove indispensable for removing stubborn tires without damaging rims. Opt for durable plastic or metal levers and always carry at least two—some high-performance tires require simultaneous leverage at multiple points. A reliable three-lever set typically costs ten to twenty dollars and lasts for years if stored properly in your repair kit.
Complete your toolkit with an air pump or CO2 inflator that matches your valve type. Floor pumps offer precise pressure control for home repairs, while CO2 inflators provide lightweight portability for emergency roadside fixes. Presta valves (common on road bikes) require different pumps than Schrader valves (found on most hybrids and mountain bikes), so verify compatibility before purchasing.
What to Pack for Roadside Emergencies
For cyclists who frequently ride away from home, create a compact emergency kit containing:
– Two tire levers (one as backup)
– Mini patch kit with 3-4 patches
– Small tube of vulcanizing fluid
– Mini pump or CO2 cartridge with inflator head
– Piece of sandpaper or emery cloth
– Small container of talcum powder
Store these items in a waterproof bag that fits in your saddlebag or jersey pocket. This setup weighs less than eight ounces but gives you the power to fix flats anywhere.
Remove Your Wheel and Tire Properly

Correct wheel removal protects your components and sets up a successful repair. For bikes with gears, shift to the smallest rear cog first to create chain slack. Quick-release wheels require fully opening the lever before attempting removal, while thru-axles demand the appropriate Allen key to loosen mounting hardware.
Critical Tire Removal Steps
- Completely deflate the tube by pressing the valve core
- Insert one tire lever under the bead near the valve
- Hook the lever under the rim edge and pry outward
- Work around the circumference with additional levers
- Remove one entire bead from the rim channel
Never force tire removal with excessive leverage against the tube, as this creates new punctures. Work slowly and methodically, especially with tight-fitting tires common on modern performance bikes.
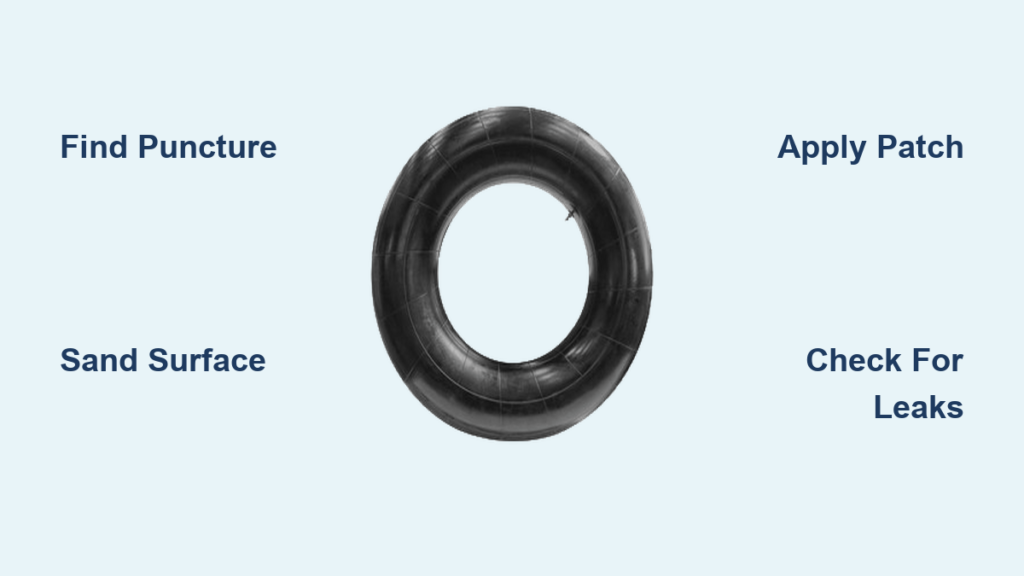
Locate the Puncture with Precision
Finding the exact leak location determines whether your repair succeeds. The water test remains the gold standard for puncture detection: inflate the tube slightly and submerge it in water while watching for bubble streams. Rotate slowly and examine every inch, as small punctures produce barely visible bubbles.
Alternative Leak Detection Methods
When water isn’t available, try these field-tested techniques:
– Listen carefully for hissing sounds while holding the tube near your ear
– Run your fingers gently along the tube surface (be cautious with high-pressure air)
– Apply soapy water to suspected areas and watch for bubble formation
– Inflate the tube and pinch sections between your fingers to feel air escaping
Always inspect the tire interior after finding a puncture. Embedded thorns, glass, or wire fragments often remain in the tire rubber and will immediately puncture your repaired tube if not removed.
Prepare the Surface for Optimal Adhesion
Surface preparation makes or breaks a tube repair. Start by drying the tube completely after leak detection. Roughen the rubber around the puncture with the sandpaper from your kit, creating a matte surface twice the size of your patch in all directions.
Apply vulcanizing fluid generously over the prepared area, extending beyond where the patch will sit. This critical step requires patience—wait until the fluid changes from shiny to matte (typically 2-5 minutes) before applying your patch. Rushing this drying period causes weak bonds that fail under pressure.
Apply Your Patch with Professional Technique
Position the patch carefully over the prepared area, pressing firmly from center to edges to eliminate air pockets. Maintain steady pressure for 2-3 minutes using your thumb or a credit card edge—most failed repairs result from releasing pressure too soon.
Allow the patch to cure fully before reinflation. While you can technically ride after 5 minutes of pressure in emergencies, waiting 10-15 minutes ensures maximum bond strength. Some cyclists carry small spring clamps to maintain even pressure during curing for roadside repairs.
Check for Hidden Damage
Experienced mechanics know single punctures often hide companions. After fixing the initial leak, continue your water inspection around the entire tube circumference. Pay special attention to areas near the valve stem and along manufacturing seam lines, where secondary leaks frequently develop.
Valve stem issues require different handling—cracks or base damage usually necessitate tube replacement rather than patching. If your valve leaks after repair attempts, invest in a new tube rather than risking failure mid-ride.
Reinstall Your Tube Without Pinching
Proper reinstallation prevents new punctures that waste your repair efforts. Start by threading the valve through the rim hole first, ensuring it sits perpendicular. Partially inflate the tube (to about 10% capacity) before reinstalling the tire—this gives the tube shape and prevents pinching between tire and rim.
Work the tire bead back onto the rim starting at the valve and moving outward in both directions. For stubborn tires, use tire levers carefully against the rim—not the tube—to avoid creating new punctures. Once both beads seat properly, inflate gradually while checking for tube pinching between rim and tire.
Recognize When to Replace Instead of Repair
Not all damage qualifies for repair. Discard tubes showing these irreparable conditions:
– Tears longer than 1/4 inch (structural integrity compromised)
– Punctures within 1/4 inch of the valve base (high-stress area)
– Multiple clustered punctures in small area
– Age-related deterioration (cracking, discoloration, hardened rubber)
When in doubt, replace the tube. A failed repair mid-ride creates more inconvenience than carrying a spare tube. Quality tubes cost $5-$10 and save you from roadside emergencies.
Prevent Future Flats Proactively
Smart maintenance reduces flat frequency dramatically. Check tire pressure before every ride using a quality gauge—under-inflation causes most pinch flats. Mountain bikes typically need 25-35 PSI while road bikes require 80-130 PSI depending on rider weight.
Inspect tires weekly for embedded debris and worn tread. Remove thorns and glass fragments immediately before they penetrate the tube. Consider upgrading to puncture-resistant tires with Kevlar belts or thorn-resistant tubes for high-risk riding areas.
Smart Inflation Practices
- Road cyclists: Inflate to 90-95% of maximum sidewall pressure
- Mountain bikers: Run lower pressures for traction but avoid pinch flats
- Check pressure weekly (tubes lose air even when not ridden)
- Use valve caps to prevent dirt from entering valve mechanisms
Mastering how to fix a tire tube gives you freedom from bike shop dependence and transforms flat tires from ride-ending disasters into minor interruptions. With proper tools, patient surface preparation, and attention to detail during patch application, your repairs will last for thousands of miles. Keep a well-stocked repair kit accessible on every ride, perform regular tire inspections, and maintain proper inflation to minimize flat occurrences. When punctures do happen—as they inevitably will—you’ll have the skills and confidence to get back on the road quickly and safely, turning potential frustrations into moments of cycling self-sufficiency.


