
That dreaded TPMS warning light flashing on your dashboard can ruin even the best driving day. When your tire slowly loses air over days or weeks, it’s more than just an inconvenience—it’s a safety hazard waiting to happen. Ignoring a slow tire leak leads to uneven tread wear, reduced fuel efficiency, and worst of all, the risk of a dangerous blowout at highway speeds. The good news is most common tire leaks can be diagnosed and fixed without professional help, saving you time and money while keeping you safe on the road.
This guide gives you everything you need to know about how to fix a tire leak yourself. You’ll learn how to pinpoint exactly where air is escaping, determine whether your specific leak can be repaired or requires replacement, and apply the right fix for punctures, valve stem issues, or bead seal problems. Whether you’re stranded in a parking lot or noticing gradual pressure loss, these step-by-step instructions will get you back on the road safely.
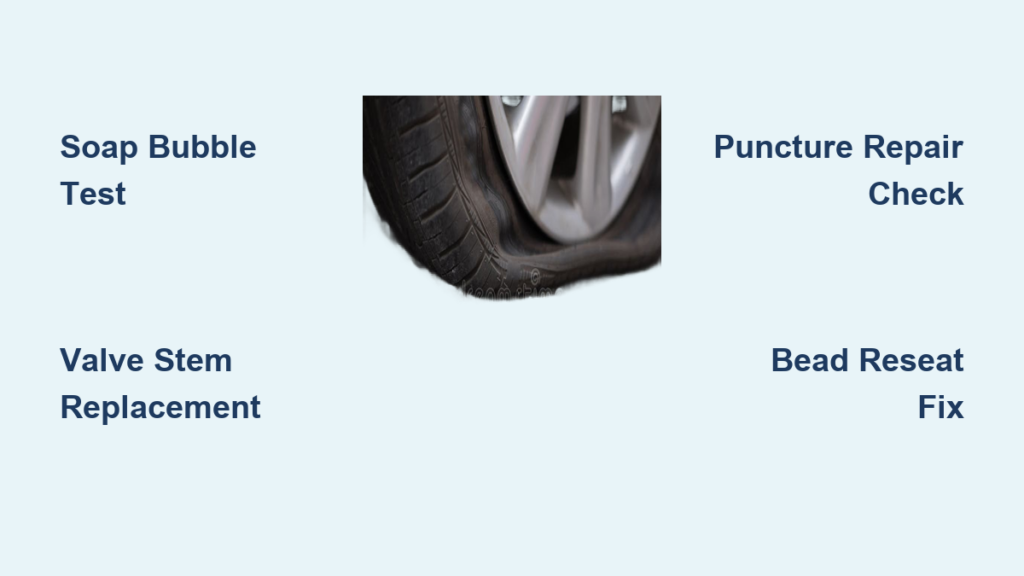
Locate Your Tire Leak with Precision

Perform the Soap Water Bubble Test
The most reliable DIY method for finding slow leaks involves creating a simple soap water solution and watching for bubbles where air escapes. Skip expensive diagnostic tools—just mix a few drops of dish soap with water in a spray bottle or bucket. Clean your tire thoroughly first, as dirt and debris can mask bubble formation.
Spray or brush the solution over the entire tire surface, focusing on three critical areas: the tread (especially near punctures), the valve stem base, and the bead seat where rubber meets wheel. Wait several minutes and watch carefully for bubbles. Small, slow-forming bubbles indicate a minor leak, while rapid bubbling means a significant problem needing immediate attention.
Pro Tip: Remove the wheel completely for the most thorough inspection. This gives you access to the hidden bead seat area, which accounts for many mysterious slow leaks. Work systematically around the entire circumference—missing the leak source wastes time and leads to repeated inflation attempts.
Check for Valve Stem Failures
Valve stems cause nearly 30% of slow leaks but are often overlooked during casual inspections. The rubber components become brittle with age and temperature changes, developing tiny cracks that allow air to escape. Start by removing the valve cap and spraying soapy water directly on the valve stem base and core.
Watch for bubbles forming at the stem-wheel interface or around the valve core. If bubbles appear when you press the valve core with a small tool, the core itself is faulty and needs replacement. Don’t confuse normal air release with a leak—genuine leaks produce continuous bubbling even when the tire is fully inflated.
Warning: Never attempt to tighten a leaking valve stem by hand—this often worsens the problem. Improper force can damage the stem or wheel, creating a larger leak that requires professional repair.
Repair Small Tread Punctures Properly
Assess Puncture Repair Viability
Not all punctures can be safely repaired. Before attempting any fix, determine if your specific puncture qualifies for repair. The golden rule: only punctures under ¼ inch in diameter located in the main tread area (not near the shoulder) can be safely patched. If the puncture is on the sidewall, near the shoulder, or larger than a pencil eraser, replacement—not repair—is your only safe option.
Measure the puncture carefully with a ruler. If you’re unsure about repair eligibility, take photos and consult a professional before attempting any fix. Attempting to repair an unrepairable puncture creates a ticking time bomb that could fail catastrophically at highway speeds.
Apply a Temporary Plug Kit Correctly
For qualifying tread punctures, temporary plug kits provide a short-term solution until professional repair can be performed. These affordable kits ($10-$20 at auto parts stores) include rubber plugs, insertion tools, and tire levers. Never use these as permanent fixes—they’re emergency solutions only.
- Deflate the tire completely by pressing the valve core
- Insert the plug through the puncture using the specialized tool
- Rotate the tool to twist the plug into place
- Trim excess plug material flush with the tread
- Reinflate the tire to proper PSI
Critical Step: After applying the plug, drive slowly to a professional shop for proper repair. The plug only addresses the puncture hole, not the damaged rubber surrounding it—permanent repairs require an internal patch that seals both the hole and compromised rubber.
Fix Valve Stem Leaks Immediately

Replace Faulty Valve Cores
Most valve stem leaks originate from worn valve cores rather than the stem itself. Replacement takes minutes and costs less than $5. Remove the valve cap, then use a valve core tool (available for $3-$5) to unscrew the old core counterclockwise.
Insert the new core, tightening it clockwise until snug—over-tightening damages the threads. Recheck for leaks using the soap water test. This simple fix solves most slow leaks caused by valve stem issues without requiring tire dismounting.
Pro Tip: Keep spare valve cores in your glove compartment. They’re tiny but essential emergency items that solve many mysterious slow leaks during road trips.
Address Bead Seat Leaks Effectively
Clean and Reseal the Bead Area
Bead seat leaks occur when the tire’s rubber edge loses its airtight seal against the wheel rim. This commonly happens after mounting/dismounting or from impacts with curbs and potholes. The solution often involves cleaning and resealing the bead area.
- Completely deflate the tire
- Apply bead sealant lubricant around the bead area
- Use a rubber mallet to gently tap the tire bead, breaking the old seal
- Inflate rapidly to 40+ PSI to reseat the bead properly
- Check for leaks using the soap water test
If bubbles still appear after reseating, the wheel may be damaged and require professional assessment. Minor wheel deformations can sometimes be corrected, but significant cracks or bending necessitates wheel replacement.
Know When Replacement Is Mandatory
Certain tire conditions cannot be safely repaired regardless of your DIY skills. Sidewall punctures, cuts, or cracks require immediate replacement—never attempt to patch sidewall damage. Similarly, multiple punctures within ½ inch of each other, punctures larger than ¼ inch, or damage extending into the tire’s shoulder area all mandate replacement.
Tire age matters too—most manufacturers recommend replacement after 10 years regardless of tread depth. Aging rubber loses flexibility, making even small repairs unreliable. Check your tire’s manufacture date (found in the DOT code) before attempting any repair on older tires.
Critical Safety Note: Driving on a tire with an improper repair risks sudden air loss at speed, potentially causing loss of vehicle control. When in doubt, replace rather than risk your safety.
Prevent Future Leaks with Smart Maintenance
Regular tire maintenance prevents most slow leaks before they start. Check pressure monthly (when tires are cold) using a quality gauge, inflating to the PSI specified on your door jamb—not the tire sidewall. Temperature changes affect pressure (approximately 1 PSI per 10°F change), so seasonal checks are essential.
Rotate tires every 5,000 miles to promote even wear and inspect for developing problems. During rotation, examine each tire closely for embedded debris, sidewall damage, and valve stem condition. Annual wheel alignments prevent uneven stress that contributes to bead seat leaks and premature wear.
Pro Tip: Keep valve stem caps always installed—they’re not just decorative! Caps protect valve cores from dirt, moisture, and accidental air release, preventing many common slow leaks.
A slow tire leak doesn’t have to mean an expensive service visit or premature tire replacement. By following these targeted diagnostic methods and repair techniques, you can confidently address most common tire leaks yourself. Remember the golden rule: when in doubt about repair viability, consult a professional—your safety is worth more than the cost of an expert opinion. Regular maintenance, prompt attention to warning signs, and understanding your tire’s limitations keep you safely on the road while maximizing your tire investment. With these skills in your automotive toolkit, you’ll transform from helpless victim of slow leaks to confident tire troubleshooter who handles problems before they escalate.


