That slow hiss when you press on your tire’s valve cap isn’t just annoying—it’s a safety hazard waiting to happen. A leaky tire valve stem causes 1 in 3 unexpected flat tires according to automotive safety reports, silently draining your tire pressure until you’re stranded on the roadside. You’ll recognize this problem when your tire consistently loses 1-3 PSI per week despite no visible punctures. The good news? Most valve stem leaks are DIY-fixable in under 15 minutes with tools you likely already own. This guide shows you exactly how to stop the leak at its source, whether it’s a faulty valve core or damaged stem housing—all without removing your tire from the wheel.
Confirming Your Valve Stem Is the Leak Source
Before grabbing tools, rule out other common leak points. Many drivers waste time replacing valve stems when the real culprit is a cracked wheel rim or faulty bead seal. Your diagnostic process starts with the soapy water test—a mechanic’s gold standard for leak detection.
Performing the Soap Test on Valve Components
Mix 2 tablespoons of dish soap with 1 cup of water in a spray bottle. Completely deflate the suspect tire until the valve core is exposed. Spray the solution liberally over three critical zones: the valve cap threads, the valve core itself, and the rubber stem base where it meets the wheel. Watch for bubbles forming within 30 seconds. Persistent bubbling at the core indicates a simple fix, while bubbles at the stem base means you’ll need replacement parts. Critical warning: Never test for leaks with a flame—soap solution is the only safe method.
Eliminating False Leak Indicators
Temperature changes cause normal pressure fluctuations that mimic leaks. Verify it’s a true leak by checking pressure when tires are cold (parked for 3+ hours). If pressure drops more than 1 PSI per day consistently, you have an actual leak. Also inspect valve caps—missing or cracked caps accelerate core deterioration but aren’t the primary leak source. A damaged cap might cause slow seepage but won’t create significant pressure loss like a compromised stem.
Fixing a Leaky Valve Core in 7 Minutes
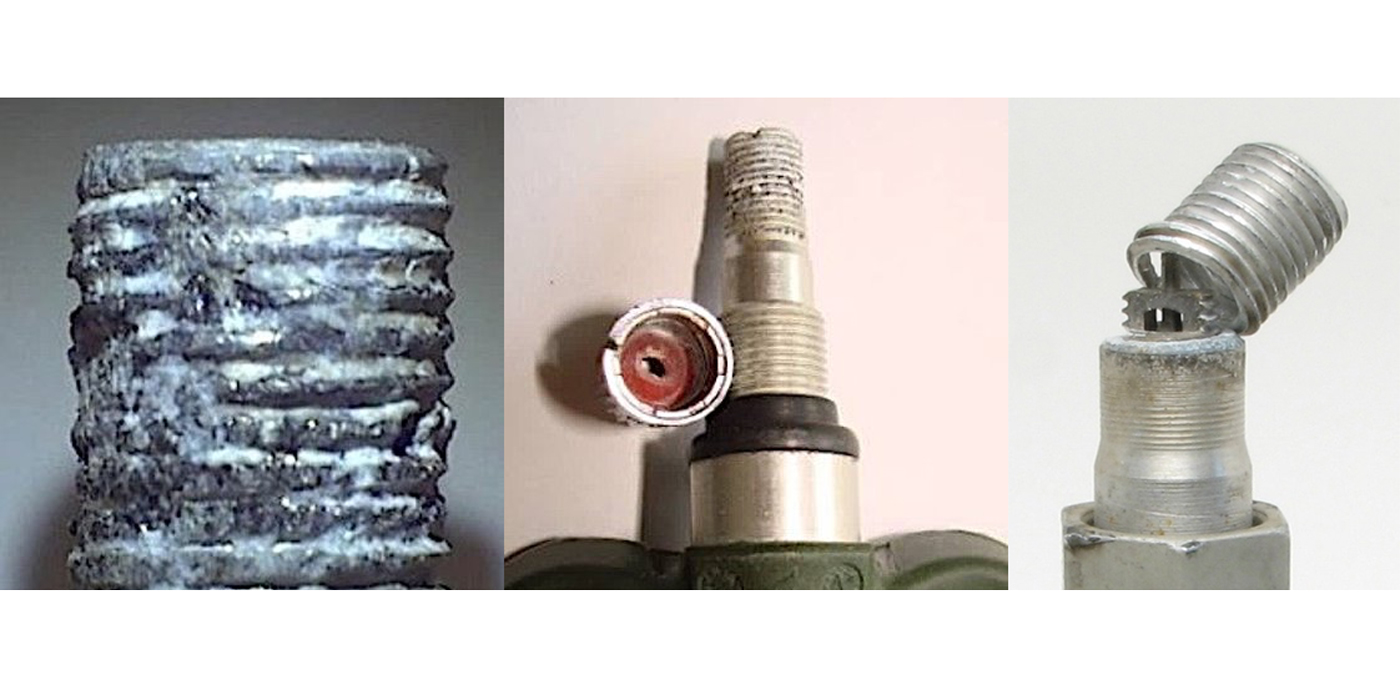
Over 80% of valve stem leaks originate from the tiny brass core inside the stem. This $2 part seals pressurized air but wears out from moisture exposure and road debris. Replacing it requires zero tire dismounting and takes less time than pumping gas.
Essential Tools for Core Replacement
Gather these three items before starting:
– Valve core removal tool (TR413 type – costs $3 at auto stores)
– New nickel-plated valve cores (TR418 standard size)
– Tire pressure gauge with built-in Schrader valve depressor
Avoid using pliers or improvised tools—they’ll damage the stem threads permanently. The nickel-plated cores resist corrosion better than standard brass versions, especially in snowy climates.
Step-by-Step Core Replacement Process
- Deflate the tire completely by pressing the center pin in the valve core with your gauge. You should hear air release steadily.
- Attach the core tool squarely onto the core and turn counter-clockwise. Apply firm downward pressure while turning—corroded cores often require significant force.
- Remove the old core and inspect for cracks or debris. Note if rubber gaskets are missing (a common failure point).
- Insert the new core by hand, turning clockwise until snug. Never overtighten—this shears internal seals. Stop when resistance increases sharply.
- Reinflate to manufacturer specs (check door jamb sticker) and retest with soapy water. Bubbles should disappear immediately.
Pro tip: Keep two spare cores in your glove compartment. They last 5+ years in sealed packaging and let you fix roadside leaks during your next gas stop.
When Valve Stem Replacement Becomes Necessary
If bubbles persist at the stem base after core replacement, your rubber stem housing is cracked or separated from the wheel. This requires stem replacement—a job needing specialized tools but still possible at home with preparation.
Identifying Irreparable Stem Damage
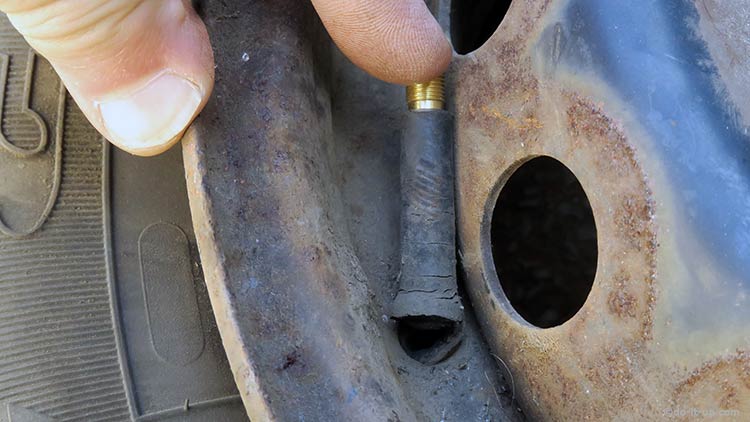
Look for these visual red flags during your soap test:
– Bubbles emerging from rubber cracks near the wheel mounting point
– Stem wobbling when gently twisted (should be completely rigid)
– Visible separation between rubber and metal base
– Corrosion eating into the wheel’s valve hole
Critical distinction: A loose stem (wobbles) means the mounting nut failed and needs tightening. A cracked stem requires full replacement. Attempting core replacement on cracked stems wastes time—the leak will continue through the housing.
Home Replacement Procedure Without Tire Removal
You can replace the stem without demounting the tire using this professional technique:
- Deflate completely and position the valve stem at 6 o’clock (bottom of wheel)
- Loosen the lock nut on the wheel’s backside with a 7/16″ wrench
- Pull the stem inward 1/4 inch to expose the base
- Cut the old stem flush with wheel using diagonal cutters
- Insert new stem through wheel hole from outside
- Pull through until base seats against wheel
- Secure with new lock nut (hand-tight only initially)
- Reinflate slowly while checking for leaks
Time estimate: 20 minutes for first-timers. Use TR608 stems for aluminum wheels—they have longer bases for proper sealing. Never reuse old lock nuts; corrosion weakens them.
Preventing Future Valve Stem Failures
Most valve stem leaks stem from preventable maintenance oversights. Implement these safeguards to avoid repeat issues.
Seasonal Protection Tactics
In winter climates, road salt accelerates stem corrosion. After each snowstorm:
– Rinse valve areas with fresh water
– Apply dielectric grease to core threads
– Install valve stem caps with rubber gaskets (not cheap plastic ones)
Expert note: The rubber in stems hardens at -20°F. If storing vehicles in extreme cold, inflate tires to 5 PSI above normal to compensate for contraction.
Critical Maintenance Schedule
Follow this stem-specific checklist:
– Monthly: Check pressure and inspect stems for cracks
– Every 6 months: Replace valve cores preventatively
– Every tire rotation: Tighten lock nuts (¼ turn max)
– After 5 years: Replace all stems (rubber degrades internally)
Common mistake: Using air compressor quick-connects that damage cores. Always press the valve pin manually before attaching hoses.
When to Call a Professional Immediately
Certain scenarios demand professional intervention. Visit a tire shop if you notice:
– Bubbles forming where the stem meets the wheel rim
– Visible cracks in the wheel’s valve hole
– Air escaping during inflation attempts
– Any sign of wheel damage near the stem
Urgent consequence: A failing stem base can cause sudden tire separation from the wheel at highway speeds. This isn’t a “wait until tomorrow” issue—it’s a critical safety failure requiring same-day service.
Key takeaways: Most valve stem leaks are simple core replacements taking under 10 minutes. Always confirm the leak source with soap solution before disassembling anything. Replace cores preventatively every 6 months in harsh climates. If bubbles appear at the stem base, stop driving immediately and seek professional help. Keeping nickel-plated cores and a $3 tool in your emergency kit transforms what seems like a crisis into a 7-minute fix. For persistent leaks after core replacement, the stem housing has failed—address this within 24 hours to avoid dangerous blowouts. Regular stem inspections during tire pressure checks add just 30 seconds to your routine but prevent 90% of valve-related flat tires.