
Dismounting a stubborn tractor tire can feel like wrestling an angry bull, but with the right technique, you’ll have that tire off the rim without breaking a sweat. Unlike passenger vehicle tires, tractor tires lack the safety bead found in automotive rims, which actually makes them easier to work with once you understand proper dismounting methods. Whether you’re replacing worn rubber, repairing sidewall damage, or preparing equipment for seasonal storage, knowing how to safely dismount a tractor tire saves you hundreds in service fees. This guide delivers step-by-step instructions that work for implements, tractors, and even stubborn R4/R1 tires—no professional equipment required.
The process varies significantly based on tire size and mounting configuration. Larger tractor tires (like 18.4x42s) often prove easier to handle because their substantial weight works in your favor—once the bead breaks, the tire essentially falls away from the rim. Smaller implement tires present unique challenges due to limited working space and difficulty achieving proper leverage. Whatever your situation, these techniques apply universally across agricultural equipment, with specific adjustments for mounted versus unmounted scenarios you’ll encounter on the farm.
Gather the Right Tools Before Starting
Your success depends entirely on having proper equipment before beginning. Skip the generic tire irons and invest in these specific tools:
- Tire spoons (minimum two): Longer spoons provide better leverage for larger tires; curved tips prevent rim damage
- Sturdy crowbar (18-24 inches): Must be straight with a flat end for prying under the bead
- Bead-breaking maul or 5-8 lb sledgehammer: Essential for breaking the initial seal
- Valve core removal tool or needle-nose pliers: For complete deflation
For lubrication, professional-grade Blackjack tire lubricant outperforms household alternatives with its thick, jelly-like consistency that stays in place during application. If unavailable, mix two cups of warm water with one teaspoon of dish soap—the warm water creates better lubricating bubbles. Apply lubricant generously around the entire bead circumference, extending three inches up the sidewall beyond the rim flange to ensure complete coverage as you work.
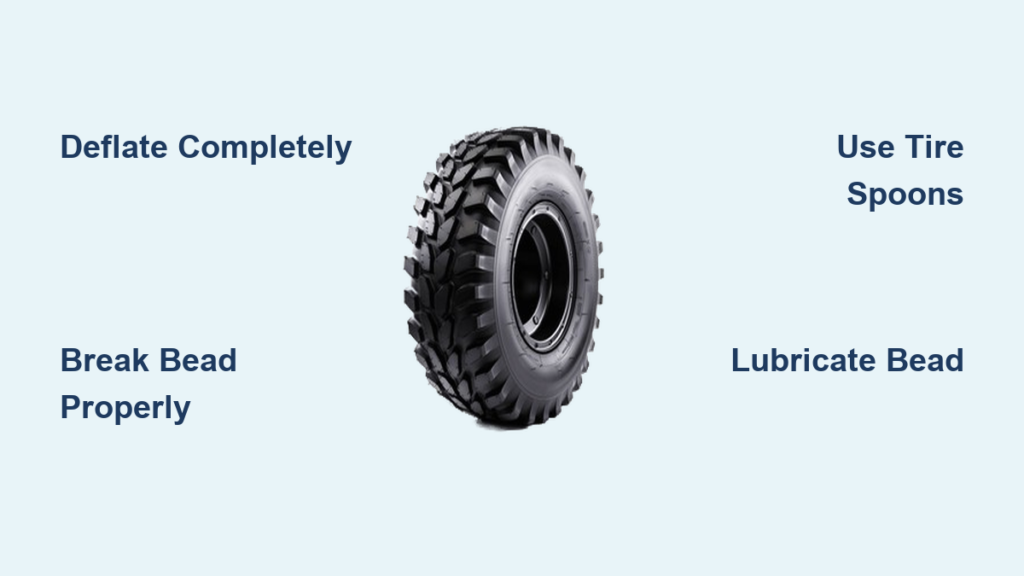
Deflate the Tire Completely Before Any Work Begins
This critical safety step prevents catastrophic failure during dismounting. Locate the valve stem and remove the cap to expose the Schrader valve underneath. Grip the valve core firmly with needle-nose pliers and rotate counterclockwise to remove it entirely—this allows air to escape rapidly. Maintain pressure on the pliers as pressure drops because the escaping air can shoot the valve core across your workspace.
Never attempt bead breaking on an inflated tire—the pressure maintains the bead seal and can cause sudden, dangerous separation. After removing the valve core, press the valve pin to confirm no air escapes. If you hear hissing, the tire isn’t fully deflated and requires additional time. Setting the valve core aside in a safe location preserves this small but essential component for reinstallation later.
Break the Tire Bead Using Proper Technique

With both sides of the tire lubricated, begin breaking the bead seal where the tire meets the rim. For large tractor tires, strike the tire just above the rim edge with a sledgehammer, working methodically around the circumference with consistent strikes. Extreme caution prevents rim damage—avoid striking the rim itself, which can bend or crack the wheel.
The wedge-and-hammer method offers more control for stubborn beads. Place a plastic bead breaker against the seal and strike it with your maul, progressively working around the tire to force the bead away from the rim flange. After completely breaking the bead on one side, flip the tire over and repeat the process on the opposite side. For mounted tires, position yourself to deliver strikes perpendicular to the bead for maximum effectiveness.
Remove the Tire from the Rim Without Damage
With both beads broken, begin prying the tire over the rim lip using your tire spoons. Wedge your first spoon where the tire connects to the rim to create an initial opening, then lay it flat across the rim so the tire edge raises over the lip. If tension prevents the spoon from staying in place, stand on it or use a heavy object like a brick to maintain the opening.
Insert your second spoon into the gap and work your way around the circumference, prying successive sections over the rim flange while the previous section remains lifted. This progressive technique gradually disconnects the entire bead without excessive force at any single point. For tires still mounted on the tractor hub, work from a standing vertical position by keeping just enough jack support to relieve the tire’s weight while spinning it for access.
Apply Lubrication at Critical Stages
Strategic lubrication makes the difference between a smooth removal and a frustrating battle. Reapply lubricant whenever the tire binds during removal—dry friction increases resistance significantly. For the second side of the tire, apply fresh lubricant after breaking the first bead since effectiveness diminishes during initial removal.
Only use products specifically designed for tire mounting—hydrocarbon, silicone, and antifreeze-based alternatives damage rubber compounds over time. When using dish soap solution, prepare a fresh mixture for each side since soap bubbles dissipate quickly. Extend lubrication up to three inches higher than the rim flange to ensure complete coverage as the tire moves during removal.
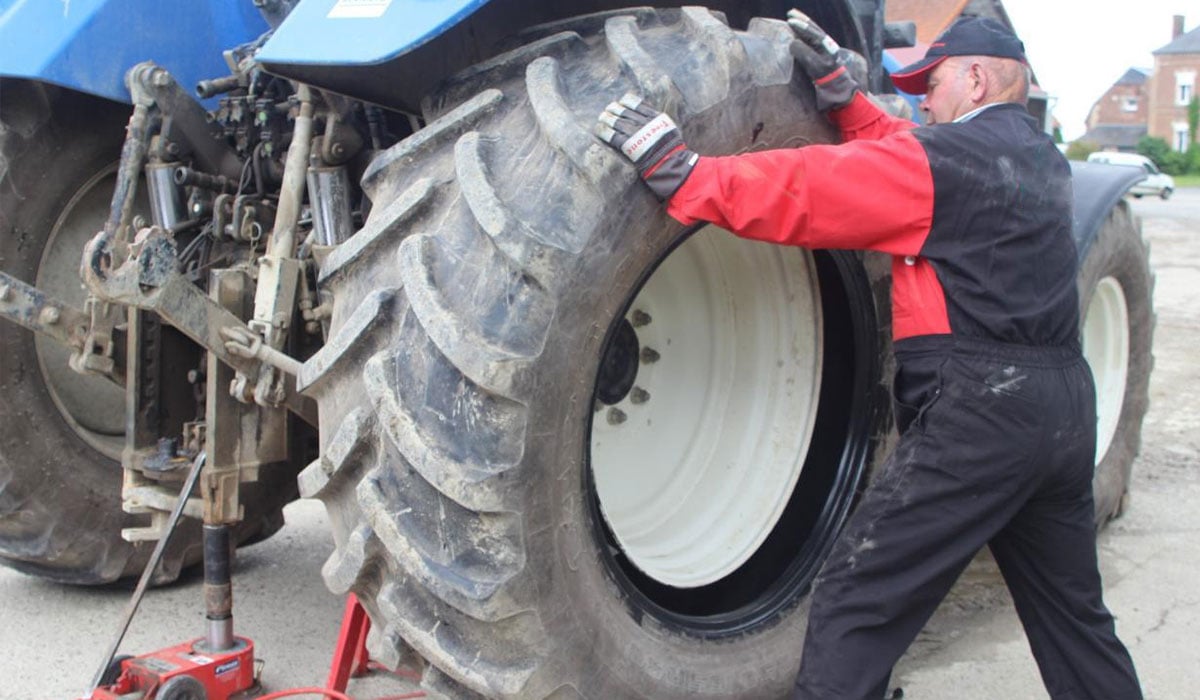
Work with Mounted Tires Using Smart Positioning

Dismounting tires while mounted on equipment eliminates heavy lifting and repositioning. Position a handyman jack against the drawbar with its foot on the tire next to the rim to apply controlled lifting force. For rear tractor tires, the ability to spin the tire provides access to both rear and inside positions essential for proper bead breaking.
Use your front end loader bucket to support the wheel during removal for implement tires that must be removed entirely. The loader can also position replacement wheels once dismounting is complete. Maintaining three points of contact with your tools during prying operations reduces slip risk and improves control throughout the process.
Avoid These Dangerous Common Mistakes
Several recurring errors create safety hazards during tractor tire dismounting. Attempting removal on an inflated tire represents the most dangerous mistake—always completely deflate and remove the valve core first. Using damaged or inappropriate tools increases injury risk and component damage—bent tire spoons can slip catastrophically during use.
Inadequate lubrication makes the job exponentially harder and increases the risk of damaging the tire bead or rim flange. Apply lubricant liberally and allow it to penetrate before attempting bead breaking. Never stand in possible trajectories of a tire or rim that might separate under pressure during any operation involving compressed air.
Know When to Call a Professional Service
While many operators successfully dismount tractor tires themselves, certain situations warrant professional help. Tires showing zipper cracks in steel belts from being run flat require expert handling—these radial tire failures may not be visible but cause catastrophic failure when aired up. Split-rim configurations with multiple bolts holding two halves together also present significant risks that justify professional service.
Very large agricultural tires (over 23.1-30 size) often exceed what most operators can safely handle without specialized mechanical bead breakers. Most tire shops mount or dismount tractor tires for a reasonable fee, and some allow customers to use their equipment under supervision—worth the investment for your first few attempts.
Inspect the Rim Thoroughly After Tire Removal
Before reinstallation or storage, properly inspect the rim for safety and performance issues. Clean the rim thoroughly with a wire brush, paying special attention to the bead seating surfaces where the tire contacts the wheel. Never mount a tire on a cracked or bent rim, or one showing signs of breakage or weld repair marks—structural integrity has been compromised.
Check the valve hole and seat for damage or wear. When mounting with an inner tube, always use a new tube suitable for your tire size. For tubeless mounting on tubeless rims, install a new tubeless valve each time to ensure proper sealing and safety. Proper rim preparation prevents future mounting difficulties and ensures optimal performance.
Master These Proven Advanced Techniques
Experienced operators develop alternative methods based on available equipment. Use your front end loader in conjunction with a handyman jack—position the jack’s foot on the tire next to the rim and jack up against the drawbar for controlled upward pressure. For badly damaged tires, cut the tire off with an angle grinder after breaking the bead on one side—this destroys the tire but preserves the rim.
For those with access to heavy vehicles, position a truck so the tire sits under its weight and lower until the bead pops free. This technique applies even pressure around the entire circumference with minimal physical effort. With patience, proper preparation, and respect for the inherent risks, dismounting a tractor tire becomes a manageable task that saves you significant time and money on the farm.


