
Have you ever needed to lower your tire pressure for off-roading, improved traction in snow, or to address an overinflated tire warning? Properly adjusting your tire pressure is crucial for vehicle safety, performance, and tire longevity. When your tires maintain the manufacturer-recommended PSI (pounds per square inch), you’ll experience optimal handling, fuel efficiency, and even tread wear. Incorrect tire pressure—whether too high or too low—can lead to dangerous driving conditions, premature tire wear, and even blowouts. This guide will walk you through the precise steps to safely decrease your tire pressure to the correct level, helping you avoid common mistakes that could damage your tires or compromise your safety on the road.
Knowing how to properly adjust your tire pressure is especially important before long road trips, when changing seasons affect tire inflation, or when preparing for specific driving conditions. Many drivers don’t realize that temperature changes as small as 10 degrees Fahrenheit can alter tire pressure by 1-2 PSI. Whether you’re preparing for winter driving, heading off-road, or simply correcting overinflation after a tire service, having the knowledge to safely decrease your tire pressure puts you in control of your vehicle’s performance and safety.
Essential Tools for Tire Pressure Adjustment

Before you begin decreasing your tire pressure, gather these critical tools to ensure a smooth and accurate process. You’ll need a reliable digital tire pressure gauge—cheap stick gauges often provide inaccurate readings that could lead to dangerous underinflation. A quality air compressor with a built-in pressure regulator is essential if you need to fine-tune after decreasing pressure, though you can release air without one. Don’t forget valve core tools for more precise control, especially when making significant pressure changes for off-road adventures. For regular maintenance, keep a small towel nearby to clean valve stems and a pen/paper to record your vehicle’s specific tire pressure requirements.
How to Verify Current Tire Pressure Accurately
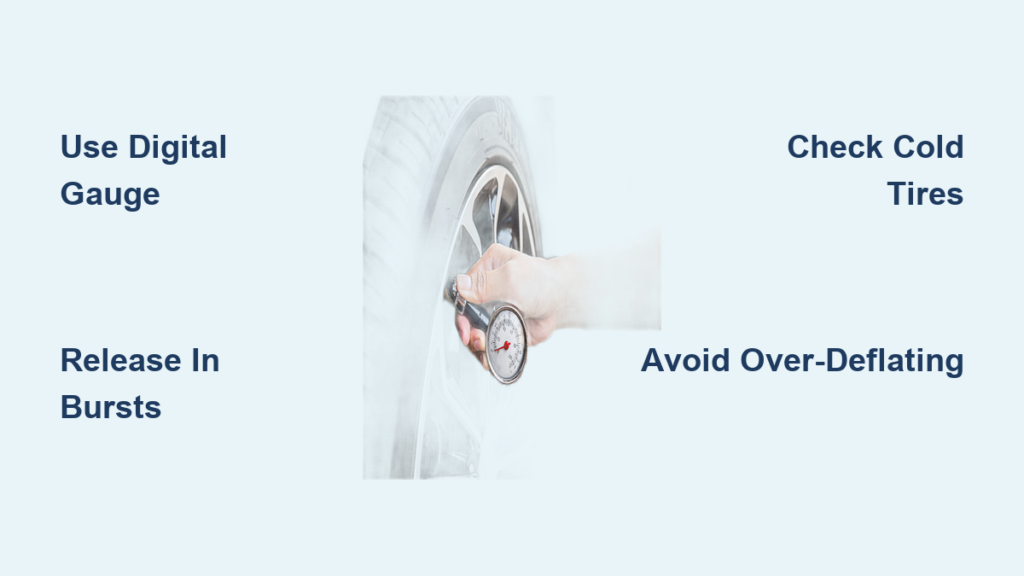
Start with cold tires for the most accurate reading—tires are considered “cold” if the vehicle hasn’t been driven more than a mile in the last three hours. Remove the valve stem cap and firmly press your gauge onto the valve stem until you hear a brief hiss. Hold it straight and steady for 2-3 seconds to get an accurate reading. Check your pressure against the manufacturer’s recommended PSI, typically found on a sticker inside the driver’s door jamb—not the number on the tire sidewall, which indicates maximum pressure, not recommended operating pressure. If your reading exceeds the recommended PSI by 3 or more pounds, you’ll need to release some air.
Step-by-Step Process to Decrease Tire Pressure
Releasing Air from Your Tires Properly
Begin by unscrewing the valve stem cap and setting it aside where you won’t lose it. Using the back end of your pressure gauge or a valve core tool, press the center pin inside the valve stem. You’ll hear air escaping—release in short bursts of 1-2 seconds, then recheck pressure. This controlled approach prevents accidentally underinflating your tire. For larger pressure reductions, like when preparing for off-roading, release air in 5 PSI increments, checking after each reduction. As you near your target pressure, switch to 1-second bursts for precision. Always recheck pressure after driving a short distance, as heat from driving temporarily increases tire pressure.
Common Mistakes That Damage Valve Stems
Many drivers unknowingly damage their valve stems while adjusting pressure. Never press the valve pin with sharp metal objects like keys or screwdrivers, as this can nick the sealing surface and cause slow leaks. Avoid holding the pin down for extended periods—this can dislodge the valve core. If you hear a continuous loud hiss rather than a controlled release, you’ve likely damaged the valve and need immediate attention. When using a valve core tool, turn counterclockwise only 1/4 to 1/2 turn—fully removing the core while the tire is pressurized can send it flying dangerously and cause rapid deflation.
Troubleshooting Uneven Pressure Release
Why One Tire Releases Air Slower Than Others
If you notice one tire releasing air significantly slower than others, inspect the valve stem for debris or corrosion. Dirt particles can temporarily clog the valve mechanism. Try pressing the pin at different angles or use compressed air to blow out the valve. If the tire still won’t release air properly, the valve core might be stuck—carefully loosen it with a valve core tool (¼ turn) before attempting to release air again. Never force the issue, as this can damage the valve stem assembly requiring expensive replacement.
Handling Stuck Valve Cores During Pressure Adjustment

When decreasing tire pressure for off-roading or other specific needs, you might encounter a stuck valve core. First, try gently tapping the valve stem with a rubber mallet to loosen any debris. Apply penetrating oil around the core and wait 5 minutes before attempting removal. If using a valve core tool, apply steady counterclockwise pressure while simultaneously pressing the center pin—this reduces pressure on the core threads. If the core remains stuck, drive carefully to a service station rather than risking complete deflation on the road.
Safety Considerations When Decreasing Tire Pressure
Minimum Safe Tire Pressure Levels by Vehicle Type
Never decrease tire pressure below these critical thresholds: passenger cars (20 PSI), SUVs (24 PSI), and trucks (26 PSI). Driving with pressure more than 4 PSI below manufacturer recommendations significantly increases blowout risk, especially at highway speeds. For temporary off-road use, never drop below 12-15 PSI, and immediately reinflate to normal levels when returning to paved roads. Remember that sidewall damage becomes likely when pressure falls too low, potentially leading to dangerous tire failure.
Immediate Risks of Over-Deflating Your Tires
Driving with excessively low tire pressure creates multiple hazards. The tire sidewalls flex excessively, generating dangerous heat buildup that can lead to tread separation. Your vehicle’s handling becomes sluggish and unpredictable, increasing stopping distances by up to 20%. Fuel efficiency drops significantly as rolling resistance increases. Most critically, the tire can become unseated from the rim during turns or sudden maneuvers, causing immediate loss of vehicle control. Always check pressure after any significant decrease before driving more than a few yards.
Precision Techniques for Specific Driving Conditions
Adjusting Pressure for Off-Road Adventures
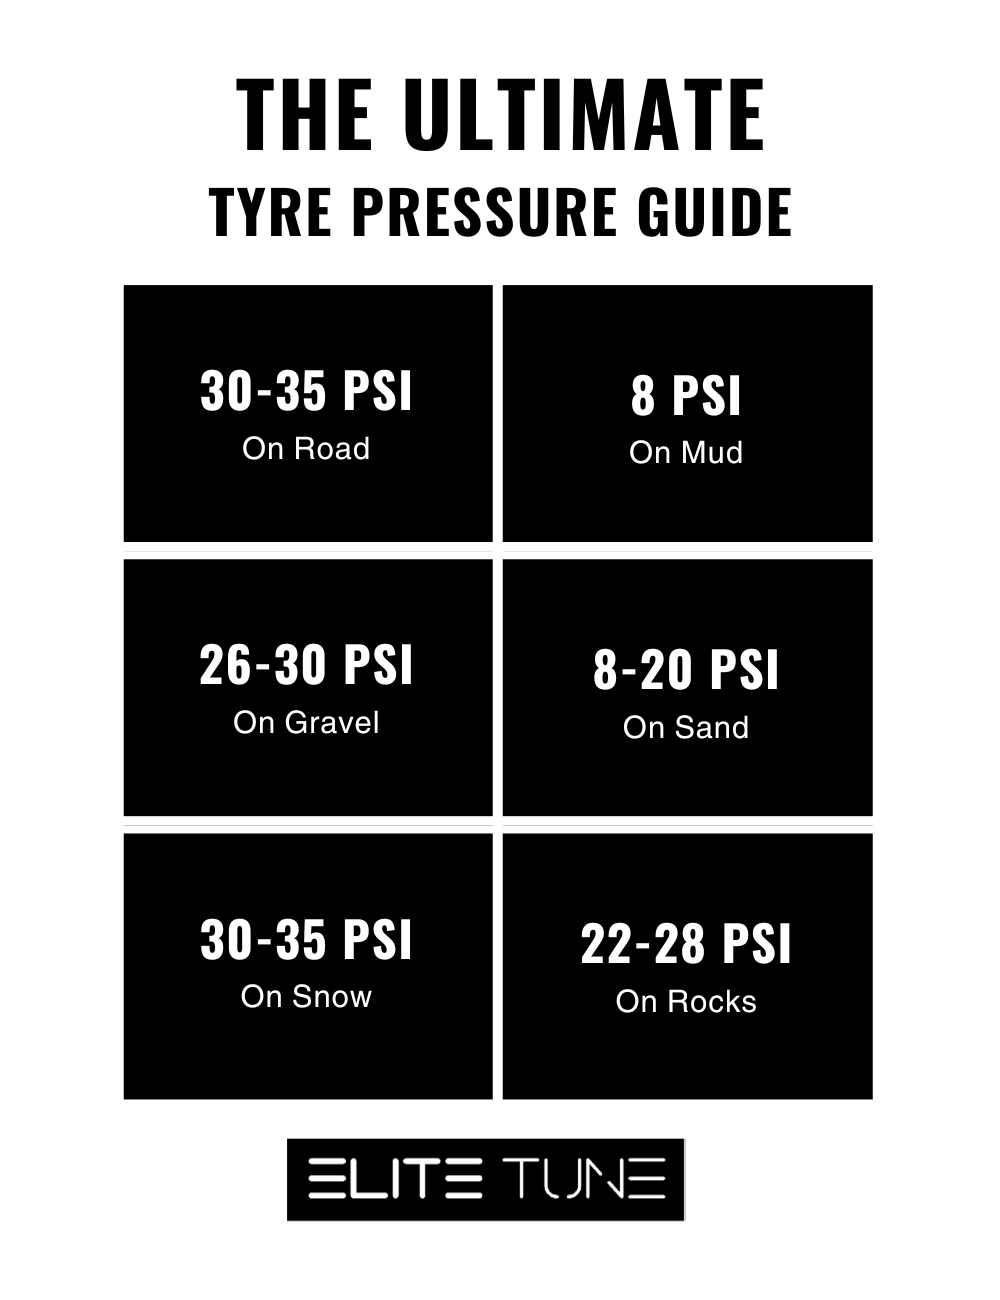
When preparing for off-road driving, decrease tire pressure gradually based on terrain: 22-24 PSI for hard-packed dirt, 18-20 PSI for rocky trails, and 12-15 PSI for deep sand. Release air in small increments while the vehicle is stationary, checking pressure after each reduction. Drive slowly for 100-200 yards after your final adjustment to allow tires to settle, then recheck pressure. Carry a portable air compressor to reinflate when returning to paved roads—driving more than 1.5 miles on underinflated tires risks permanent damage.
Seasonal Tire Pressure Adjustments for Winter Driving
As temperatures drop 10°F, tire pressure decreases approximately 1 PSI. In winter, you might intentionally decrease pressure by 3-5 PSI below the recommended level for improved snow traction, but never below 24 PSI for most passenger vehicles. Check pressure when tires are cold (before driving) as temperature fluctuations significantly affect readings. After a cold spell, if your pressure monitoring system activates, don’t immediately add air—recheck after driving 10-15 minutes when tires warm up. Remember that winter pressure adjustments should be temporary, returning to normal levels as temperatures stabilize.
Post-Adjustment Verification and Maintenance
Confirming Proper Tire Pressure After Adjustment
After decreasing your tire pressure, drive slowly for 1-2 miles to allow tires to warm up slightly, then recheck pressure when tires are “warm” (not hot). The pressure should be within 2 PSI of your target—significant deviations indicate possible leaks. Visually inspect each tire for proper shape; underinflated tires will bulge noticeably at the bottom contact patch. Listen for unusual tire noises while driving at low speeds that might indicate improper inflation. Reset your tire pressure monitoring system if your vehicle has one, following your owner’s manual instructions.
Establishing a Tire Pressure Maintenance Routine
Create a monthly tire pressure check habit, always when tires are cold. Keep a tire pressure log in your glove compartment noting each reading and date. Invest in high-quality valve stem caps with rubber seals—they prevent dirt entry and maintain pressure integrity. Check pressure before long trips or significant temperature changes. Remember that tires naturally lose about 1 PSI per month, so regular monitoring prevents gradual underinflation. For seasonal changes, adjust pressure proactively rather than waiting for warning lights.
Final Note: Properly decreasing tire pressure requires precision and attention to detail—never guess when it comes to your vehicle’s safety. Always return tires to manufacturer-recommended pressure after temporary adjustments for specific conditions. If you frequently need to decrease tire pressure for off-roading or other specialized driving, consider investing in a quality portable air compressor and digital gauge system for quick, accurate adjustments. Regular tire pressure maintenance not only keeps you safer but can improve your fuel economy by up to 3% according to transportation safety studies. When in doubt about proper pressure levels for your specific vehicle and conditions, consult your owner’s manual or a trusted tire professional before making adjustments.


