
Your tire valve stem might be one of the smallest components on your vehicle, but keeping it clean and functional is essential for maintaining proper tire pressure and preventing slow leaks. Over time, dirt, road debris, and moisture can accumulate around the valve core and stem, leading to corrosion, air leaks, or difficulty maintaining inflation. Learning how to clean a tire valve stem properly takes just a few minutes and can save you from bigger problems down the road.
This guide walks you through everything you need to know about tire valve stem maintenance, from identifying when cleaning is necessary to executing the proper cleaning technique. Whether you’re a seasoned DIY mechanic or someone who simply wants to keep their vehicle in top condition, these step-by-step instructions will help you restore your valve stems to optimal condition and prevent future issues.
Why Corroded Valve Stems Cause Dangerous Tire Pressure Loss
Tire valve stems are constantly exposed to the elements, making them vulnerable to a range of problems that affect your vehicle’s performance and safety. Understanding these risks helps motivate consistent maintenance and prevents costly repairs.
How Road Debris Creates Hidden Air Leaks
The valve stem protrudes from your wheel, creating a natural collection point for road grime, brake dust, and environmental contaminants. When these materials mix with moisture—whether from rain, car washes, or humidity—they create an acidic environment that accelerates corrosion on the metal valve core and stem body. This corrosion can compromise the seal between the valve core and stem, leading to slow air leaks that cause your tires to lose pressure gradually. Left unchecked, corrosion can become severe enough that the entire valve stem requires replacement rather than simple cleaning.
Salt exposure during winter months poses an especially aggressive threat to valve stems. Road salt accelerates corrosion processes significantly, meaning vehicles in northern climates or coastal areas with salt air require more frequent inspection and cleaning. The good news is that regular cleaning removes these corrosive compounds before they can cause lasting damage.
Why Your TPMS Fails with Dirty Valve Stems
A dirty or corroded valve stem often manifests as a slow leak that frustrates drivers who find themselves inflating tires more frequently than expected. These leaks typically occur at the interface between the valve core and the stem threads, where debris or corrosion interferes with the proper seal. Even minor seal compromises allow tiny amounts of air to escape over time, leading to measurable pressure loss within days or weeks.
Modern vehicles with tire pressure monitoring systems (TPMS) can alert you to pressure issues, but a clogged or corroded valve stem can sometimes interfere with sensor function or cause false readings. Keeping valve stems clean ensures your TPMS sensors remain accurate and functional, providing reliable warnings about tire pressure problems.
Essential Tools for Effective Valve Stem Cleaning

Gathering the proper supplies before you begin makes the cleaning process smoother and more effective. Most of these items are inexpensive and likely already in your garage or household.
A flathead screwdriver or specialized valve core tool serves as the primary tool for removing valve cores during deep cleaning. Valve core removal tools are inexpensive and prevent damage to the valve threads that can occur when using improper tools like pliers. You’ll also need a small brush with stiff bristles—old toothbrushes work excellently for this purpose and allow you to reach into the small valve stem opening.
Cleaning solution options include mild dish soap diluted in water, isopropyl alcohol for stronger cleaning action, or commercial valve stem cleaners available at automotive retailers. Compressed air or a hand pump helps dry the stem after cleaning and can blow out loosened debris. A rag or microfiber cloth wipes away external grime, while a small container catches the small valve cores when removed so they don’t get lost.
Rubber glove protection keeps your hands clean and provides better grip when working with small components. Consider having a small flashlight or headlamp available to inspect the valve stem interior and ensure all debris has been removed.
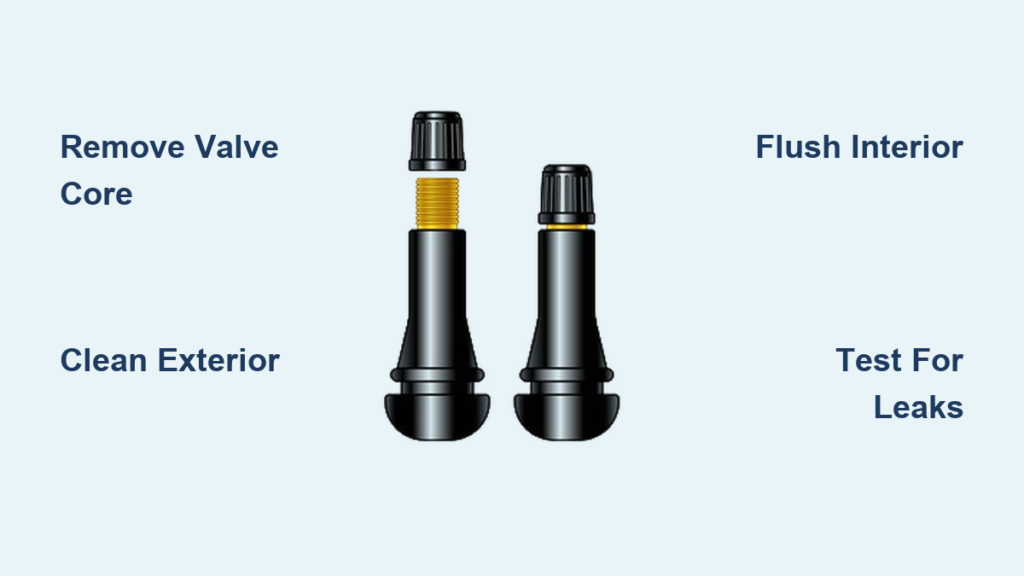
Complete Valve Stem Cleaning Procedure in 4 Steps
Following a systematic approach ensures thorough cleaning while preventing damage to your valve stems or wheels. Take your time with each step, especially when handling the small valve cores.
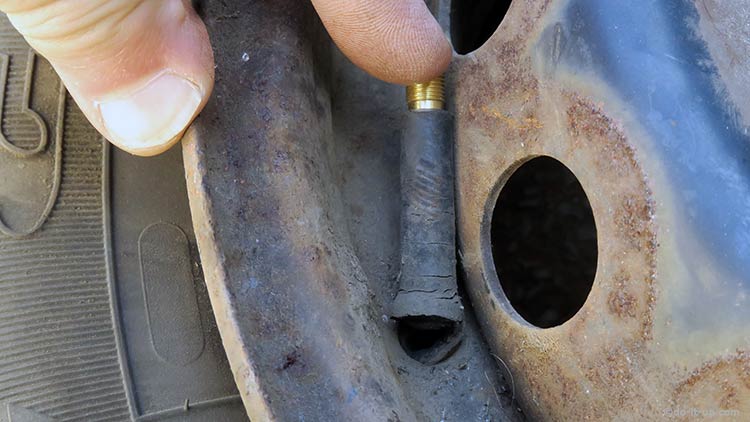
Step 1: Prepare Your Vehicle and Inspect Valve Stems
Begin by parking your vehicle on a flat surface and engaging the parking brake. If you’ve driven recently, allow the tires to cool for at least 30 minutes before working on them, as hot tires make valve core removal more difficult and potentially dangerous. Visually inspect each valve stem, noting the extent of dirt buildup, any visible corrosion, and whether the valve caps are present and intact.
Rotate each wheel so the valve stem is at the 3 o’clock or 9 o’clock position, which provides easy access and prevents cleaning solution from dripping onto brake components. Remove the valve cap and set it aside in a safe location where it won’t roll away—these small caps are easy to lose.
Step 2: Thoroughly Clean External Valve Stem Surfaces
Use your stiff-bristled brush to scrub the exterior of the valve stem, removing loose dirt, brake dust, and road grime. Work the brush in circular motions around the stem body and pay particular attention to the base where the stem meets the wheel rim. This area collects significant debris and is prone to moisture retention that accelerates corrosion.
For stubborn exterior buildup, apply your cleaning solution to the brush and continue scrubbing. Avoid spraying large amounts of cleaning solution directly onto the wheel or near brake components, as some cleaners can damage wheel finishes or corrode brake hardware. Wipe the stem clean with a rag and inspect your progress.
Step 3: Deep Clean the Valve Core and Interior
For valve stems with visible corrosion around the core or those suspected of slow leaks, remove the valve core for thorough cleaning. Insert your valve core tool into the valve stem and turn counterclockwise to unscrew the core. Work slowly and steadily—valve cores thread in and out easily, but cross-threading or forcing a stuck core can damage the stem requiring replacement.
Once removed, inspect the valve core for corrosion, debris, or damage. Clean the core by scrubbing with your brush and cleaning solution, then rinse thoroughly with water or alcohol. Blow the core dry with compressed air and set it aside on a clean surface. Avoid touching the rubber seals on the valve core with bare fingers, as oils from your skin can degrade the rubber over time.
With the core removed, you can access the interior of the valve stem. Spray a small amount of cleaning solution into the stem opening and use your brush to scrub the interior walls. Compressed air blown through the stem from the inside helps flush out loosened debris. Repeat the flushing process until no visible debris emerges and the compressed air blows clean.
Step 4: Correctly Reinstall Components and Verify Seals
Before reinstalling the valve core, inspect the rubber seal at the base of the stem for damage or deterioration. This seal creates the primary air seal for your tire, and damaged seals require stem replacement rather than simple cleaning. If the seal appears intact, reinstall the valve core by threading it clockwise with your tool. Tighten until snug but avoid overtightening, which can damage the threads or compress the seal improperly.
Apply a small amount of soapy water to the valve stem opening and around the base where the stem meets the rim. Watch for bubbles indicating air escaping from compromised seals. A properly sealed stem shows no bubbles at all. If bubbles appear at the base, the stem seal may be damaged; if bubbles emerge from the valve core area, the core may not be sealing properly and might need replacement.
Screw the valve cap back onto each stem, ensuring it’s snug but not overly tight. The cap provides a secondary seal against moisture and debris and should always be in place when driving.
When Valve Stem Replacement Is Necessary Instead of Cleaning
Sometimes cleaning isn’t enough, and valve stem replacement becomes necessary. Knowing when to replace rather than clean prevents frustration and ensures your tires maintain proper pressure.
Visible damage to the stem body—such as cracks, severe corrosion, or deformation—indicates replacement is needed. Stems with damaged bodies cannot maintain proper seals regardless of cleaning. Corrosion that has pitted the metal significantly compromises structural integrity and often cannot be fully removed without thinning the metal excessively.
If cleaning doesn’t resolve a slow leak, the valve stem likely needs replacement. Leaks that persist after thorough cleaning typically indicate either a damaged internal seal or a compromised valve core. In these cases, replacing the valve stem is more cost-effective than continued troubleshooting and provides reliable long-term results.
Age also plays a factor in replacement decisions. Rubber valve stems deteriorate over time due to UV exposure, ozone, and temperature cycling. Stems older than seven to ten years, even if appearing intact, may have degraded internally and are candidates for proactive replacement during routine tire service.
Proactive Maintenance to Extend Valve Stem Lifespan
Consistent maintenance extends the time between cleanings and prolongs valve stem lifespan. Implementing these practices reduces the accumulation of debris and corrosive materials.
Always keep valve caps installed when driving. These caps provide a first line of defense against debris ingress and moisture penetration. Missing valve caps allow direct access for road grime and accelerate corrosion significantly. Consider upgrading to chrome or brass valve caps if your current plastic caps crack or degrade.
Regular visual inspections catch problems early before they escalate. Check your valve stems monthly, especially before long trips or seasonal changes. Look for accumulated debris, early corrosion signs, and verify caps are intact and functional.
Prompt attention to slow leaks prevents larger problems. If you notice a tire losing pressure more quickly than others, the valve stem is a common culprit. Addressing leaks early prevents flat tires and the safety risks associated with driving on underinflated tires.
Winter and coastal vehicle owners should increase cleaning frequency to combat salt exposure. A quick cleaning every few weeks during winter months prevents salt accumulation that accelerates corrosion dramatically. After driving on salted roads, a brief rinse with water can remove salt residue before it causes damage.
Critical Mistakes That Damage Valve Stems During Cleaning

Certain practices damage valve stems or compromise their function. Avoiding these mistakes ensures your cleaning efforts produce lasting results.
Never use metal tools that can damage the soft aluminum or rubber of valve stems. Screwdrivers, pliers, and other improvised tools often cause cross-threading or marring that leads to leaks. Invest in a proper valve core tool—it’s inexpensive and prevents costly damage.
Avoid overtightening valve caps and cores. While these components need to be snug, excessive force strips threads, deforms seals, and can break valve cores off inside the stem. Hand-tight plus a quarter turn provides adequate security without risk of damage.
Don’t skip the leak test after cleaning. Assuming everything is sealed without verification often leads to discovering a problem days later when the tire has lost significant pressure. The simple bubble test takes moments and confirms your work was successful.
Using harsh chemicals like bleach, acetone, or petroleum-based products damages rubber seals and can corrode metal components. Stick to mild soap solutions, isopropyl alcohol, or commercial cleaners designed specifically for automotive valve stems.
Final Valve Stem Maintenance Recommendations
Learning how to clean a tire valve stem is a simple but valuable skill that protects your tires and maintains proper inflation. The few minutes invested in regular valve stem maintenance pay dividends through fewer slow leaks, more accurate tire pressure readings, and extended tire life. Combine this cleaning routine with consistent visual inspections and prompt attention to any pressure issues, and you’ll enjoy reliable tire performance for years to come.
For best results, mark your calendar for monthly inspections and a thorough cleaning every few months or whenever you notice visible buildup. Vehicles in harsh environments—those exposed to road salt, extreme dust, or coastal conditions—benefit from more frequent attention. This small investment in maintenance keeps your valve stems functioning properly and prevents the frustration of unexplained tire pressure loss.


