
Finding yourself stranded with a flat tire on your Lexus RX 350 can happen to even the most cautious driver, and knowing how to handle this situation properly saves you time, money, and stress. Unlike many modern vehicles that only provide temporary tire repair kits, the RX 350 comes equipped with a full-size spare tire stored beneath the trunk floor—giving you a reliable solution without the speed and distance limitations of compact “donut” spares. This guide provides the exact steps you need to safely access, remove, and install your RX 350’s spare tire, ensuring you’re prepared for unexpected roadside emergencies.
The process might seem daunting if you’ve never accessed your spare tire before, especially with the RX 350’s unique under-floor storage system. But with the right tools and knowledge, changing your spare takes just 15-20 minutes. By the end of this guide, you’ll know precisely how to locate the access panel, lower the spare using the specialized wrench, safely remove your flat tire, and properly mount the replacement—all while avoiding common mistakes that could compromise your safety.
Access Your Lexus RX 350’s Hidden Spare Tire Compartment
Your RX 350 stores its full-size spare tire beneath the trunk floor, requiring specific steps to reach it. This secure storage location keeps your cargo area clean while protecting the spare from damage.
Locate and Open the Trunk Access Panel Correctly
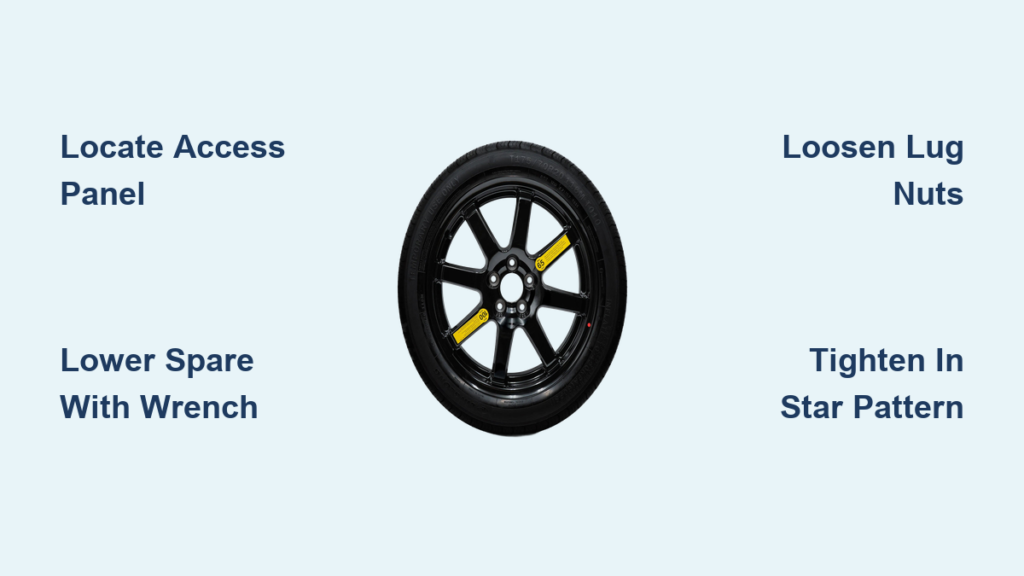
Open your trunk and examine the floor near the rear seats to find the rectangular access panel clearly marked for spare tire identification. This panel typically features a small handle or indentation designed for easy lifting. Grip the handle firmly and lift the panel upward to expose the spare tire compartment below. Inside, you’ll immediately see the large securing bolt in the center, the winch mechanism, and your spare tire positioned above. If you can’t locate the panel, check near the spare tire storage area for any carpet covering that might need removal first.
Lower the Spare Tire Using the Specialized Wrench
Your RX 350 includes a dedicated wrench specifically designed for the spare tire carrier system—this tool is not interchangeable with standard wrenches. Insert this tool into the large securing bolt visible in the compartment, then turn it counterclockwise to loosen and completely remove the bolt. As you turn, watch for the spare tire to begin descending slowly on the winch mechanism. Allow it to lower until it reaches a position near the ground where you can easily reach it—this typically takes about 30 seconds of steady turning. Carefully pull the spare tire out from beneath the vehicle, checking that the valve cap remains secure to avoid losing it during removal.
Pro Tip: When reinstalling your spare after use, position it with the valve stem facing toward the rear of the vehicle. This orientation makes future pressure checks significantly easier and prevents you from having to crawl underneath your vehicle to access the valve.
Remove Your Flat Tire Without Compromising Safety
With your spare tire accessible, you now need to safely remove the damaged tire from your vehicle. This phase requires proper preparation to prevent accidents or vehicle damage.
Prepare Your Safe Work Zone in Under 2 Minutes
Before touching any tools, position your vehicle on flat, stable ground away from traffic flow. Turn on your hazard lights to alert approaching drivers, and engage the parking brake to prevent rolling. Never attempt a tire change on soft surfaces like dirt or grass where the jack might sink during operation. Gather your tools: the jack (stored under the trunk floor near the spare), the lug wrench, and wheel wedges such as rocks or bricks to chock the opposite wheels. If you’re working after dark, use your phone flashlight to illuminate your workspace—this simple step prevents misplacing small parts.
Secure Your Vehicle Properly Before Lifting
Place wheel wedges behind the tires opposite the one you’re changing—this is non-negotiable for safety. If replacing a rear tire, wedge both front tires securely. This simple step prevents the vehicle from rolling while you work beneath it, an essential precaution that could save your life. Double-check that your transmission is in Park (or in gear if manual) before proceeding to the next step.
Loosen Lug Nuts While Tire Remains Grounded
Using your lug wrench, loosen the lug nuts on the flat tire by turning them counterclockwise approximately a quarter turn each. Don’t remove them completely yet—keeping them loosely in place helps hold the tire on the wheel hub while you position the jack. Working the nuts while the tire is still on the ground gives you the leverage needed that becomes much harder to apply once the wheel is suspended. If nuts are extremely tight, stand on the wrench handle for additional force rather than risking injury from excessive twisting.
Mount Your Spare Tire with Professional Precision

Now that your flat tire is removed, it’s time to install your spare correctly. Improper mounting can lead to dangerous driving conditions, so follow these steps carefully.
Align and Seat the Spare Tire Properly
Position the spare tire so its mounting holes align with the wheel bolts on your wheel hub. The tire should slide on smoothly with minimal force—if you encounter resistance, double-check the alignment before proceeding. Never force the tire onto the hub, as this can damage wheel studs or cause injury. Once the spare seats flush against the hub, hand-tighten all lug nuts onto the wheel studs. Hand tightening prevents cross-threading and ensures the tire is held securely while you prepare to lower the vehicle.
Lower Vehicle and Tighten Lug Nuts in Star Pattern
Slowly lower the vehicle using the jack until the spare tire touches the ground but the vehicle’s full weight isn’t yet on the tire. At this point, use your lug wrench to tighten the lug nuts in a crisscross or star pattern—starting from one nut, moving to the opposite nut, and continuing around the wheel. This alternating sequence ensures even pressure distribution around the wheel hub. Once all nuts are snug, fully lower the vehicle and remove the jack.
Verify Final Lug Nut Torque for Safety
With the vehicle completely on the ground and the jack removed, give all lug nuts a final tightening using the star pattern. This step is critical: under-tightened nuts can loosen during driving and cause wheel separation. If you have access to a torque wrench, verify that lug nuts meet your vehicle’s specifications—typically between 76-83 ft-lbs for the RX 350. Drive cautiously for the first few miles, then recheck lug nut tightness as they may settle slightly after initial use.
Check and Maintain Your Spare Tire Pressure Regularly
Unlike your regular tires, checking your RX 350’s spare requires a specific procedure since it’s stored beneath the trunk floor.
Access Spare for Pressure Verification Properly
The only way to check or adjust pressure in your RX 350’s spare is to lower it from storage using the winch tool. Once lowered, locate the valve stem, remove the valve cap, and use a quality tire pressure gauge to check against specifications. Many owners set their spare at 35 psi—this provides optimal results, high enough to prevent tire pressure monitoring system warnings while maintaining emergency readiness.
Reset TPMS After Spare Tire Installation
If your tire pressure warning light illuminates after installing the spare, your spare tire may be the culprit. The RX 350’s tire pressure monitoring system detects low pressure in the spare as well. Inflate the spare to 35 psi, and the warning light should reset after driving for a short distance. Some owners find their local Lexus dealer will check all tire pressures, including the spare, at no charge—a convenient option if you live near a dealership.
Essential Tools Required for RX 350 Tire Changes
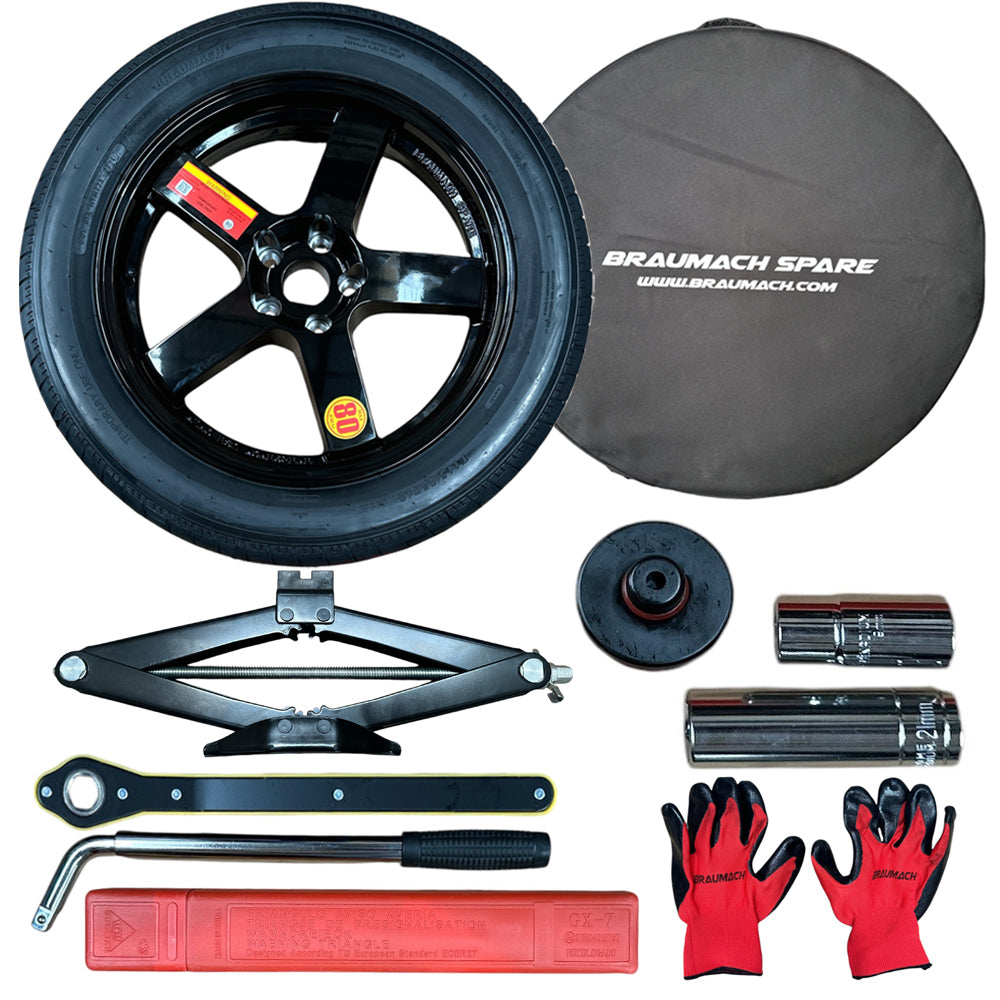
Your Lexus RX 350 includes specific tools designed for the spare tire system. Knowing what you have and where it’s stored makes all the difference during an emergency.
Identify Your Specialized Spare Tire Wrench
The specialized wrench for the spare tire carrier is uniquely designed for your RX 350 and cannot be substituted with common shop wrenches. This tool fits the securing bolt in your trunk floor compartment and provides necessary leverage for the winch mechanism. Keep this tool in its designated storage location at all times—misplacing it means you cannot access your spare tire when needed most.
Organize Your Complete Tire Change Kit
In addition to the spare tire wrench, your vehicle includes a scissor-style jack designed specifically for RX 350 jacking points and a lug wrench for wheel nuts. Consider adding these items to your kit:
– A compact tire pressure gauge
– A small flashlight for visibility
– Work gloves to protect your hands
– Reflective triangles for roadside safety
Critical Safety Precautions for RX 350 Tire Changes
Working around a raised vehicle involves significant risks. Following these safety protocols prevents injuries and ensures your tire change is completed correctly.
Avoid These Dangerous Jacking Mistakes
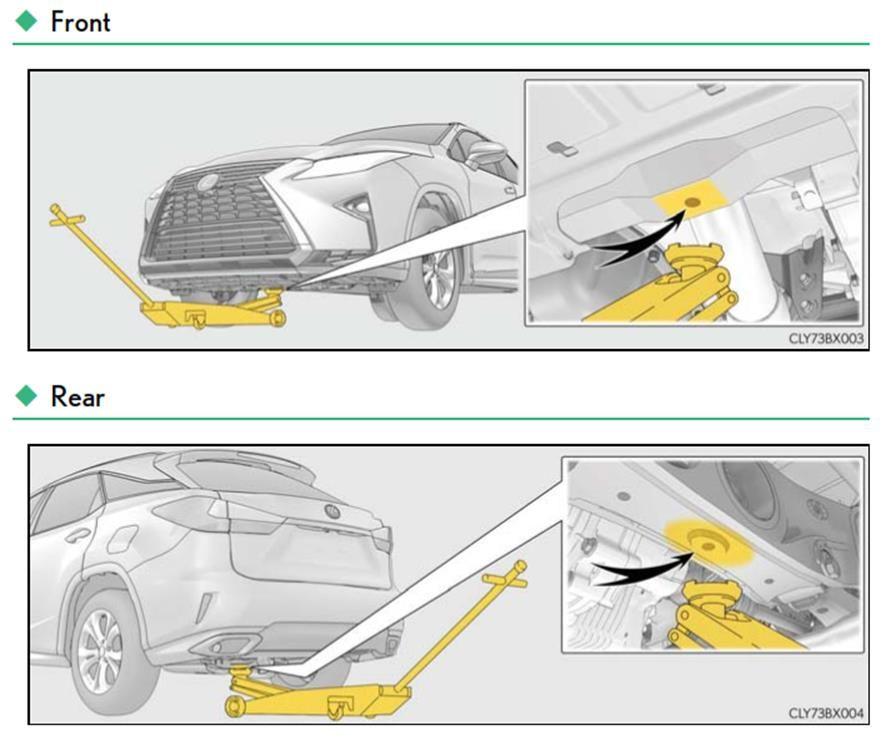
Always position your vehicle on firm, level ground before jacking. Never jack from under body panels, suspension components, or any area not specifically designed for lifting—doing so can cause serious injury. Consult your owner’s manual to identify the correct jacking points, typically reinforced areas along the vehicle’s frame or pinch weld. If you must change a tire on soft ground, place plywood beneath the jack to prevent sinking.
Recognize When to Call for Professional Help
If you encounter any of these situations, call roadside assistance instead of proceeding:
– The spare tire mechanism won’t lower after multiple attempts
– You’re on a steep incline or unstable surface
– You’re in a high-traffic area with limited visibility
– Multiple tires are damaged or you’re unsure about the process
Maintain Your Spare Tire System for Emergency Readiness
Regular maintenance keeps your spare tire and its retrieval system ready when you need it most.
Exercise Winch Mechanism Every 6 Months
Take your spare down and raise it back up every six months to prevent seizing. Tires stored in the raised position for years often develop stiff mechanisms that become difficult to operate when needed. During these sessions, check for rust or corrosion on the winch components and apply a light lubricant if necessary.
Verify Spare Tire Condition During Oil Changes
Make spare tire checks part of your regular maintenance routine. When you get oil changes, take 2 minutes to:
– Check spare tire pressure
– Inspect for dry rot or cracking
– Ensure valve stem isn’t damaged
– Confirm all tools are present and functional
Changing a spare tire on your Lexus RX 350 becomes straightforward once you understand the process. By familiarizing yourself with these procedures before an emergency occurs, you’ll handle roadside tire changes with confidence. Remember to periodically exercise your spare tire mechanism, maintain proper pressure, and keep all tools organized for quick access. Most importantly, always prioritize safety—properly securing your vehicle and correctly tightening lug nuts ensures your spare tire change is both effective and safe, getting you back on the road without unnecessary risks.


