
Changing a flat tire on a lifted truck presents unique challenges that standard passenger vehicles don’t face. With increased ground clearance often exceeding 10-12 inches higher than stock models, conventional jacks may not reach properly, and the elevated height creates significant safety risks during the process. Many truck owners discover too late that their standard roadside emergency kit lacks the specialized equipment needed for lifted vehicles, leaving them stranded when they need help most. This comprehensive guide details the specific procedures, equipment requirements, and critical safety steps you need to successfully change a tire on your modified truck without risking injury or vehicle damage.
Specialized Equipment Required for Lifted Truck Tire Changes

Jack Selection for Increased Ground Clearance
Standard scissor jacks that come with most vehicles typically only lift 12-14 inches—insufficient for trucks with 6+ inch lifts. You’ll need either a hydraulic floor jack with at least 20 inches of lift capacity or a high-reach bottle jack specifically designed for lifted vehicles. Hydraulic floor jacks provide better stability, but require a relatively flat surface, while bottle jacks work in tighter spaces but need proper stabilization. Always verify your jack’s maximum lift height exceeds your truck’s clearance by at least 2 inches to ensure you can fully remove the tire.
Essential Stabilization Gear
Lifted trucks require significantly more stabilization than stock vehicles due to their higher center of gravity. Standard wheel chocks aren’t enough—you need heavy-duty rubber or composite chocks placed both in front of and behind the diagonally opposite tire. Additionally, never rely solely on the jack; always use appropriately rated jack stands under reinforced frame points. For trucks with lifts over 6 inches, consider using cribbing blocks to reduce the jack’s required lift height and improve stability.
Critical Safety Preparations Before Starting
Proper Vehicle Positioning on Lifted Trucks
Finding the right location to change a tire on a lifted truck is more critical than with standard vehicles. Pull completely off the roadway onto a surface that’s both level and solid—soft ground can cause dangerous shifting when the truck is partially lifted. The increased height means even slight inclines become significantly more hazardous. Turn your hazard lights on and deploy emergency flares or reflective triangles at least 50 feet behind your vehicle, especially important since lifted trucks sit higher and may be less visible to approaching traffic.
Identifying Correct Jack Points on Modified Frames
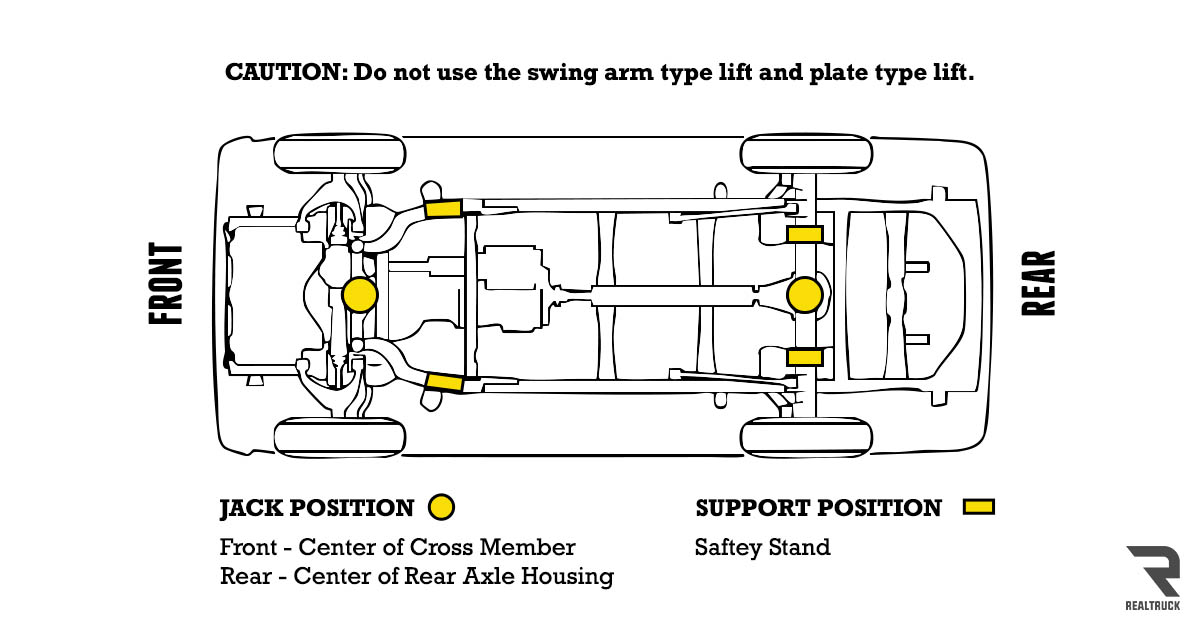
Aftermarket lift kits often alter or reinforce frame structure, making factory jack points unreliable or inaccessible. Consult your lift kit manufacturer’s documentation to identify reinforced jacking points, as using improper locations can bend frame components or cause the truck to slip off the jack. Many lift kits include custom jack points near the前后 suspension mounts that provide the most stable lifting positions for modified vehicles.
Step-by-Step Lifted Truck Tire Replacement Process
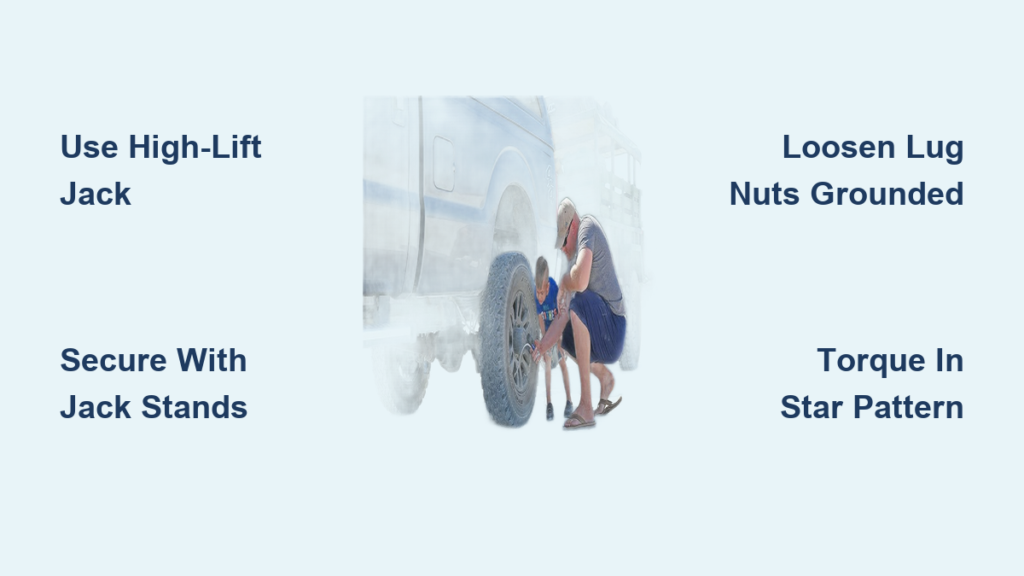
Initial Lug Nut Loosening While Vehicle Is Grounded
- Apply the parking brake and shift into park (or first gear for manuals)
- Remove the hubcap or wheel cover if present
- Break the initial resistance on lug nuts by turning counterclockwise with a 1/2-inch drive breaker bar—do not remove completely yet
- Loosen each lug nut approximately 1/4 turn following a star pattern
- For trucks with torque specifications over 140 ft-lbs, consider using a cheater pipe for additional leverage
Common mistake: Many owners try to remove lug nuts completely before lifting, causing the wheel to spin freely when elevated. Always perform initial loosening with the truck firmly on the ground.
Proper Lifting Sequence for Modified Suspension
- Position your high-capacity jack under the designated reinforced lift point
- Raise the truck incrementally while checking for stability at each stage
- Once the tire clears the ground by 2-3 inches, position jack stands under secondary support points
- Lower the truck onto the jack stands (never work under a vehicle supported only by a jack)
- Lift an additional inch to ensure adequate clearance for tire removal
Pro tip: For trucks with suspension lifts over 8 inches, consider using a two-stage lifting approach—first to position jack stands, then a secondary lift for tire clearance—to minimize the risk of jack slippage at extreme heights.
Tire Removal and Mounting Challenges
The increased weight of larger aftermarket wheels common on lifted trucks makes removal and installation significantly more difficult. When removing the flat tire, slide it out slowly while supporting its weight—you may need to rotate the tire slightly to clear suspension components. When mounting the spare, have someone assist you as the extra weight and height make positioning challenging. Ensure the wheel is properly aligned with hub studs before attempting to thread lug nuts.
Troubleshooting Common Lifted Truck Tire Change Issues

What to Do When Your Jack Won’t Reach
If your standard jack lacks sufficient lift height, don’t attempt dangerous improvisation. Instead:
– Create a stable platform using interlocking cribbing blocks
– Never use unstable materials like rocks or cinder blocks
– Consider investing in a high-lift jack specifically designed for off-road vehicles
– For temporary roadside solutions, partially deflate the opposite tire to lower that side of the truck
Handling Stuck Lug Nuts on Aftermarket Wheels
Aftermarket wheels often use different lug nut styles that can seize due to dissimilar metals or over-torquing:
– Apply penetrating oil and wait 10 minutes before attempting removal
– Use a six-point socket instead of twelve-point for better grip
– Tap the socket gently with a hammer to break loose corrosion
– For extreme cases, carefully apply heat around (not directly on) the lug nut
Post-Replacement Critical Steps
Proper Lug Nut Torque Sequence for Lifted Vehicles
The increased leverage from larger tires makes correct lug nut torque even more critical:
1. Hand-tighten all lug nuts in a star pattern
2. Lower the truck until the tire lightly contacts the ground
3. Tighten to 50% of specified torque using a crisscross pattern
4. Fully lower the truck and tighten to manufacturer specifications (typically 140-180 ft-lbs for lifted trucks)
5. Recheck torque after driving 50 miles
Warning: Under-torqued lug nuts on lifted trucks can work loose more quickly due to increased suspension articulation and larger tire leverage.
Spare Tire Limitations for Lifted Applications
Most factory spare tires won’t fit properly on lifted trucks with larger aftermarket wheels. If you’ve installed a smaller temporary spare:
– Drive no faster than 50 mph
– Limit distance to 70 miles maximum
– Avoid rough terrain completely
– Find a tire shop immediately rather than continuing your journey
Prevention Strategies for Future Roadside Emergencies
Custom Emergency Kit for Lifted Trucks
Standard roadside kits are inadequate for lifted vehicles. Your specialized kit should include:
– High-capacity hydraulic jack (3+ ton rating)
– Extended-reach breaker bar with appropriate sockets
– Heavy-duty jack stands rated for your truck’s weight
– Lug nut key if using locking lug nuts
– Tire pressure monitoring system reset tool
– Emergency traction boards in case you get stuck while changing the tire
Regular Maintenance Checks Specific to Lifted Setups
Schedule monthly inspections of:
– Jack and jack stand condition (hydraulic fluid levels, structural integrity)
– Lug nut tightness (check after first 50 miles following any tire service)
– Spare tire inflation (lifted trucks often require higher PSI)
– Emergency kit contents (replace expired flares, check tool condition)
Changing a tire on a lifted truck requires specialized knowledge and equipment that goes beyond standard procedures. By preparing with the right tools, understanding the unique challenges of elevated vehicles, and following these specific safety protocols, you can handle roadside tire emergencies confidently and safely. Remember that the increased height of your vehicle demands greater attention to stabilization and proper technique—never compromise on safety steps just to save time. Keep your specialized emergency kit properly maintained and practice the process in your driveway before you ever need it on the roadside.


