
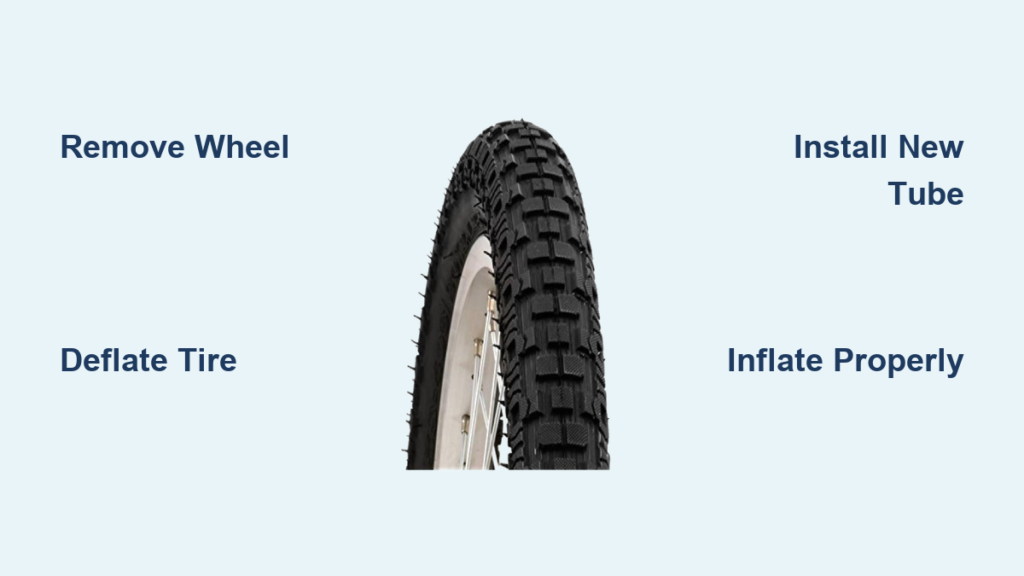
Nothing ruins a perfect cycling experience faster than a sudden flat tire halfway through your ride. Knowing how to change a Schwinn bike tire yourself means you’re never stranded—whether you’re commuting downtown or exploring forest trails. This step-by-step guide gives you everything needed to replace your Schwinn tire confidently, saving you money on shop visits and getting you back on the road in under 30 minutes.
Schwinn bikes use standard wheel and tire systems that make replacement accessible even for beginners. From their classic aluminum-frame hybrids to modern mountain models, the tire-changing process remains consistent across most Schwinn lines. By following this guide, you’ll master a fundamental bike maintenance skill that enhances your riding independence and extends your bike’s lifespan.
Gather Essential Tools and Supplies
Before removing your wheel, prepare these five critical items to ensure a smooth tire replacement process. First, collect three plastic tire levers—they’re inexpensive but vital for removing stubborn tires without damaging rims. Unlike metal levers that can scratch aluminum rims, plastic versions provide the necessary leverage while protecting your wheel investment.
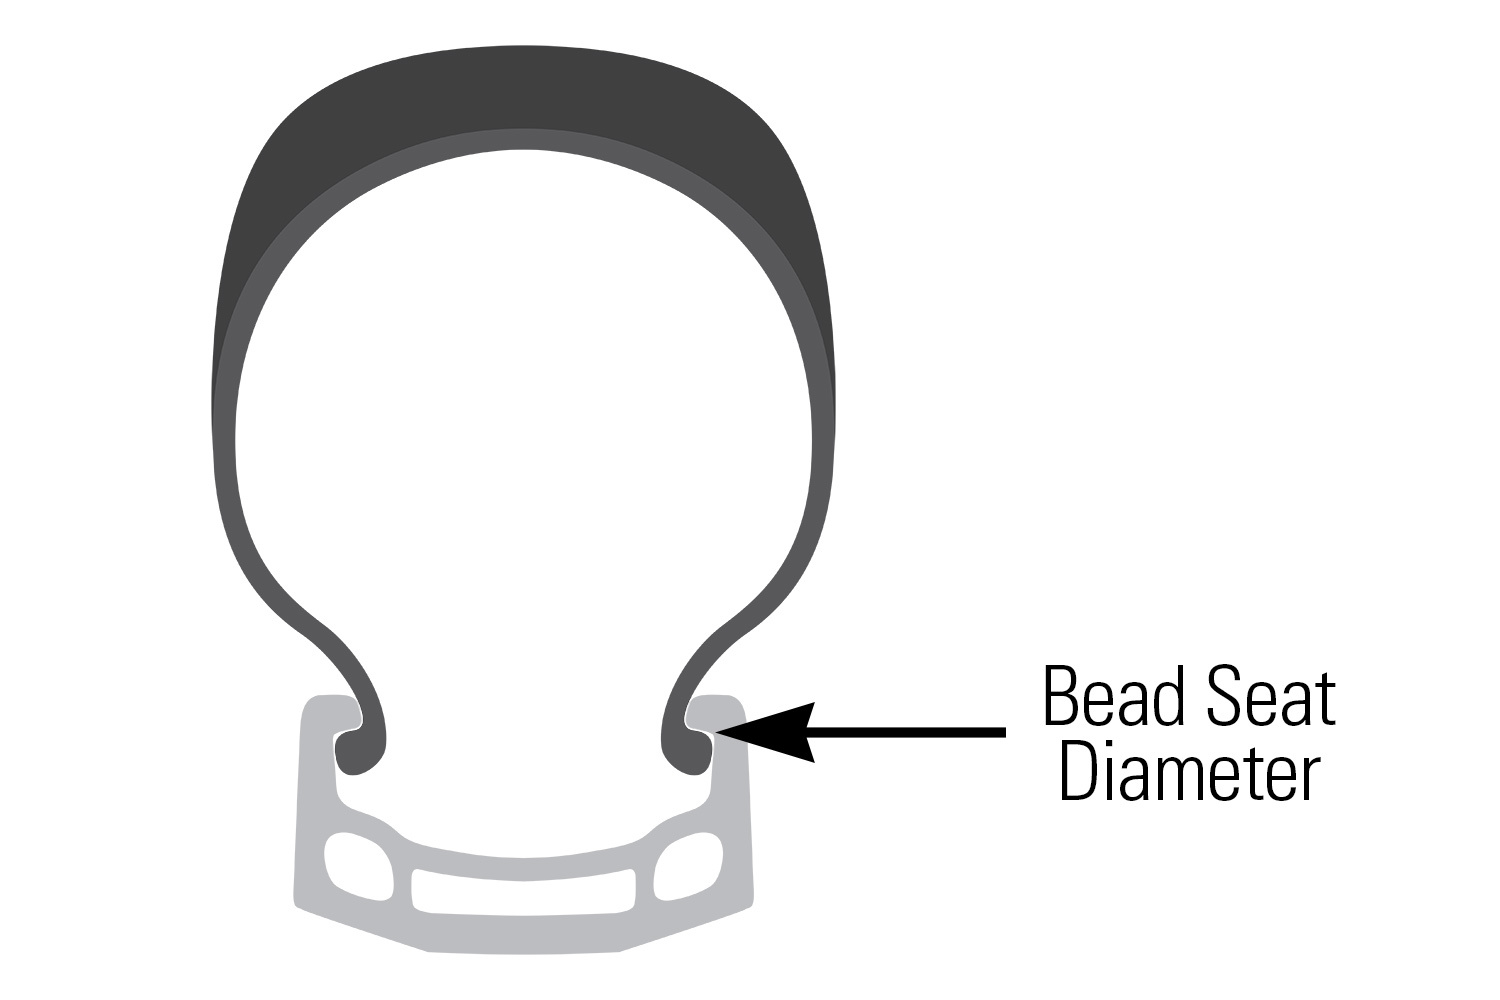
Your floor pump with pressure gauge is non-negotiable—Schwinn tires require specific PSI ranges printed on their sidewalls. Check your current tire size (typically 26×1.95 for mountain models, 700×35 for hybrids, or 20×1.75 for kids’ bikes) before purchasing replacements. Many cyclists make the costly mistake of buying the wrong size, so verify this measurement twice.
Don’t forget a spare inner tube matching your tire size—Schwinn uses standard tubes compatible with most brands. While you’re at it, include a patch kit for emergency roadside repairs. Finally, keep a clean rag and small bowl of soapy water nearby for bead lubrication during installation. This simple mixture helps tires seat properly on the rim, preventing frustrating installation failures.
What to Do When You’re Stranded with a Flat
If you’re changing your tire mid-ride without tools, improvise strategically. Use your bike’s quick-release lever as a makeshift tire lever when plastic versions aren’t available. Fold your clothing to create padding between the tire and rim when prying—this prevents accidental rim damage. Carry a small plastic grocery bag in your seat pack to store debris found in the tire, helping you identify the puncture cause later.
Remove the Wheel Properly
Shift your Schwinn to the smallest rear cog before attempting wheel removal—this provides crucial clearance for the chain. For rear wheels, locate the quick-release lever near the axle and flip it outward until it’s perpendicular to the frame. If your Schwinn has bolt-on axles instead of quick-release, use a 15mm wrench to loosen both nuts equally, turning counterclockwise about five full rotations.
Gently lower your bike while supporting the rear derailleur to prevent chain tension from damaging it. For disc brake models, carefully guide the rotor away from the caliper without touching its surface—oil from your fingers can contaminate braking performance. Front wheel removal is simpler: just open the quick-release or loosen axle nuts, then lift the wheel straight up.
Common Wheel Removal Mistakes to Avoid
Many cyclists damage their derailleurs by improperly removing rear wheels. Never pull the wheel straight back while the chain is engaged—the derailleur needs to swing inward first. Avoid forcing the wheel out if it feels stuck; instead, check that brake calipers have sufficient clearance. For bikes with rim brakes, remember to open the brake quick-release before attempting wheel removal.
Deflate and Remove the Old Tire
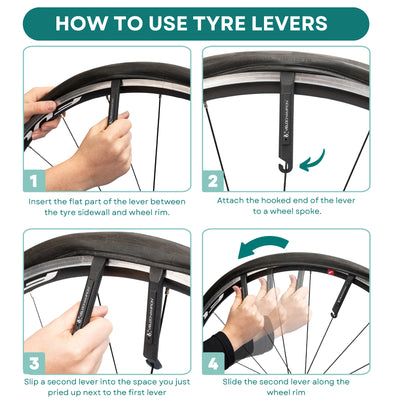
Completely release all air by pressing the valve core—Schrader valves (thick, car-style) require pressing the pin inside, while Presta valves (thin, European-style) need the top nut unscrewed first. Push both tire beads toward the rim center to create slack, then insert your first tire lever under the bead about six inches from the valve stem.
Hook the lever onto a spoke to maintain leverage while inserting your second lever three inches away. Work these levers around the rim like a zipper, maintaining consistent pressure without snapping the tire bead. Once one side is completely off, pull out the inner tube starting from the valve stem.
How to Identify the Cause of Your Flat
Examine the removed tube for the puncture location, then match it to the tire’s interior surface. Run your fingers along the tire tread from inside to outside—be careful not to cut yourself—to find embedded glass, thorns, or wire fragments. Hold the tire up to sunlight to spot tiny holes you might miss otherwise. This detective work prevents repeated flats from the same culprit.
Install the New Tire Correctly
Begin by verifying directional arrows on your new Schwinn tire—install with arrows pointing forward in the rotation direction. Start seating one bead by hand, working from the valve stem outward and using your thumbs to press the bead into the rim’s center channel. This deeper center section makes initial installation significantly easier.
Partially inflate your new tube (just enough to hold shape), then insert it into the tire with the valve stem aligned through the rim hole. Before seating the second bead, pinch the tube away from where you’re working to prevent pinching. For stubborn tires, apply soapy water to the bead as a lubricant—never use petroleum-based products that degrade rubber.
Troubleshooting Difficult Tire Installation
If the final section of tire bead won’t seat, try this professional technique: position the unseated section at the bottom, then sit on the tire while pulling both sides toward you. For extremely tight fits, use two tire levers simultaneously but be extra cautious about pinching the tube. If the tire still resists, check that you’re not accidentally installing it backward—some directional tires have subtle orientation markings.
Inflate and Check for Proper Seating
Begin inflation slowly to about 20 PSI, then check that both tire beads sit evenly against the rim all the way around. Properly seated beads create a consistent line where the tire meets the rim—any bulging indicates improper seating. For Schrader valve tires, ensure the valve stem remains straight during inflation; angled stems cause slow leaks.
Gradually increase pressure to the recommended range (35-65 PSI for hybrids, 40-80 PSI for mountain bikes). Spin the wheel and watch for sections where the tire appears uneven—it may need manual adjustment at these points. After reaching full pressure, perform the critical “bead pop” test: squeeze the tire near the rim; you should hear a distinct snapping sound as the bead fully seats.
Reinstall the Wheel and Final Checks
For rear wheels, thread the chain onto the smallest rear cog while guiding the wheel into the dropouts. Ensure the quick-release lever faces backward for safety—this prevents it from catching on obstacles. Tighten to the “firm palm imprint” standard: when closing the lever, it should leave a slight mark on your hand without excessive force.
Spin the wheel and verify it rotates freely without rubbing against brakes or frame. For rim brakes, check that pads clear the tire by about 2mm on each side. Take your Schwinn for a short test ride in a safe area, listening for unusual sounds and feeling for vibrations that might indicate improper installation.
Prevent Future Flats with Proper Maintenance
Check tire pressure before every ride using your floor pump’s gauge—Schwinn recommends checking weekly for commuters. Inspect tread for embedded debris after muddy or glass-prone routes, removing objects with needle-nose pliers before they work through to the tube. Consider installing puncture-resistant tires if you frequently encounter road hazards.
Rotate your tires front-to-rear every 500 miles to even out wear patterns—front tires develop different wear characteristics than rear due to steering forces. For optimal performance, replace tires when tread wear indicators become visible or when sidewalls show cracks. Quality Schwinn tires typically last 1,500-3,000 miles depending on riding conditions and maintenance.
Changing a Schwinn bike tire transforms you from a passenger on your cycling journey to an active participant in your bike’s performance. By mastering this fundamental skill, you eliminate one of the most common barriers to consistent riding—unexpected flats. The initial investment in basic tools pays for itself after just one avoided shop visit, while the confidence to handle roadside repairs opens up new riding possibilities. Remember that proper tire maintenance affects more than just flat prevention; correctly inflated, well-maintained tires improve your bike’s handling, efficiency, and overall riding enjoyment. Keep this guide bookmarked for your next tire change, and soon you’ll perform this essential maintenance task with professional speed and confidence.


