
Changing a pit bike tire is a fundamental maintenance skill that every pit bike owner should master. Whether you’re preparing for race day, replacing a worn-out tire, or fixing a flat after a trail ride, knowing how to handle this task yourself saves time and money while keeping your bike performing at its best. A worn or damaged tire compromises handling, reduces traction, and can turn a fun riding session into a frustrating experience. With the right tools, proper technique, and about 30-60 minutes of your time, you can complete this task in your garage without visiting a shop.
This comprehensive guide walks you through the entire tire-changing process, from gathering the right tools to reinstalling the wheel and checking your work. We’ll cover both tube-type and tubeless tire configurations, since pit bikes commonly use both depending on the model. You’ll learn how to break the bead, remove the tire, inspect components for damage, mount the new tire correctly, and inflate it to the proper pressure. We also include troubleshooting tips for stubborn beads, advice on avoiding common mistakes, and maintenance recommendations to extend your tire’s lifespan.
Gather Essential Tools and Materials
Before you begin changing your pit bike tire, having the right tools ready prevents frustrating interruptions mid-job. The basic toolkit for tube-type tires includes tire irons (also called tire levers), a bead breaker tool, a set of hex wrenches or a socket set to remove the wheel, and a pump or air compressor with a pressure gauge. Tubeless setups require similar tools but may benefit from a bead breaker designed for tighter beads and a sealable repair kit for emergency plugs.
Tire irons come in steel or plastic variants—plastic is gentler on rims and less likely to scratch aluminum alloy wheels, while steel offers more durability for stubborn beads. Look for irons with curved tips that hook over the tire edge smoothly; straight irons tend to slip and can damage your rim or pinch your tube. A quality bead breaker, whether the hammer-style swinging arm type or the threaded scissor design, makes the initial tire separation much easier than trying to pry tires off with irons alone.
You’ll also need a clean workspace with good lighting, preferably a workbench or sturdy table where you can secure the wheel. Having a bucket of soapy water nearby helps lubricate the tire beads during mounting, and a rag keeps your hands and components clean. For tube-type tires, always have a fresh inner tube on hand—inspect it carefully for manufacturing defects before installation. Some riders keep a spare tube and valve stem core tool as emergency supplies for trail-side repairs.
Remove the Wheel from Your Pit Bike
Securing the wheel properly before working on it prevents damage and makes the entire process smoother. Start by placing your pit bike on a center stand or paddock stand if available; this elevates the bike and gives you clear access to the wheels. If you lack stands, carefully lean the bike on its side on a soft surface like grass or a mat, ensuring it’s stable and won’t tip over during work.
Next, loosen the axle nut or bolt using the appropriate socket or wrench—typically 17mm or 19mm for most pit bikes. Don’t remove it completely yet; just break the tightness so you can spin it by hand afterward. If your bike has brake calipers, carefully swing the caliper outward or unbolt it completely, then secure it out of the way with a zip tie or bungee cord so it doesn’t hang by the brake line. For disc brake models, be careful not to contaminate the rotor with grease or oil.
With the caliper secured, pull the axle partially out while supporting the wheel, then slide the wheel free from the swingarm dropouts. Take note of any washers, spacers, or speedometer gear assemblies on either side of the wheel—these must go back in the same order and orientation when reinstalling. Place the removed wheel on your work surface with the tire facing up, ready for the bead-breaking phase.
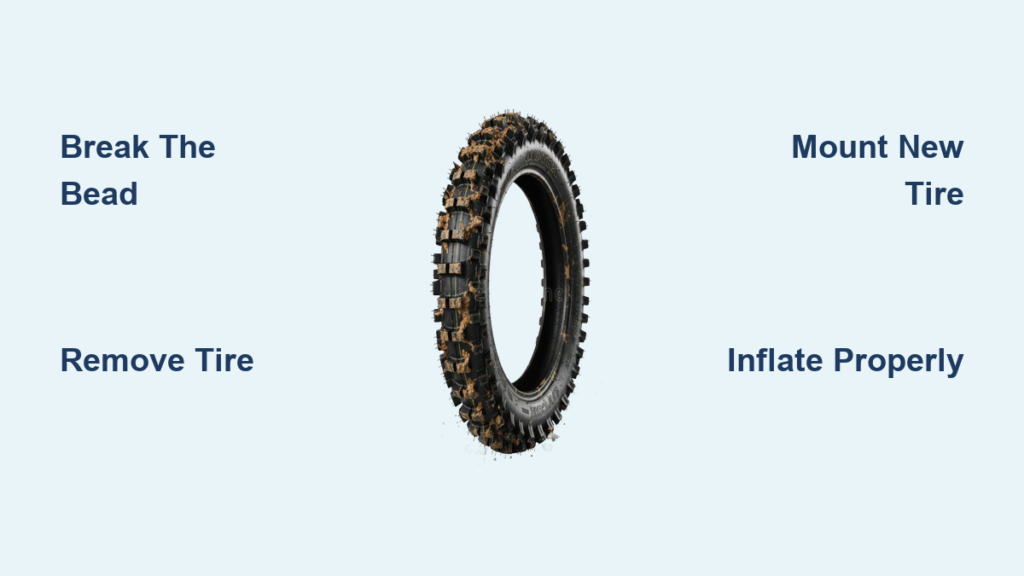
Break the Tire Bead and Remove the Tire
Breaking the bead—the seal between the tire edge and rim—requires deliberate force and the right technique. For tube-type tires, position your bead breaker on the tire sidewall opposite the valve stem, with the breaking arm positioned just above the rim edge. Swing the hammer forcefully to press the tire away from the rim, working around the circumference in small sections. You’ll hear popping sounds as the bead releases; continue until the entire bead is separated from one side.
Once the first bead is loose, push that side of the tire down into the rim well, creating space to work. Insert your first tire iron under the tire bead approximately six inches from the valve stem, hooking the iron over the rim edge. Work a second iron under the bead a few inches away from the first, using a levering motion to pull the tire over the rim. Continue this process around the wheel, alternating irons until one tire bead completely clears the rim. At this point, you can lift the tire off the rim, exposing the inner tube.
Pro Tip: When using tire irons, always hook them over the rim edge rather than prying against the rim itself to avoid damaging the rim surface.
Carefully remove the valve stem cap and core, allowing the tube to deflate completely before pulling it out from between the tire and rim. Check the tube for punctures, tears, or valve stem damage—these often cause flats and should be addressed before reinstalling. For tubeless configurations, the process is similar but requires extra caution to avoid damaging the valve stem and seal, and you’ll need to remove any old sealant before mounting the new tire.
Inspect Components and Prepare for Installation

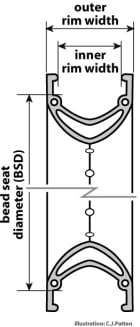
A thorough inspection before mounting the new tire prevents future problems and extends component life. Start by examining the rim for damage: check for cracks, dents, bent flanges, or corrosion that could compromise the bead seal or cause uneven wear. Run your finger along the rim bead seats—these are the inner edges where the tire bead sits—and feel for burrs, sharp spots, or accumulated dirt that could slice your new tube or prevent a proper seal.
Critical Check: Pay special attention to the valve stem hole area, as this is a common failure point where rim damage can cause repeated flats.
Clean the rim thoroughly with soapy water and a rag, removing old tire sealant, road grime, or debris. For tubeless rims, inspect the valve stem hole for cracks and ensure the rubber grommet is in good condition. Check that the valve stem nut is tight and that the valve core seals properly. If you’re converting from tube-type to tubeless or vice versa, verify your rim is compatible—some rims require specific valve stems or rim locks for secure mounting.
Examine the new tire before installation, checking for manufacturing defects, damaged beads, or uneven curing on the tread surface. Find the rotation arrow if your tire is directional and ensure it will spin the correct direction when mounted. For tube-type tires, lightly dust the tube with talcum powder to prevent it from sticking to the tire interior during use, which can cause premature wear and hot spots.
Mount the New Tire Correctly
Position the tire on your work surface with the rotation direction clearly marked, and place the rim beside it. For tube-type installations, partially inflate the new tube just enough to give it shape—about 5-7 PSI—then insert it into the tire, keeping the valve stem aligned with the hole in the rim. Push the valve stem through the rim hole from inside, then hand-tighten the valve nut to hold everything in place.
Working on one side at a time, push the tire beads down into the rim well to create slack. Starting at the valve stem, use your tire irons to hook the first bead over the rim edge, working around the circumference in small increments. The key is to use short, controlled lever motions rather than forcing the bead over all at once—this reduces the risk of pinching the tube between the tire and rim. Once the first bead is fully seated, push down on the center of the tire to create space for the second bead.
Mount the second bead using the same technique, but work from the opposite side of the valve stem to distribute tension evenly. As you progress, you may need to push the already-mounted bead inward to make room for the remaining section. When only a few inches of the final bead remain, use both irons together to lever it over the rim edge—this section is usually the tightest and may require extra force. Avoid pinching the tube by keeping it positioned in the center of the tire during this process.
Inflate and Seat the Beads Properly
With the tire mounted, reinstall the valve core and attach your air source. Inflate the tire in short bursts, checking the bead seal around the entire circumference after each addition of air. For tube-type tires, 10-12 PSI is usually sufficient to seat the beads fully; tubeless tires may require 15-20 PSI depending on the rim and tire combination. Listen for the distinctive “popping” sound as the beads seat against the rim flanges—this indicates a proper seal.
Troubleshooting Tip: If one bead seats before the other, push on the unseated section while adding air to the opposite side, or deflate and reposition the tire to ensure even seating. For stubborn beads, try bouncing the wheel on the ground or striking the tire sidewalls with a rubber mallet while maintaining air pressure—this vibration helps the beads find their seating position.
Once both beads are fully seated, inflate to your recommended operating pressure, typically 12-15 PSI for most pit bike applications, but consult your owner’s manual for manufacturer specifications. Check for leaks around the valve stem by applying soapy water and watching for bubbles. Inspect the entire bead area as well, particularly if you heard any unusual popping sounds during inflation.
Reinstall the Wheel Correctly
Before reinstalling, ensure your axle and swingarm components are clean and lightly lubricated with grease where specified. Slide the wheel back into the swingarm dropouts, aligning any spacers or washers exactly as they were removed. Push the axle through completely and hand-tighten the axle nut, then torque it to manufacturer specifications using a torque wrench—over-tightening can strip threads or warp components.
Spin the wheel to check for clearance through the swingarm and brake assembly. The wheel should spin freely without rubbing against the swingarm, chain, or brake caliper. Reattach the brake caliper if removed, ensuring the brake pads are properly aligned with the rotor and the caliper bolts are torqued correctly. Test the brakes by squeezing the lever several times to restore hydraulic pressure if running a hydraulic system, or pump the brake pedal for mechanical setups.
Rotate the wheel through its full range of motion while checking chain tension and clearance. Your chain should have approximately 1-1.5 inches of vertical play at the midpoint of the lower run, adjustable through the axle position or chain tensioners. Take a final look at tire pressure with a reliable gauge and adjust if necessary before your first ride.
Troubleshoot Common Tire-Changing Problems
Even experienced riders encounter challenges during tire changes, and knowing how to address them keeps you moving forward. If the tire bead refuses to seat despite your best efforts, the most common causes are insufficient lubrication, rim contamination, or a mismatched tire-rim combination. Apply more soapy water to the bead seats and ensure the rim is completely clean and dry before attempting to reseat.
A tube that keeps going flat after installation usually indicates a pinch point during mounting, a valve stem leak, or a defective tube. Deflate completely, remove the tire, and inspect the tube for holes or thin spots—often caused by the tire iron catching during installation. Check the valve stem area carefully, as this is a common failure point. If you find a pinched tube, replace it rather than attempting to patch it, as the compromised rubber will likely fail again under riding conditions.
Pro Tip: When encountering stubborn beads, try spraying soapy water directly into the bead gap while applying air pressure—it often creates just enough lubrication to seat the bead.
Beads that keep unseating during inflation often point to rim damage or improper tire-rim sizing. Inspect the rim flanges for bent areas that prevent the bead from locking in place. If your tire consistently loses pressure on one side, you may have a rim that’s slightly out of round or a tire with an irregular bead shape.
Changing a pit bike tire is a straightforward process that builds confidence and self-reliance as a rider. By following these steps carefully, using the right tools, and paying attention to details like bead seating and proper inflation, you can maintain your bike’s performance and safety without depending on shop visits. Remember to work patiently through each stage, check your work thoroughly before riding, and address any issues immediately rather than risking a failure on the track or trail. With practice, you’ll complete this task in under 30 minutes while ensuring your bike is ready for whatever riding challenges come next.


