
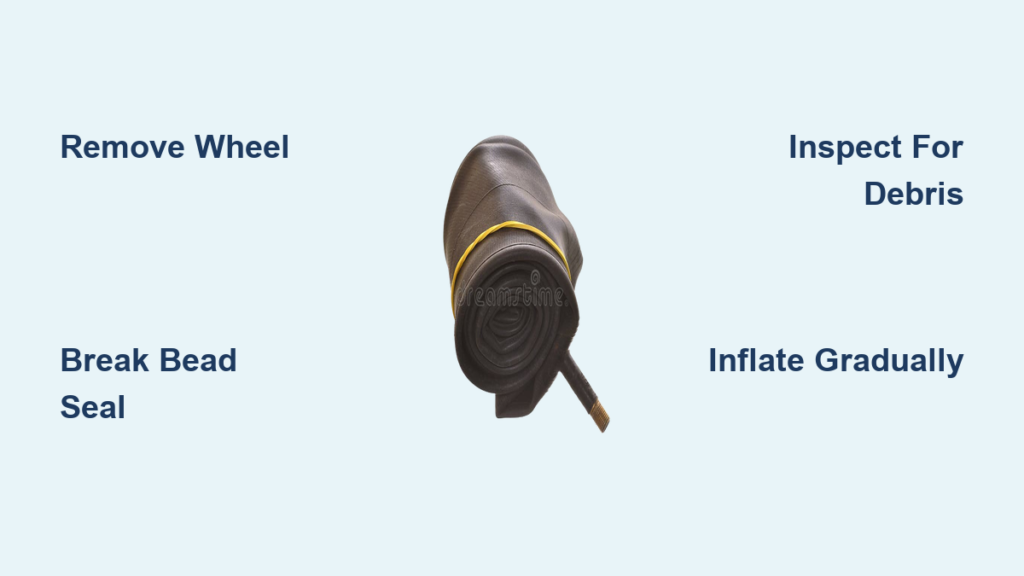
Nothing ruins trail momentum like that dreaded hiss of a flat tire deep in the woods. Knowing how to change a mountain bike tire tube means the difference between cutting your ride short and getting back to the adventure in 20 minutes. Unlike road bikes, mountain bikes face tougher terrain, larger tires, and more challenging conditions that make proper tube replacement technique essential. Mastering this skill ensures you’re never stranded when a thorn, rock, or hidden debris punctures your tube miles from civilization.
Changing a mountain bike tire tube might seem intimidating at first, but the process becomes second nature with practice. The key is understanding the specific challenges mountain bike tires present—thicker rubber, deeper treads, and often stubborn bead retention. Whether you’re a weekend warrior or a serious trail rider, this guide gives you the complete, step-by-step process to handle flats confidently anywhere on the trail.
Gather Essential Tools Before You Hit the Trail
The difference between a smooth repair and a frustrating battle comes down to proper preparation. Don’t wait for a flat to discover you’re missing critical tools—pack these essentials in your saddle bag before every ride.
Your mountain bike tube replacement kit must include two durable tire levers (plastic works best to avoid rim damage), a floor pump with pressure gauge or CO2 inflator with appropriate head for your valve type, and at least one spare tube matching your tire size and valve type. Mountain bike tubes typically use Presta valves (thin with a lock nut) rather than Schrader valves (wider, automotive-style), so verify compatibility before heading out. Carrying a patch kit serves as a valuable backup when you’re running low on spare tubes.
Additional items that prevent roadside headaches include a multi-tool with hex wrenches for wheel removal, latex gloves to keep your hands clean when dealing with muddy tires, and a small rag for wiping debris off rims. If you’ve converted a tubeless setup to use tubes, a small bottle of tire bead lubricant helps with stubborn tire installations. Organize these items in a compact saddle bag that won’t bounce during your ride—nothing’s worse than discovering your tools are missing when you need them most.
Remove Your Wheel Without Damaging Components
Proper wheel removal sets the stage for a successful tube replacement, especially with mountain bikes where rear derailleur clearance creates unique challenges. For front wheels, simply release your quick-release lever or loosen your thru-axle, then lift the wheel straight out of the fork dropouts.
Rear wheel removal requires careful attention to the drivetrain. Shift your chain to the smallest rear cog before beginning, then open your quick-release lever or loosen your thru-axle. Lift the bike slightly and gently pull the wheel backward, guiding the chain off the cassette while supporting the derailleur to prevent damage. Some modern mountain bikes with clutch derailleurs require extra care—keep tension on the derailleur pulley wheel as you remove the wheel.
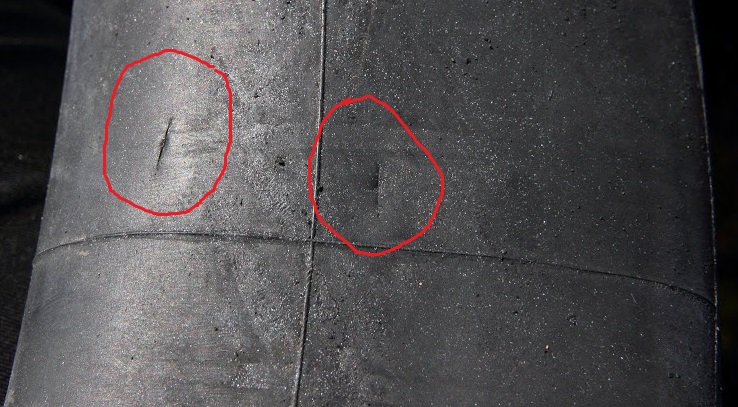
Once the wheel is free, take 30 seconds to inspect for the cause of your flat. Run your fingers carefully along the tire tread to find embedded thorns, glass, or sharp rocks that caused the puncture. Check both the tire casing and the rim for damage that might compromise your new tube. Identifying and removing the culprit prevents immediate repeat flats after your repair.
Break the Tire Bead Away from the Rim

With your wheel safely removed, your next critical step is separating the tire bead from the rim to access the tube. Start by fully deflating the tire—press the center pin on a Presta valve or unscrew the cap on a Schrader valve until all air escapes. A completely deflated tire makes bead separation safer and easier, preventing unexpected pops during lever work.
Insert your first tire lever between the tire bead and rim edge, hooking it under the bead about 2 inches from the valve. Leverage the tire over the rim edge, then slide the lever around the rim to break the initial seal. Insert your second lever every 3-4 inches to hold progress while you reposition the first. Work systematically around the wheel, never forcing the lever deep into the tire channel where it could damage your rim tape or pinch the tube.
For particularly stubborn mountain bike tires, push the opposing bead into the center of the rim channel with your palms to create slack. This technique provides the extra room needed to work the stubborn bead over the rim edge. Never use screwdrivers or improper tools—quality tire levers designed for mountain bikes prevent rim damage during this critical step.
Locate and Remove the Damaged Tube
With one tire bead completely free from the rim, you can now extract the damaged tube for inspection. Carefully pull the valve stem through the rim hole, then work the tube out from between the tire and rim. Take your time during this step—rushing can leave debris behind that will flat your new tube immediately.
Thoroughly inspect both the old tube and tire interior before proceeding. Locate the puncture on the tube and compare its position to any debris still embedded in the tire. A single hole typically indicates a thorn or nail puncture, while two small parallel holes (snake bites) signal a pinch flat from hitting an obstacle too hard with low tire pressure. If the puncture appears on the tube’s underside where it contacts the rim, check your rim tape for damage or misalignment.
Run your fingers carefully along the inside of the tire casing to find any remaining debris. Small pieces of glass or wire can hide deep in mountain bike tread patterns, waiting to slice your new tube. Remove all foreign objects before installing your replacement—this simple step prevents most repeat flats.
Prepare Your Replacement Tube for Installation
Before inserting your new tube, verify it matches your tire specifications—most mountain bikes use 27.5-inch or 29-inch diameter tubes with widths between 2.1″ and 2.5″. Using an incorrectly sized tube leads to pinch flats or premature wear. Also confirm the valve type (Presta is standard on most modern mountain bikes) and length matches your rim depth.
Partially inflate your new tube to about 10-15% capacity—just enough to give it shape without stretching the rubber. This “pre-inflation” prevents the tube from twisting or pinching during installation. Avoid over-inflating, as a fully inflated tube becomes difficult to position correctly inside the tire.
Inspect your new tube for manufacturing defects or damage from packaging. Run your fingers along the entire surface to feel for thin spots or irregularities. While rare, catching a defective tube before installation saves the frustration of discovering a leak immediately after your repair.
Install the New Tube Without Pinching
Positioning the replacement tube correctly prevents the most common installation errors. Start by threading the valve stem through the rim hole, ensuring it sits perpendicular to the rim surface. Hand-tighten the valve nut just enough to hold the stem in position without restricting movement.
Work the tube into the tire casing, starting from the valve and moving outward in both directions. Push the tube into the center of the tire channel so it rests evenly between the tire beads. Avoid bunching or folding the tube, as these create weak spots that can fail under pressure.
Reseat the tire bead starting at the valve and working outward in both directions. Use your thumbs to push the bead toward the center of the rim channel while simultaneously working it over the rim edge. Tire levers should only be needed for the final stubborn section—using them excessively increases the risk of pinching the tube against the rim.
Inflate and Verify Proper Tire Seating
With both tire beads fully seated, gradually inflate your new tube while checking for proper seating. Stop every 10-15 psi to inspect that the tire is sitting evenly all around the rim. Watch for sections where the bead might be sitting inside the rim edge rather than fully engaged—this appears as a visible ridge along the tire’s edge.
Mountain bike tires typically require 20-35 psi depending on rider weight, tire width, and terrain conditions. Consult your tire sidewall for the manufacturer’s recommended pressure range, starting in the middle and adjusting based on your riding preferences. Wider tires generally run at lower pressures for better traction on technical trails.
After reaching your target pressure, check for leaks by applying saliva or water around the valve base—bubbles indicate a leak requiring additional tightening. Squeeze the tire all around to verify even seating and ensure you haven’t pinched the tube anywhere. A properly installed tube should hold pressure overnight.
Reinstall Your Wheel and Confirm Safe Operation
Rear wheel installation requires careful attention to the drivetrain. Thread the chain back onto the smallest rear cog, guide the axle into the dropouts, and secure your quick release or thru-axle. Rotate the cranks to ensure proper chain engagement and check that your brakes function correctly before riding.
Take a short test ride at low speed to verify everything functions properly. Pay attention to any unusual vibrations, clicking sounds, or handling issues that might indicate improper tube seating or tire damage. Start with gentle terrain before returning to technical trails—this brief check prevents dangerous failures at speed.
Prevent Future Flats with Smart Maintenance
Regular tire inspections prevent most flats before they happen. Check your tires after every ride for embedded debris, especially following rides in areas with cactus, thorns, or glass. Remove foreign objects before they work through the tire casing using tweezers or a small pick.
Maintain proper tire pressure for your riding conditions—check before each ride as mountain bike tires lose air faster than road tires. Riding at appropriate pressure prevents pinch flats while maintaining traction on technical terrain. Consider puncture-resistant tires or tire liners if you frequently experience flats, though these add slight weight and affect ride quality.
Regularly inspect your rim tape for damage or misalignment—this critical component protects your tube from spoke holes. Replace worn rim tape during tube replacements to prevent slow leaks from exposed spoke ends. With these maintenance habits, you’ll spend less time fixing flats and more time enjoying the trails.
Final Note: Changing a mountain bike tire tube becomes quick and reliable with practice. Keep quality tools in your saddle bag, take your time during installation, and always investigate the cause of each flat. With these skills mastered, a flat tire transforms from a ride-ending catastrophe into just another part of the trail experience you handle with confidence.


