
Nothing disrupts your mowing schedule faster than discovering a flat tire when you’re ready to tackle the lawn. While some might assume a flat means replacing the entire wheel assembly, the reality is most lawn mower tire issues can be fixed with a simple tube replacement. Learning how to change a lawn mower tire tube is a practical skill that puts you in control of maintenance costs and gets you back to yard work in under an hour. Whether your tire succumbed to a hidden nail, age-related dry rot, or simply deflated from seasonal storage, this guide delivers the precise steps you need to complete the repair successfully. With basic tools and careful technique, you’ll transform what seems like a frustrating setback into a quick victory that saves you money and builds your DIY confidence.
Before reaching for your tools, understand that lawn mower tires use specialized inner tubes similar to those found in wheelbarrows and other outdoor equipment. These compact tubes are inexpensive (typically $5-$15) and readily available at hardware stores, home centers, and online retailers. The repair process involves deflating the tire, separating the tire from the rim, removing the damaged tube, installing a replacement, and properly reinflating. Each stage requires specific techniques to prevent damaging your new tube or rim, but with patience, even beginners can master this essential maintenance task.
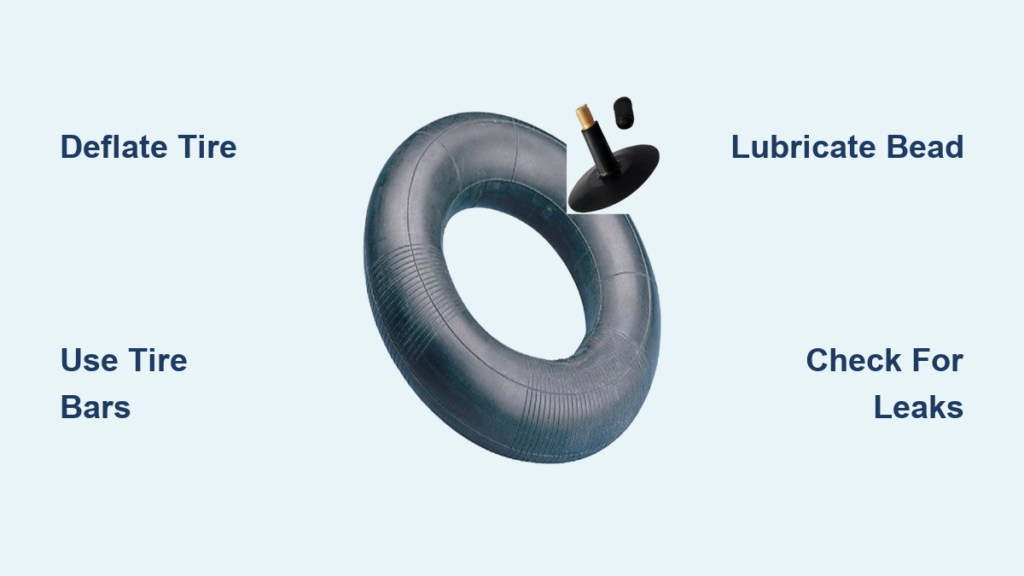
Gather Essential Tools Before Starting
Having the right equipment ready prevents mid-repair frustration and ensures a smooth process. The two non-negotiable tools for changing a lawn mower tire tube are tire bars (also called tire levers or tire spoons). These curved steel tools slide between the tire and rim without damaging either component. You’ll need two bars—one to hold the tire edge while the other works it over the rim lip. While standard tire bar sets cost under $10 at auto parts stores, sturdy flathead screwdrivers can serve as a temporary substitute if rounded at the tip to prevent punctures.
Beyond tire bars, you’ll need a lubricant to help the rubber slide over the metal rim. Light machine oil, soapy water, or specialized tire lubricant reduces the force required during installation and minimizes tear risks. Apply this liberally around the tire bead area before prying. Don’t skip hand protection—work gloves shield against rim cuts and improve grip on slippery tools, while safety glasses protect your eyes from unexpected debris as tension releases from the rubber.
Prepare Your Workspace for Safety
Setting up properly prevents accidents and makes the repair significantly easier. Choose a well-lit, level surface like a garage floor or concrete driveway where you can clearly see your work and the wheel won’t roll unexpectedly. If working on a riding mower, engage the parking brake and chock the opposite wheels. For push mowers, carefully tip the machine onto its side with the flat tire facing upward—consult your owner’s manual first to avoid oil migration into sensitive components like the carburetor.
Before touching the tire, remove the valve cap and fully deflate the tube by pressing down on the valve core with a tire bar end or small screwdriver. Listen for the hiss of escaping air and wait until the tire completely collapses against the rim. Attempting this repair with any residual pressure creates dangerous tension that can cause tools to slip unexpectedly. This simple step takes only a minute but dramatically improves safety and makes subsequent steps far easier.
Remove the Tire from the Rim Correctly
With the tire completely deflated, spray lubricating oil around the entire tire bead where it meets the rim, focusing on the area near the valve stem. Let the oil penetrate for 3-5 minutes to break the seal between rubber and metal. Now slide one tire bar between the rim and tire approximately six inches from the valve stem. Insert it at a shallow angle to avoid puncturing the hidden tube, then use it as a pivot point while working the second bar underneath the tire edge.
Technique for Prying Without Damage
Work the second bar around the wheel in small increments—about two inches at a time—using a gentle levering motion to gradually pull the rubber over the rim lip. Alternate between both bars as you progress, never forcing more than a few inches at once. The goal is to free one entire side of the tire from the rim, not to completely remove the tire. If you encounter resistance, reapply lubricant rather than increasing force. Stop periodically to check that you’re not pinching the tube between your tools and the rim.
When to Use Alternative Methods
Some stubborn tires require additional techniques. If the bead won’t release, try tapping the tire sidewall with a rubber mallet to break the seal. For particularly tight fits, work opposite sides of the wheel simultaneously—one person holding each tire bar while another applies pressure at the midpoint. Never use screwdrivers with sharp edges near the tube area, as their flat profiles easily slice through delicate rubber.
Extract the Damaged Tube Safely
:max_bytes(150000):strip_icc()/Tireinnertubebuffingpatchsite2_preview-ef83419fa0ea4bee9ac6817b08d15a29.jpg)
With one side of the tire pulled away from the rim, carefully locate the valve stem where it protrudes through the rim’s valve hole. Hold the stem steady while you work the rest of the tube out, being mindful of any sharp edges on older rims that could cause new punctures. Gently pull the valve stem through the valve hole, then slowly draw the rest of the tube from underneath the tire.
Before discarding the old tube, examine it for the cause of failure. Look for punctures from nails or thorns, cracks near the valve stem indicating dry rot, or abrasion marks suggesting improper installation. This diagnosis helps prevent repeat failures—what caused the first flat might still be lurking inside your tire. While the tube is out, run your gloved hand along the interior tire surface and rim to feel for hidden debris or sharp burrs that could damage your replacement tube.
Install the New Tube Without Pinching
Begin by partially inflating your new tube—just enough to give it shape but not so much that it becomes difficult to position. This crucial step prevents bunching and makes installation significantly easier. Carefully thread the valve stem through the rim’s valve hole, ensuring it enters straight without twisting. If your tube came with a valve nut, screw it on finger-tight to secure the stem in place and prevent it from pulling back through during installation.
Positioning the Tube Correctly
Start by tucking the valve stem area into place, then work the rest of the tube into the space between tire and rim in both directions. The tube should lie completely flat with no folds or twists—any creases will likely cause immediate failure when inflated. Take special care around the valve stem area, ensuring the rubber isn’t stretched or pinched. Pause frequently to check that the tube remains centered and hasn’t worked its way underneath the tire bead.
Seating the Tire Back Onto the Rim
Using your tire bars, begin working the tire bead back over the rim lip starting near the valve stem. Apply lubricant as needed to help the rubber slide. Work in small sections around the wheel, periodically checking that the tube hasn’t shifted or become trapped. Listen carefully for any unusual sounds that might indicate pinching—if you hear a tearing noise, stop immediately and reposition. The final section near the valve stem often requires extra attention to avoid kinking the stem.
Inflate and Test Your Repair
With the tire fully seated, attach your air compressor or hand pump and begin inflating slowly. Stop every few PSI to check that the tube is seating evenly and the tire bead is snapping into place against the rim. Most lawn mower tires require only 10-20 PSI—check your owner’s manual or tire sidewall for specifications. As inflation progresses, you should hear distinct “pops” as the bead seals against the rim on both sides.
Leak Testing Procedures
Once at full pressure, perform a thorough leak check by applying soapy water to the valve stem, bead area, and any suspicious spots on the tire. Bubbles indicate air escaping—small leaks often resolve as the tube settles, but significant bubbling means you’ll need to deflate and reseat the tire. Let the tire sit overnight before final testing; pressure loss of more than 2 PSI indicates a problem requiring attention. A properly installed tube should hold pressure indefinitely under normal conditions.
Extend Your New Tube’s Lifespan
Maximize your repair investment by adopting simple maintenance habits. Store your mower in a covered area away from direct sunlight, which accelerates rubber deterioration. Before each mowing season, inspect tires for dry rot (characterized by small cracks in the rubber) and embedded debris that could work through to the tube over time. Maintain proper inflation—underinflated tires create excessive flexing that wears out tubes prematurely, while overinflation stresses the rubber beyond its limits.
When you notice a slow leak, address it immediately rather than continuing to ride on a partially deflated tire. Each rotation with low pressure creates heat buildup that can damage both tube and tire. For seasonal storage, slightly overinflate tires (within 5 PSI of maximum) to compensate for natural air loss during dormancy, but never exceed the maximum pressure rating stamped on the tire sidewall.
Replacing a lawn mower tire tube is one of the most accessible repairs a homeowner can master. By following these precise steps—gathering the right tools, preparing safely, working methodically through removal and installation, and maintaining your repair—you’ll save money on service calls and gain confidence for tackling other outdoor equipment maintenance. The next time you discover a flat tire on your mower, you’ll know exactly how to change a lawn mower tire tube efficiently and get back to maintaining your lawn without unnecessary delays or expenses. This practical skill not only keeps your equipment running smoothly but also puts you in control of your yard care schedule, ensuring nothing stands between you and a perfectly manicured lawn.


