
You’ve just mounted a new tubeless tire on your wheel, but no matter how hard you pump, the bead won’t seal and the tire won’t hold air. That frustrating “thump-thump” sound as the bead fails to seat properly is all too familiar to cyclists and off-road enthusiasts. Tubeless tire setup can be challenging, especially when dealing with stubborn beads that refuse to lock into place on the rim. This comprehensive guide will show you the safe, effective methods to properly inflate tubeless tires without risking dangerous failures. You’ll learn the right techniques to seat your tire bead securely, avoid common mistakes that lead to sudden air loss, and enjoy the benefits of a properly set up tubeless system that performs reliably on the trail or road.
Why Tubeless Tires Won’t Seat Properly
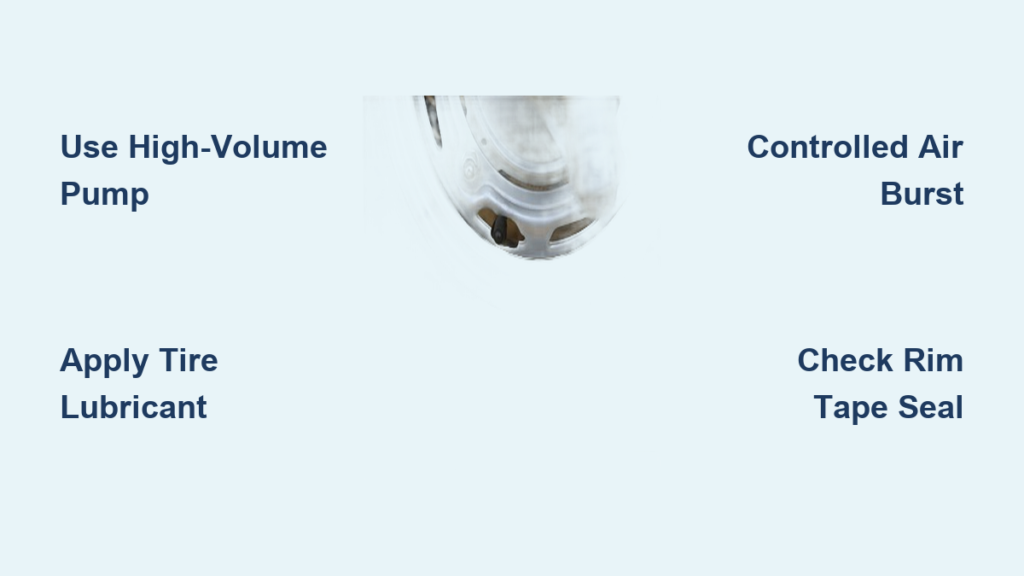
Tubeless tire installation challenges typically stem from three main issues: improper rim preparation, insufficient air pressure delivery, and incompatible components. When the tire bead doesn’t properly seat against the rim flange, air escapes rapidly instead of building pressure. This often happens with newer rims that have tighter tolerances or when using tires known for stiff sidewalls. The bead seating process requires a critical burst of air pressure—typically 35-60 PSI depending on tire size—to forcefully push the tire bead into its proper position against the rim’s hook. Without this initial pressure surge, the tire will continue to leak air no matter how long you pump. Understanding these mechanics is crucial before attempting any inflation technique.
Common Installation Mistakes That Prevent Proper Seating
Many DIYers unknowingly sabotage their tubeless setup with these preventable errors:
- Insufficient rim tape coverage causing air leaks through spoke holes
- Inadequate tire lubrication making the bead stick instead of slide into position
- Using only a hand pump which cannot deliver the rapid air volume needed
- Incorrect valve core installation creating slow leaks at the valve stem
- Dry or damaged rim sealing surfaces preventing proper bead engagement
The Dangers of Improper Tubeless Tire Inflation
Attempting to force a tubeless tire to seat using unsafe methods creates serious risks. When people search for “how to blow up a tubeless tire,” they may mistakenly believe explosive methods are necessary, but these approaches endanger both installer and bystanders. Tire beads under pressure store tremendous energy—when they finally seat, the sudden movement can cause tools to slip or components to fail catastrophically. More dangerously, some misguided techniques involve using compressed air sources beyond safe limits, risking tire explosion. A rapidly unseating tire bead can propel the tire and wheel assembly with dangerous force, causing serious injury. Always use proper techniques designed for controlled, safe seating.
Essential Equipment for Successful Tubeless Tire Setup

Must-Have Tools for First-Time Success
To properly seat your tubeless tire without dangerous shortcuts, you’ll need these specific tools:
- High-volume floor pump with pressure gauge (minimum 160 PSI capacity)
- Tubeless-specific tire levers with smooth edges to prevent rim damage
- Quality tubeless sealant (minimum 2-4 ounces depending on tire size)
- Tubeless valve stems with removable cores
- Rim tape appropriate for your wheel width
- Tire mounting lubricant or soapy water solution
Why Compressor Methods Require Extreme Caution
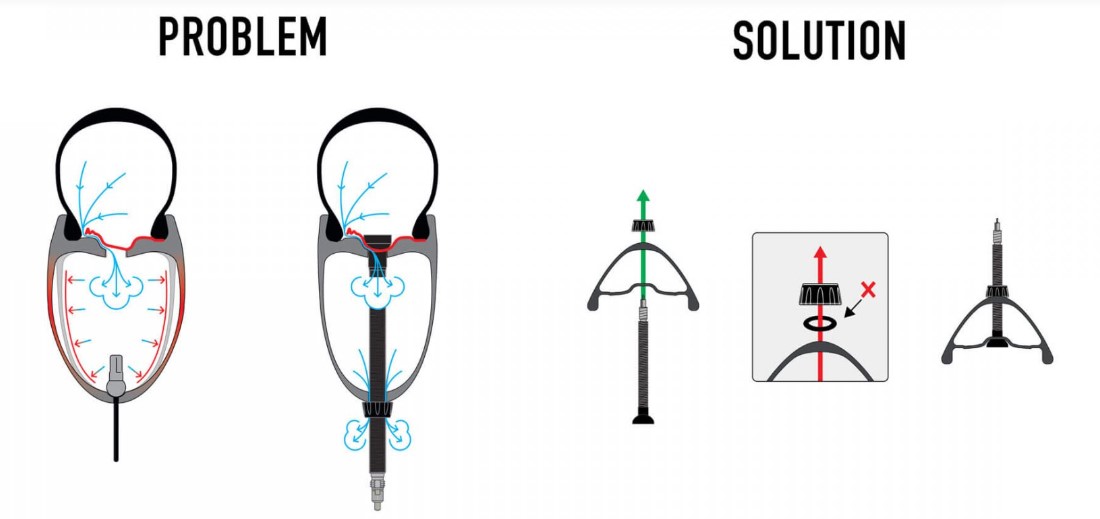
While many guides suggest using an air compressor to quickly seat stubborn tubeless tires, this approach demands careful execution. The critical factor isn’t the compressor itself but how you control the air delivery. Never connect a compressor directly to the valve stem—that uncontrolled blast of air creates dangerous pressure spikes. Instead, use a compressor with a regulated air tank and follow the “shot method”: fill the tank to 100-120 PSI, then open the valve briefly (2-3 seconds) to deliver a controlled burst of air. Always stand clear of the tire’s sidewalls during compressor attempts, positioning yourself at the wheel’s axle line where energy dissipates safely if the bead seats suddenly.
Step-by-Step Tubeless Tire Seating Procedure

Pre-Installation Preparation Checklist
Before adding any air, verify these critical setup points:
- Confirm rim tape completely covers all spoke holes with no wrinkles
- Ensure valve stem is properly seated and tightened (hand-tight plus quarter-turn)
- Apply tubeless sealant before attempting final inflation (30-60ml for standard MTB tires)
- Lubricate both tire beads thoroughly with tubeless-specific lubricant
- Double-check that tire beads are properly positioned on both sides of the rim
Controlled Hand Pump Method for Stubborn Tires
For tires that resist standard inflation:
- Partially inflate the tire to 5-10 PSI using steady pump strokes
- Walk around the wheel pressing each section of the tire toward the rim center
- Listen for the distinct “pop” as sections of the bead seat
- Continue pumping while periodically checking for complete seating
- Once fully seated, inflate to your target pressure (typically 25-35 PSI for MTB)
Emergency Seating Technique for Extremely Stubborn Beads
When standard methods fail, try this controlled approach:
- Deflate the tire completely and apply additional lubricant to problem areas
- Position the wheel vertically with the stubborn section at 3 o’clock
- Use a second person to maintain downward pressure on the tire bead
- Have your assistant deliver short bursts from a compressor while you monitor
- Stop immediately when you hear the bead seat—over-pressurizing risks damage
Troubleshooting Common Tubeless Inflation Problems
Why Your Tire Keeps Losing Air After Initial Seating
If your tire initially seats but then rapidly deflates, check these specific failure points:
- Pinched sealant channels where the bead didn’t fully engage the rim hook
- Inadequate sealant coverage failing to plug micro-punctures in the bead area
- Valve core leakage from improper installation or debris in the valve
- Rim tape defects allowing air to escape through spoke holes
Pro Tip: After initial seating, rotate the wheel slowly while adding sealant through the valve to ensure complete coverage before final inflation.
When to Suspect Equipment Compatibility Issues
Certain tire and rim combinations present unique challenges:
- Wide rims with narrow tires create excessive bead tension
- Carbon rims with stiff tire compounds resist seating forces
- Asymmetric rim designs require specific mounting orientation
- Used tires with set memory from previous mounting
If you’ve attempted proper seating techniques three times without success, consider whether your components are truly compatible. Some high-performance tires require specific rim profiles for reliable tubeless operation.
Critical Safety Practices for Tubeless Tire Maintenance
Recognizing Dangerous Pressure Buildup Signs
Never ignore these warning indicators during inflation:
- Visible bulging in the tire sidewall beyond normal profile
- Unusual stretching sounds from the tire bead area
- Rapid temperature increase in the tire/wheel assembly
- Sealant leaking from multiple points simultaneously
If you observe any of these signs, immediately stop inflation and carefully release pressure using a valve core removal tool from a safe angle.
Proper Disposal of Failed Tubeless Setups
When a tire repeatedly refuses to seat properly, don’t force the issue. Instead:
- Completely deflate the tire and remove the valve core
- Apply additional lubricant to problem areas
- Carefully remove the tire from the rim using plastic levers
- Inspect both rim and tire for damage before attempting reinstallation
- Replace any components showing signs of stress or deformation
Preventing Future Tubeless Installation Problems
Seasoning New Tubeless Setups for Reliability
New tubeless systems require a break-in period:
- Inflate to maximum recommended pressure for 24 hours before first ride
- Rotate the wheel periodically during initial seating to distribute sealant
- Check pressure daily for the first week as sealant finds micro-leaks
- Re-torque valve stems after the first few pressure cycles
Long-Term Maintenance Schedule
To ensure continued trouble-free operation:
- Top off sealant every 3-6 months (evaporation is inevitable)
- Check tire pressure before every ride (tubeless loses pressure faster)
- Clean valve cores quarterly to prevent clogging
- Replace rim tape when changing tires to maintain optimal seal
Final Note: Proper tubeless tire setup requires patience and the right techniques—not dangerous shortcuts. By following these safe, proven methods, you’ll avoid the risks associated with improper inflation while enjoying the performance benefits of a properly seated tubeless system. Remember that “blowing up” a tire refers to catastrophic failure, not proper inflation—always prioritize safety over speed when working with pressurized systems. If you encounter persistent seating issues after following these guidelines, consult a professional bike mechanic who can assess your specific components for compatibility issues. Properly maintained tubeless systems deliver superior traction, fewer flats, and a smoother ride—making the careful setup process well worth the effort.


