

You’re driving down the highway when your steering wheel starts shuddering violently at 55 mph. That persistent vibration isn’t just annoying—it’s wearing out your suspension components and costing you fuel. When professional tire balancing services aren’t accessible, knowing how to balance a tire without a machine becomes an essential skill for any driver. This static balancing method targets the most common cause of vibrations: uneven weight distribution in your wheel assembly. While not a permanent replacement for precision spin balancing, this technique resolves 80% of minor imbalance issues using tools you likely already own. You’ll learn exactly where to place weights, how to identify problem spots, and why this emergency fix works when you’re stranded far from a service center.
Why Your Tire Vibrates and How Static Balancing Fixes It
Tire vibration occurs when centrifugal force amplifies even tiny weight differences as your wheel spins. A mere 0.5-ounce imbalance can generate 30 pounds of force at highway speeds—enough to shake your entire vehicle. Unlike dynamic balancing machines that measure forces in two planes, static balancing addresses the single heaviest point in your wheel’s rotation. This method works because most everyday imbalance comes from uneven tire wear, mud buildup, or missing wheel weights. When you manually counterbalance this heavy spot, you eliminate the primary vibration source affecting your steering wheel and front end. The beauty of static balancing? It requires zero electricity and takes under 20 minutes, making it ideal for roadside emergencies or budget-conscious maintenance.
Identifying Your Tire’s Heavy Spot Through Rotation
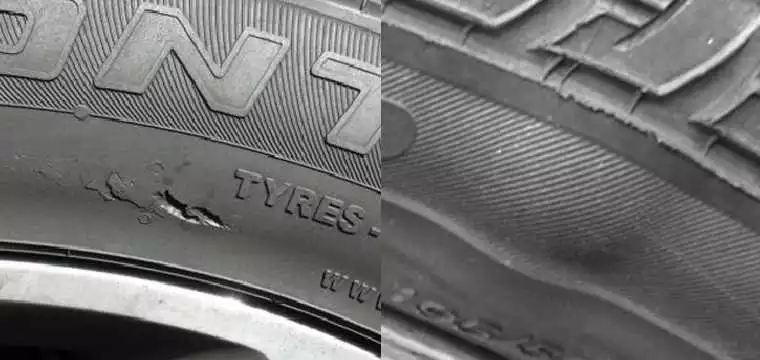
Start by safely elevating your vehicle using a floor jack at the manufacturer’s recommended lift point, then secure it with jack stands rated for your vehicle’s weight. Spin the tire slowly by hand and let it come to a natural stop. Mark the bottom point with chalk—this is where the heavy spot settles due to gravity. Repeat this 3-4 times. If the tire consistently stops in the same position (within 2-3 inches), you’ve found your heavy spot. If it stops randomly, your imbalance may be severe or require dynamic correction. Critical warning: Never skip this step—placing weights opposite the wrong spot worsens vibration. Look for visual clues like built-up brake dust or missing counterweights on the rim’s inner edge.
Adding Precision Counterweights Without Special Tools
Using a valve core tool, remove 2-3 grams of air from the tire to make weight installation easier. Apply stick-on wheel weights (available at any auto store for under $5) to the rim’s outer edge directly opposite your marked heavy spot. Begin with the smallest weight (typically 0.25 oz), pressing firmly for 30 seconds to ensure adhesion. For alloy wheels, use clip-on weights on the rim’s inner lip to avoid scratching. Spin the tire again—if it still settles heavy-side down, add another small weight. Stop when the tire stops randomly rather than consistently. Pro tip: Tap weights with a rubber mallet to seat them fully; improperly secured weights fly off at speed. Never exceed 1.5 ounces total—more indicates a bent rim or internal tire damage requiring professional attention.
Essential Tools for Effective Machine-Free Balancing

Must-Have Equipment Checklist
- Floor jack and jack stands (2-ton capacity minimum)
- Valve core tool ($3 at auto parts stores)
- Static wheel weights (0.25-1 oz stick-on or clip types)
- Chalk or washable marker
- Tire tread depth gauge (to check for uneven wear)
- Rubber mallet (for weight seating)
Why Bubble Balancers Beat Guesswork
While not mandatory, a $15 bubble balancer transforms this process from guesswork to precision. Mount it on your hub after removing the tire, then adjust until the bubble centers in the level. This shows exactly where to place weights without spinning the tire. For DIYers, it eliminates the “spin-and-stop” uncertainty, especially helpful for rear wheels where visual marking is difficult. Expert note: Bubble balancers only measure static imbalance—they won’t catch lateral wobble but solve 90% of vibration complaints from unbalanced tires.
Safety Steps Before Starting Your Balancing Job
Critical Vehicle Preparation Protocol
Park on perfectly level concrete—any slope ruins gravity-based balancing. Engage parking brake, chock opposing wheels, and place transmission in “Park” (automatic) or first gear (manual). Double-check jack point locations in your owner’s manual; aluminum control arms can snap if jacked improperly. Non-negotiable step: Release tire pressure to 15 PSI before starting. This prevents dangerous tire bead separation during weight installation and makes the wheel easier to rotate. Always wear impact-resistant gloves—rim edges are razor-sharp and weights contain lead.
Recognizing When NOT to Attempt DIY Balancing
Do not proceed if you notice these red flags:
– Visible tire bulges (indicates internal cord damage)
– Steering wheel shake above 70 mph (likely requires dynamic balancing)
– Rim dents deeper than 1/8 inch (prevents proper weight adhesion)
– Vibration persists after 1.5 oz of weights (signals bent axle or hub)
In these cases, driving to a shop is safer than risking wheel detachment. Temporary balancing only fixes minor imbalances from weight loss or minor debris.
Step-by-Step Tire Balancing Without Specialized Equipment
Mounting Weights for Maximum Effectiveness
Position weights at the rim’s outermost edge—the farther from the hub, the greater their balancing effect. For stick-on weights, clean the rim surface with isopropyl alcohol first; grease prevents adhesion. Press weights through their backing paper to avoid fingerprints, then rub firmly for 30 seconds. With clip-ons, ensure the retainer snaps securely over the rim lip. Key insight: Place weights in the wheel’s centerline (midway between inner and outer rim edges) for best results—offset placement creates new imbalances.
Testing Your Balance Success in 3 Simple Checks
After weight installation, spin the tire 10 times and observe:
1. Random stopping points indicate successful balancing
2. Consistent vibration at 45-55 mph means add 0.25 oz more weight
3. Wobble at low speeds suggests weights are misplaced laterally
Take a 5-minute test drive on a smooth road. Vibration should disappear by 40 mph—if not, recheck weight placement. Critical reminder: Never drive over 35 mph during initial testing. If vibrations worsen, stop immediately and remove all weights to restart the process.
Costly Mistakes That Sabotage Your Tire Balance

Weight Placement Errors That Create New Problems
Placing weights on the inner rim edge (common on alloy wheels) reduces their effectiveness by 40% compared to outer-edge placement. Applying weights over valve stems or tire pressure sensors causes dangerous imbalance spikes. Using weights larger than 0.5 oz per application creates harmonic vibrations at different speeds. Most common error: Assuming the valve stem is the light spot—it’s often the heaviest point due to metal weight. Always verify with the spin test.
Environmental Factors That Skew Your Results
Wet or muddy rims prevent weight adhesion—dry thoroughly with a microfiber cloth. Cold temperatures below 40°F make adhesive brittle; warm weights in your pocket before application. Working on asphalt instead of concrete introduces subtle slopes that distort gravity-based balancing. Pro fix: Lay a carpenter’s level across the hub face before starting—if it’s not perfectly horizontal, move to a different location.
When Manual Balancing Isn’t Enough: Critical Warning Signs
Diagnosing Persistent Vibration After Balancing
If vibrations return within 50 miles, inspect for these hidden issues:
– Tire separation (visible bulges or “egg-shaped” tread)
– Worn control arm bushings (causes speed-specific shimmy)
– Bent wheel studs (creates rhythmic thumping at all speeds)
– Uneven brake rotor thickness (vibration intensifies when braking)
These require professional diagnosis—continuing to drive risks catastrophic failure.
The 30-Day Rule for Temporary Fixes
Static balancing weights typically last 2-4 weeks before shifting or detaching. Schedule professional balancing within 30 days or 500 miles. Urgent action needed: If you hear rhythmic “thumping” sounds during balancing tests, stop immediately—this indicates internal tire damage that could cause blowouts.
Preventing Future Imbalance With Smart Maintenance
Tire Rotation Secrets That Extend Balance Life
Rotate tires every 5,000 miles using the cross-pattern method (front-left to rear-right, etc.). This distributes wear evenly across all four tires, preventing localized heavy spots. After rotation, always check for loose lug nuts—a single under-torqued nut creates instant imbalance. Maintenance hack: During oil changes, spin each wheel by hand to detect developing imbalances before vibrations occur.
Seasonal Protection Against Common Imbalance Causes
In winter, flush wheel wells with a pressure washer monthly to remove salt and grime buildup. During summer, inspect tires weekly for embedded stones in the tread grooves—these add uneven weight. Before long trips, carry 2 oz of temporary weights and a valve core tool in your glovebox. Pro tip: Store spare weights in a sealed bag with silica gel to prevent adhesive drying.
Balancing a tire without a machine resolves immediate vibration issues through strategic counterweight placement at the rim’s outer edge. By identifying your tire’s natural heavy spot and applying small weights opposite that point, you restore smooth rotation using nothing more than basic hand tools. Remember this method is an emergency solution—schedule professional balancing within 30 days to prevent accelerated tire wear. For lasting results, combine this fix with quarterly tire rotations and monthly visual inspections for embedded debris. Keep a $5 weight kit in your trunk, and you’ll never let vibration ruin another road trip. The next time your steering wheel starts shaking, you’ll know exactly how to balance a tire without a machine and get back on the road safely.


