
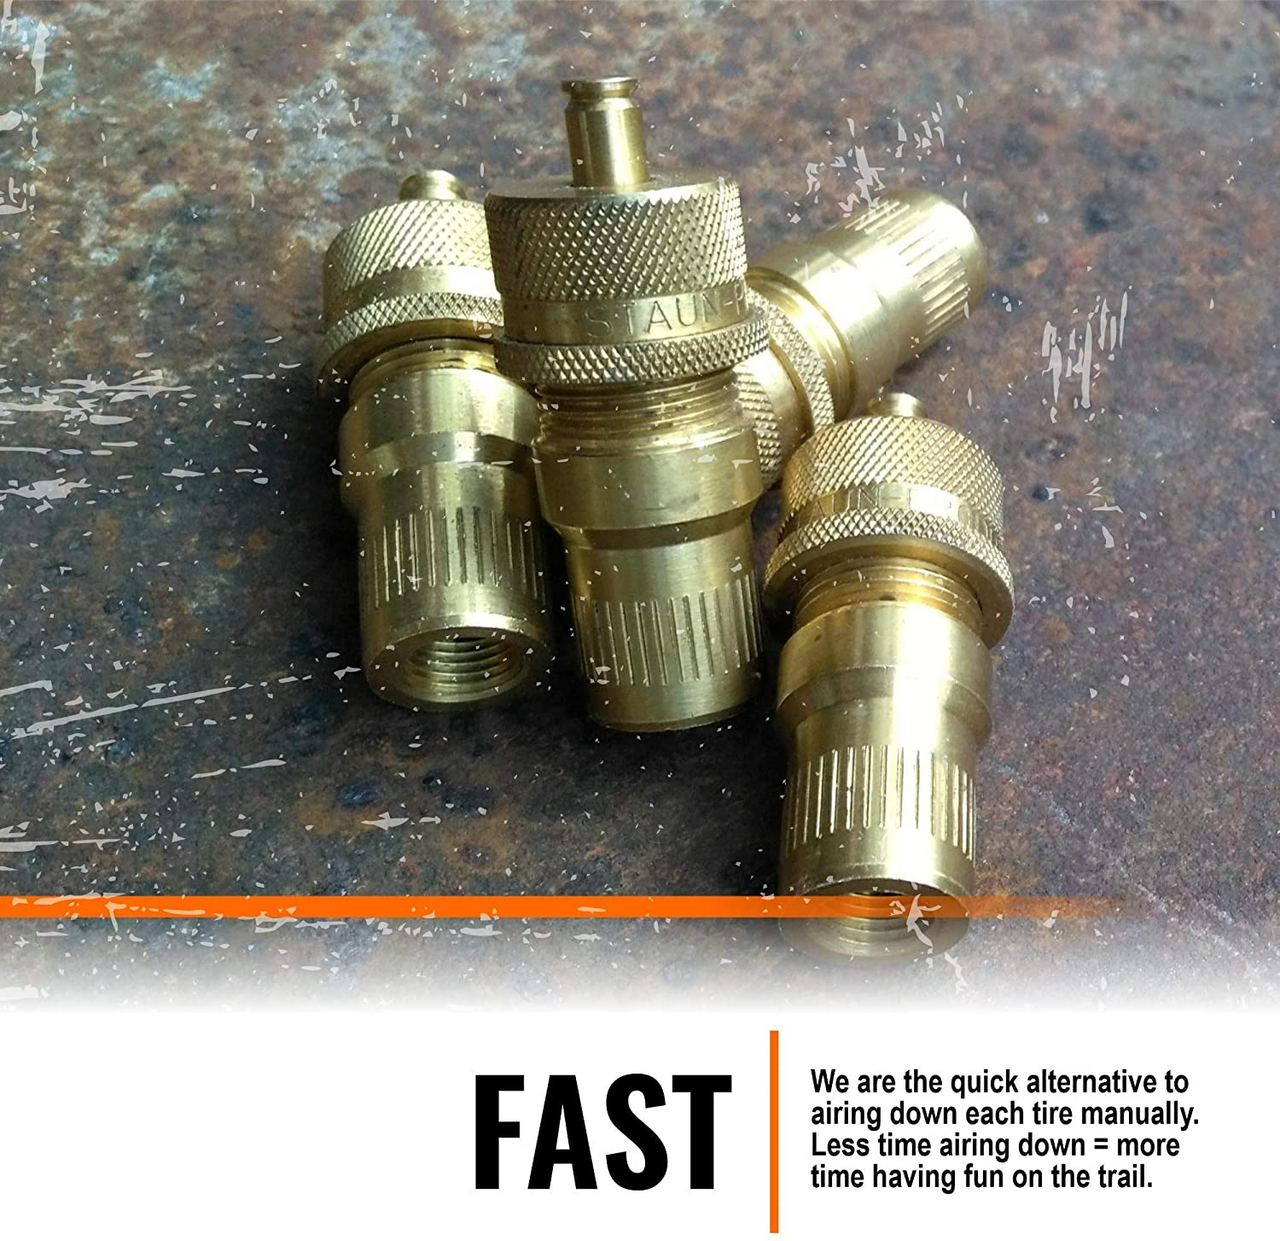
Nothing frustrates off-road enthusiasts more than arriving at the trailhead only to realize your tire pressure is wrong for the conditions. Staun tire deflators solve this problem by automatically setting your tires to your preferred pressure while you prepare for your adventure. These precision tools arrive from the factory pre-set to 18 PSI—a setting that works for maintained fire roads but falls short for serious off-roading. Learning how to adjust Staun tire deflators correctly means you can set them once and trust them to deliver perfect pressure every time, whether you’re tackling deep sand, rocky trails, or technical obstacles. Proper calibration transforms these simple tools into your most reliable off-road companions.
When you understand how to adjust Staun tire deflators properly, you’ll save valuable time at the trailhead and gain confidence that your tires will perform exactly as intended. This guide walks you through every adjustment method, common mistakes to avoid, and terrain-specific pressure recommendations so you can maximize traction and minimize the risk of getting stuck.
Staun Deflator Components and How They Work
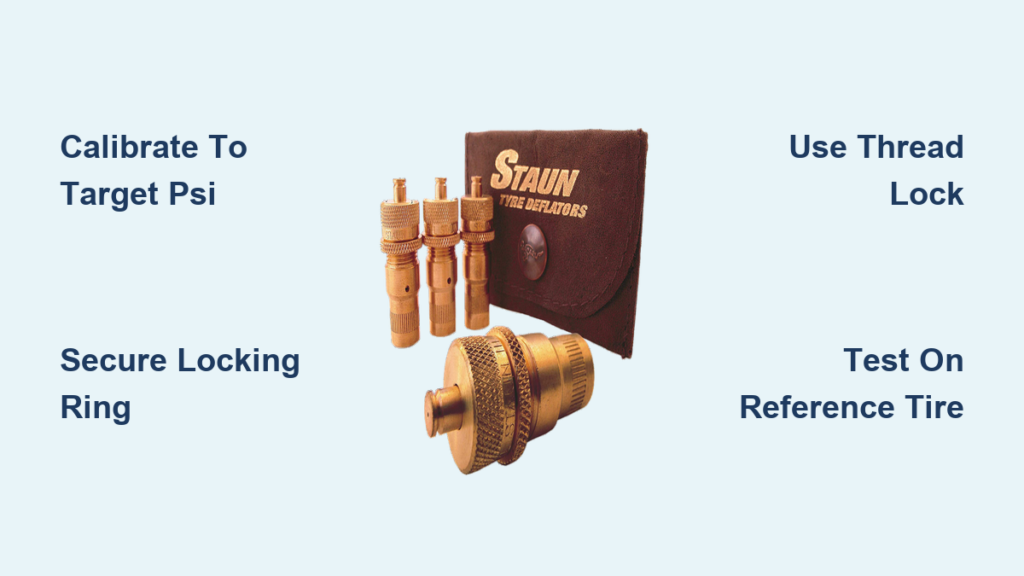
Before adjusting your Staun tire deflators, you need to understand the three critical components that make them function: the main body, adjusting cap, and locking ring. The main body screws directly onto your valve stem and contains the internal valve mechanism that controls airflow. The larger adjusting cap on top rotates to expose more or less of the internal valve pin, determining your target pressure. When you loosen this cap counter-clockwise, you expose the valve pin and allow air to escape; tightening it clockwise seals the mechanism.
The thinner locking ring serves as your calibration’s insurance policy—it prevents vibration from gradually changing your pressure setting during driving. Many users skip properly securing this ring and later wonder why their deflators seem to “drift” from their intended settings. The factory pre-set of 18 PSI works adequately for graded roads but falls short for specialized off-road applications where pressures as low as 7-8 PSI provide optimal traction.
Five-Step Precision Calibration Method

This comprehensive adjustment method guarantees accuracy and works best for first-time setup or when you demand exact pressure control for technical trails.
Deflate Your Reference Tire to Target Pressure
Start by manually deflating one tire—your reference tire—to your desired pressure. While 18 PSI matches the factory setting, most off-roaders prefer 10-15 PSI for trail use. Take your time with this step, as an inaccurate reference pressure means inaccurate calibration. A high-quality digital gauge ensures precision where cheap gauges might introduce errors.
Install Deflator in Fully Closed Position
With both the locking ring and adjusting cap screwed all the way clockwise down against the main body, attach the deflator to your reference tire’s valve stem. At this fully compressed position, no air should escape—you’ve essentially closed the valve completely. This step is critical—if air leaks at this stage, your valve stem may be damaged or contaminated.
Adjust Cap Until Air Begins Flowing
Slowly rotate the adjusting cap counter-clockwise until you hear air begin to leak from the deflator. The moment airflow starts, immediately tighten the cap clockwise by a small amount to stop the leak. You’ve now established your pressure point. Many users find that approximately half a turn of the cap equals about 3 PSI of pressure change on standard models.
Secure the Locking Ring Without Disturbing Calibration
Rotate the locking ring counter-clockwise until it contacts the adjusting cap, then give it a quarter-turn to secure the setting. Be extremely careful not to rotate the adjustment cap during this step, as even slight movement changes your pressure setting. If you accidentally move the cap, you’ll need to restart the calibration process.
Apply Thread Lock for Long-Term Stability
For maximum reliability, apply a single drop of blue thread lock compound to the locking ring threads before final tightening. This prevents vibration from loosening your setting over time while still allowing future adjustments. Some users wrap electrical tape around the assembly instead, but this creates a messy, temporary solution that interferes with storage.
Three-Step Quick Calibration Method
When time is limited or you’re confident in your technique, this streamlined approach gets you trail-ready in minutes.
Prepare Your Reference Tire
Manually deflate any tire to your exact target pressure. Using a smaller spare tire (like a motorcycle trailer tire) significantly reduces re-inflation time between calibration attempts, making this process much more efficient.
Position Components Correctly
Ensure both the lock-ring and adjusting cap are screwed all the way down onto the main body in their fully closed positions. The deflator should seal without leaking at this stage.
Attach to Reference Tire
Simply screw the deflator onto your reference tire’s valve stem. The device is now calibrated to maintain that specific pressure. Repeat this process for all four deflators, and you’re ready to hit the trail. This method works because the Staun deflator maintains pressure by exposing its valve pin at a specific mechanical position relative to your reference tire’s pressure.
Troubleshooting Common Adjustment Problems
Even properly calibrated Staun deflators can behave unexpectedly for reasons unrelated to your adjustment technique. Knowing how to diagnose these issues saves time and frustration.
One Deflator Works While Others Don’t
When one deflator maintains accurate pressure but others don’t, the problem typically relates to valve stem variations rather than the deflator itself. Different tires use different valve core designs that affect how the deflator engages. Test your “faulty” deflator on the same tire where your accurate one works—if it performs correctly there, the issue is your tire’s valve stem, not the deflator.
Deflator Won’t Start Deflating Immediately
When reinstalling a calibrated deflator on a tire inflated 5+ PSI above your target, it often won’t begin deflating immediately. This is normal behavior, not a malfunction. Simply pull up slightly on the internal deflation pin to initiate the exhausting process. The deflator will then function normally, stopping precisely at your target pressure.
Gradual Loss of Calibration Over Time
If your deflators gradually lose accuracy between trips, vibration has likely loosened the locking ring. If you didn’t apply thread lock during initial calibration, this is almost inevitable. Always apply blue thread lock to prevent this issue, and verify your calibration before important trips by testing on a reference tire.
Air Leaking Around Valve Stem Connection
Leaks at the valve stem connection typically mean the deflator isn’t fully seated. Hand-tighten more firmly to ensure the brass fitting contacts the valve stem shoulder. If leaks persist, inspect your valve stem for damage or debris that might prevent a proper seal.
Terrain-Based Pressure Recommendations
Your ideal tire pressure varies significantly based on terrain, and knowing how to adjust Staun tire deflators for different conditions maximizes performance.
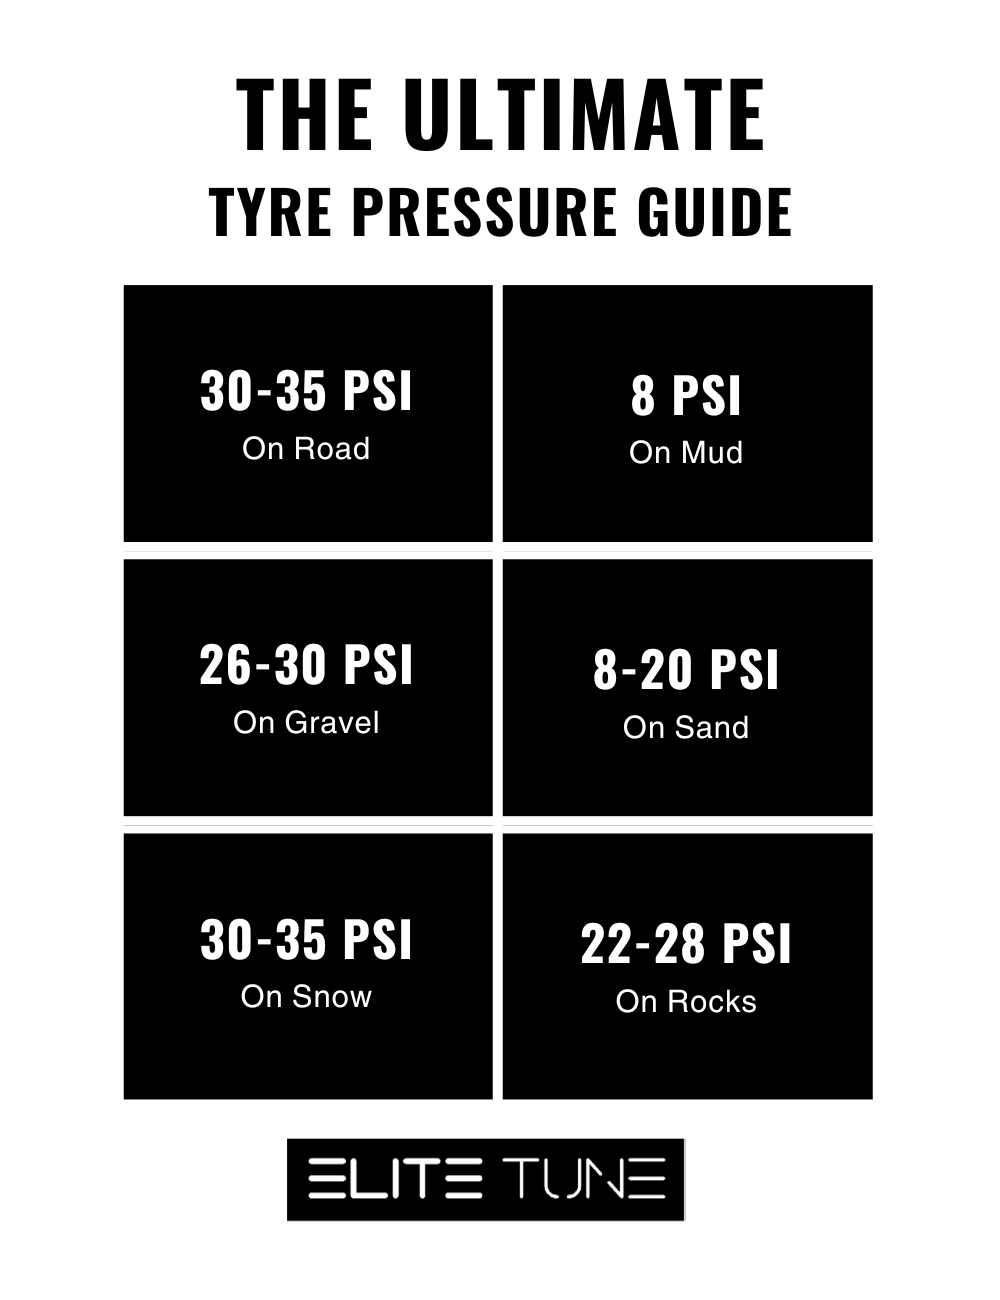
For maintained fire roads and graded trails, factory settings of 15-18 PSI provide reasonable performance with adequate sidewall stability. Deep sand and dune driving demand significantly lower pressures of 10-12 PSI to allow the tire to “float” across the surface rather than dig in. Rock-crawling on technical trails benefits from pressures as low as 7-8 PSI, though many experienced off-roaders set their deflators to 10 PSI and then manually release additional pressure at particularly difficult sections.
Critical tip: Document your successful pressure settings for different terrains. When you find a setting that works well for your vehicle and typical trails, note the exact position of the adjustment cap so you can replicate it reliably.
Maintenance and Storage Best Practices
Proper storage and maintenance keep your Staun deflators accurate and reliable for years of service.
Never store calibrated deflators loose in pockets or tool bags where they can rattle around freely. The internal components will shift position, disturbing your carefully calibrated settings. The rattling sound itself indicates components have moved—your pressure setting is no longer accurate. Store deflators in their original packaging, dedicated pouches, or any container that prevents movement.
Before each off-road trip, verify your deflators’ calibration by testing them on a reference tire. This five-minute check catches any drift that may have occurred since your last outing. Apply silicone grease to the O-rings annually to keep them supple and ensure proper sealing, especially if stored in extreme temperatures.
With your Staun deflators properly calibrated and maintained, you gain a significant advantage on the trail. Instead of manually checking and adjusting each tire with a gauge, you simply screw on your pre-set deflators and let them do the work while you attend to other preparation tasks. Take the time to learn how to adjust Staun tire deflators correctly now, and they’ll serve you reliably on every adventure that follows.


