
You’re cruising down the highway when suddenly—thump, thump, thump—your Kia Carnival develops a flat tire. As you pull over to safety, panic sets in: “Where’s the spare tire, and how do I get it out?” Unlike older models with trunk-mounted spares, the Kia Carnival stores its emergency tire underneath the vehicle, hidden beneath the cargo floor. This smart design maximizes interior space but leaves many drivers stranded trying to access it during emergencies. Knowing exactly how to remove spare tire Kia Carnival vehicles properly prevents roadside frustration and keeps you moving safely. This guide delivers precise, model-specific instructions verified through Kia’s official service documentation—no guesswork, just reliable steps that work whether you’re on a city street or rural highway.
Attempting spare tire removal without proper knowledge risks damaging your vehicle’s carrier mechanism or causing injury. Many owners waste critical minutes fumbling with tools or forcing components because they don’t understand the specialized lowering system. The entire how to remove spare tire Kia Carnival process takes just 10-15 minutes once you know the sequence, but skipping safety steps can turn a simple tire change into a costly repair. By following this guide, you’ll gain confidence in handling this crucial emergency procedure while protecting your vehicle’s integrity.
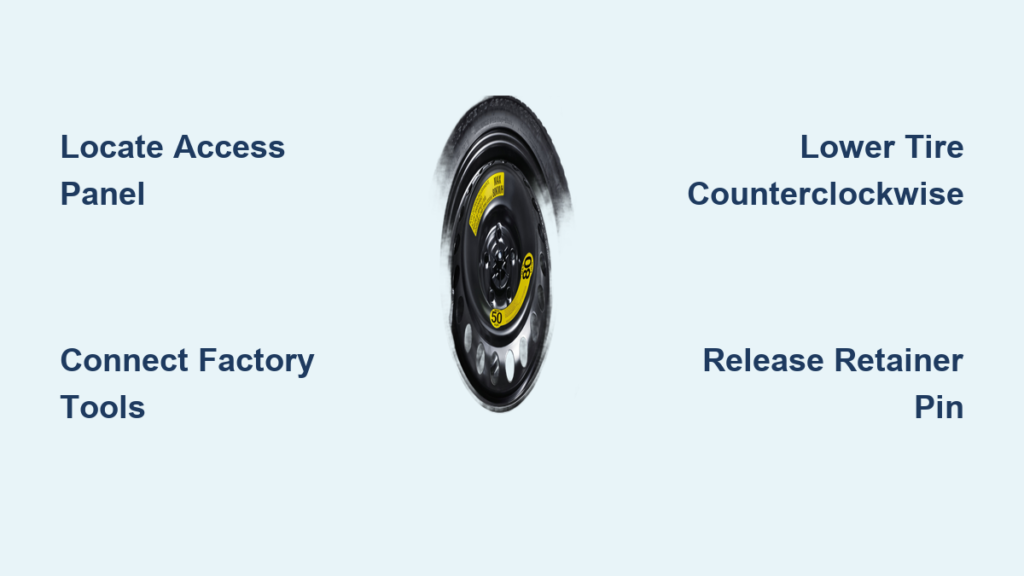
Locate Your Kia Carnival’s Hidden Spare Tire Compartment
Your Kia Carnival’s spare tire lives directly beneath the cargo area, suspended from a steel carrier attached to the vehicle’s frame. Unlike traditional trunk spares, this undercarriage storage keeps weight low for better handling while freeing up interior space. To access it, park on level ground with the parking brake firmly engaged—this prevents dangerous movement during removal. Open the liftgate fully to maximize workspace, then slide out any cargo floor panels covering the rear section. The spare tire mounting point sits centered under the cargo area, typically visible as a circular access hole in the metal floor.
Hybrid and plug-in hybrid models feature identical spare tire locations but may have slightly different cover designs near the rear seats. Check for a small rectangular or oval panel flush with the cargo floor—this conceals the critical fixing bolt you’ll operate. If your Carnival has a tool case secured by a clamp in this area, release the clamp first using the provided latch before proceeding. Never attempt removal on sloped surfaces; the carrier mechanism requires precise alignment to function correctly, and uneven terrain can cause the tire to jam mid-lowering.
Identify Your Model’s Specific Access Cover
Kia Carnival models require different approaches to expose the spare tire fixing bolt depending on powertrain type. For standard gasoline and hybrid versions, locate a black plastic cover approximately 3 inches in diameter positioned between the rear seats and liftgate. This cover snaps into place with hidden clips—press firmly on one edge with your thumb while prying opposite side gently with a flathead screwdriver. Plug-in hybrid variants feature a slightly larger rectangular cover secured by two visible clips; squeeze these clips inward while lifting the panel straight up.
If you encounter resistance, double-check for additional fasteners beneath cargo mats or storage trays. Some trims include a secondary plastic shield over the bolt mechanism that must be removed first. The resource documentation confirms both hybrid and plug-in hybrid models use identical mounting hardware once the cover is removed, so don’t be alarmed by visual differences in the access panels. Always store removed covers securely—losing this small component complicates future spare tire access.
Connect Your Factory Tools Correctly
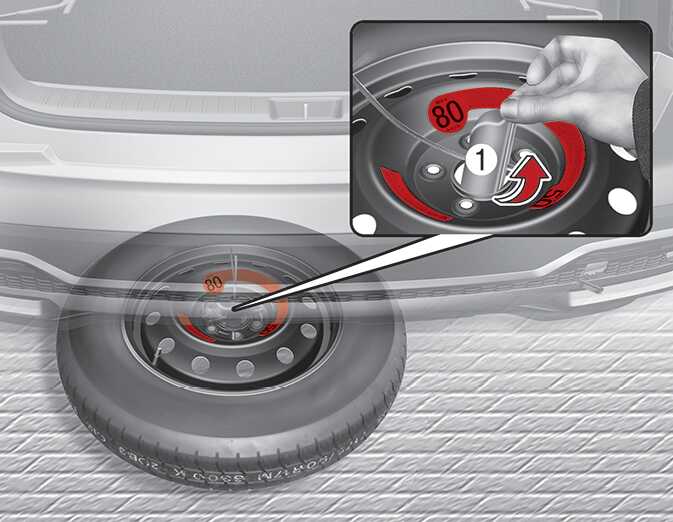
Your Kia Carnival’s emergency kit contains two specialized tools stored beneath the cargo floor: a 17mm socket and an extendable wheel lug nut wrench. These components must connect precisely to operate the spare tire mechanism. Slide the socket fully onto the wrench’s square drive end until it clicks into place—this connection bears significant torque during operation. A loose fit causes dangerous slippage that can strip the fixing bolt or injure your hands.
Position yourself facing the liftgate with your left hand stabilizing the socket on the fixing bolt. The socket fits only one way onto the bolt’s square drive; rotate it until the internal grooves align fully. Test the connection by applying gentle pressure before full rotation. Many owners waste time forcing the socket when simple realignment solves the issue. Keep your right hand on the wrench handle’s end for maximum leverage, maintaining a firm grip throughout the process to prevent tool disengagement.
Lower the Spare Tire Without Damaging the Carrier
With tools securely connected, rotate the wrench handle counterclockwise to lower the spare tire. Expect significant resistance during the first 2-3 rotations as you break initial tension—this is normal. Continue steady, smooth turns rather than jerking motions. The tire descends approximately 18 inches, so allow 15-20 full rotations before it contacts the ground. Listen for consistent mechanical sounds; grinding or clicking indicates misalignment requiring immediate stoppage.
Once the tire touches the pavement, keep turning counterclockwise for an additional 5-7 rotations. This critical step retracts the carrier cable into the housing, creating slack to pull the tire outward. Kia’s engineering documentation specifically warns against excessive rotation beyond this point—forcing extra turns can permanently damage the cable mechanism. Stop when you feel sudden resistance or hear a distinct “clunk” indicating full cable retraction. Never stand directly under the lowering tire; maintain a safe 2-foot distance to avoid injury if components fail.
Release the Spare Tire from Its Carrier Mechanism

After lowering, locate the retainer pin protruding through the spare tire’s center hub. This spring-loaded clip secures the tire to the carrier and requires careful removal. Grip the retainer’s knurled end firmly and pull straight outward—do not twist or wiggle, as this can bend the pin. On some models, you’ll need to compress a small release button while pulling; consult your owner’s manual if resistance exceeds gentle hand pressure.
Once free, slide the entire tire assembly straight back from under the vehicle. Inspect both the tire and carrier for rust, debris, or cable fraying before proceeding with your repair. Check tire pressure immediately—Kia specifies 60 PSI for temporary use—and examine the tread for embedded objects. If the spare appears damaged or underinflated, contact roadside assistance rather than risking unsafe driving. Never leave the carrier mechanism dangling after removal; secure loose cables to prevent road hazards.
Reinstall the Spare Tire Properly to Avoid Road Hazards

Storing the spare incorrectly risks catastrophic failure while driving. Begin by positioning the tire valve stem facing upward—this orientation ensures proper seating during retraction. Slide the tire straight forward under the vehicle until the wheel hub aligns with the carrier mechanism. Reinsert the retainer pin through the wheel center with firm pressure until it clicks fully into place.
Rotate the wrench handle clockwise to raise the tire, applying steady pressure. The system requires 25-30 full rotations to reach storage position. Stop immediately when you hear a distinct double-click—the resource documentation confirms this sound indicates full engagement with the locking mechanism. Never judge completion by visual height alone; insufficient tightening causes the tire to detach during driving. Test security by gently shaking the tire—zero movement should occur. Finally, replace all access covers and secure tool cases before closing the liftgate.
Avoid Critical Safety Mistakes During Removal
Kia’s service bulletins highlight two life-threatening errors during how to remove spare tire Kia Carnival procedures. First, never touch the luggage room floor immediately after driving—the metal surface transfers engine heat rapidly, reaching 140°F+ within minutes. The manufacturer’s explicit warning states this can cause severe burns even with brief contact. Always wait 20 minutes after turning off the engine or wear heat-resistant gloves when working near this area.
Second, never force rotation if the mechanism binds. Forcing turns when the tire carrier jams strips internal gears, requiring $400+ repairs. If resistance occurs, reverse direction slightly to free obstructions before proceeding. Many owners damage carriers by continuing to turn when the tire hits uneven ground—always work on level surfaces. Keep children and bystanders clear during operation; falling tools or sudden cable releases pose serious hazards.
Troubleshoot Common Spare Tire Removal Failures
Why won’t my Kia Carnival’s spare tire lower?
If the fixing bolt turns freely without lowering the tire, the cable has likely detached from its housing—a known issue in 2020-2023 models. Stop turning immediately and inspect under the vehicle. If the cable hangs loose, you’ll need professional reattachment. For minor binding, spray penetrating oil around the bolt mechanism and wait 10 minutes before retrying. Never use extension pipes on the wrench; excessive torque destroys the plastic housing.
How do I know when the spare is fully secured?
The double-click confirmation sound occurs at approximately 3 inches below the cargo floor. Visually verify the tire sits 1-2 inches higher than its lowest position. Perform the “shake test” by gripping the tire sidewall—any movement means insufficient tightening. If clicks don’t occur after 35+ rotations, check for retainer pin obstruction or debris in the carrier track.
Maintain Your Spare Tire System for Emergency Readiness
Check your spare tire monthly by lowering it 6 inches using the wrench. Verify 60 PSI pressure and inspect for cracks or dry rot—tires degrade even when unused. Apply white lithium grease annually to the fixing bolt and cable mechanism to prevent corrosion. Store the emergency kit tools in their designated cargo floor compartment; misplaced tools render the system useless during actual emergencies. Remember: Kia Carnival spares are temporary “donut” tires limited to 50 miles at 50 MPH—replace with a standard tire immediately after use.
Final Note: Mastering how to remove spare tire Kia Carnival vehicles transforms a stressful emergency into a manageable task. By following these precise steps, you protect your vehicle’s specialized carrier system while ensuring roadside safety. Always verify your spare’s condition before long trips—most failures occur because owners discover flat or damaged spares only when needed. Keep this guide in your glove compartment for quick reference, and share these critical steps with family members who drive your Carnival. For visual reinforcement, consult your owner’s manual pages 127-129 showing model-specific access points. Your preparedness today prevents dangerous roadside situations tomorrow.


