
That moment when your Jeep JL Wrangler won’t quite fit in the garage because the spare tire sticks out just a few inches too far is incredibly frustrating. If you’ve Googled “how to remove jeep jl spare tire” while standing in your driveway, you’re not alone. Thousands of JL owners face this exact problem, especially those with standard two-car garages that barely accommodate the Wrangler’s 188-inch length (with spare). Removing your spare tire can provide that crucial 4-6 inches of rear clearance you need, but the JL’s integrated camera system makes this process different from previous Jeep models. This guide walks you through every step of safely removing your Jeep JL spare tire while addressing the unique camera considerations that could leave you with an obstructed rearview if handled incorrectly.
Unlike older Jeep models, the JL Wrangler’s spare tire mount houses both your spare wheel and the rearview camera as a single integrated assembly. This means simply taking off the tire leaves that camera sticking out awkwardly where your spare used to be. Whether you’re removing your spare for garage clearance, aesthetic modifications, or planning to install an aftermarket delete kit, understanding this integrated system before you start prevents costly mistakes. With the right tools and about 30-60 minutes of your time, you can successfully complete this task while making informed decisions about camera functionality and spare tire storage alternatives.
Why Jeep JL Owners Remove Rear Spare Tires (Clearance & Modifications)
Jeep JL owners remove their rear spare tires primarily for garage clearance issues, aesthetic preferences, or to accommodate aftermarket modifications. The standard JL Unlimited measures approximately 188 inches long, while many standard residential garages max out at 18-20 feet deep—leaving minimal room when factoring in driveway slope and parking position. Removing the spare tire typically gains you 4-6 inches of crucial rear clearance, making the difference between fitting comfortably and constantly worrying about hitting the garage door.
How Much Clearance You Actually Gain
The exact clearance improvement depends on your tire size and mounting configuration. For a standard 33-inch spare tire, you’ll typically gain 4-5 inches of rear extension reduction. If you’ve upgraded to larger 35-inch tires, that number jumps to 5-6 inches of additional clearance. Measure from the rear of your bumper to the furthest point of the spare tire, then compare this to your garage depth minus the distance from your bumper to the garage wall when parked. This simple calculation determines whether spare removal solves your specific clearance problem.
Common Modification Goals That Require Spare Removal
Many JL owners remove their spare tires as part of larger modification projects. Installing certain rear bumper upgrades often requires spare tire removal first, as some aftermarket bumpers have integrated spare carriers with different mounting systems. Off-road enthusiasts sometimes relocate the spare tire to a roof rack to improve departure angles for serious trail driving. Others remove the spare entirely to install a sleeker, more integrated rear appearance that mimics the look of Jeep’s factory “Spare Tire Delete” option available on some trims.
Essential Tools for Jeep JL Spare Tire Removal
Gathering the right tools before starting prevents frustration mid-process and ensures you can handle unexpected complications like missing locking lug keys. The basic toolkit requires minimal investment but makes the difference between a smooth removal and a stalled project.
Must-Have Basic Tools
- Lug wrench or 21mm socket (standard size for Jeep lug nuts)
- Breaker bar or 1/2-inch drive ratchet for stubborn nuts
- Flashlight or work light for visibility under the carrier
- Work gloves to protect hands from sharp edges
- Wheel chocks for safety (even though you’re working at the rear)
Specialized Tools for Locking Lug Nuts
If your JL came with the factory locking lug nut system (common on higher trims), you’ll need either the original key or alternative removal tools. The special key typically stores in your glove compartment or center console. If missing, prepare one of these alternatives:
- Impact socket one size smaller than the locking nut (usually 19mm for a 21mm nut)
- Heavy-duty mallet or dead blow hammer
- Vise-grip pliers as a backup removal method
- Angle grinder with cutting wheel (last resort option)
Step-by-Step: Loosening Jeep JL Spare Tire Lug Nuts Safely
Identifying Your Spare Tire Mounting Configuration
Your Jeep JL spare tire attaches to the carrier using either two standard lug nuts or a combination of one standard nut and one locking nut. Locate these fasteners at the 3 o’clock and 9 o’clock positions on the spare wheel’s mounting surface. The locking nut typically features a distinctive cap that prevents standard socket engagement. If you see this cap but don’t have the key, don’t force a standard socket—that’s how you strip the locking mechanism and create a much bigger problem.
Proper Lug Nut Loosening Technique
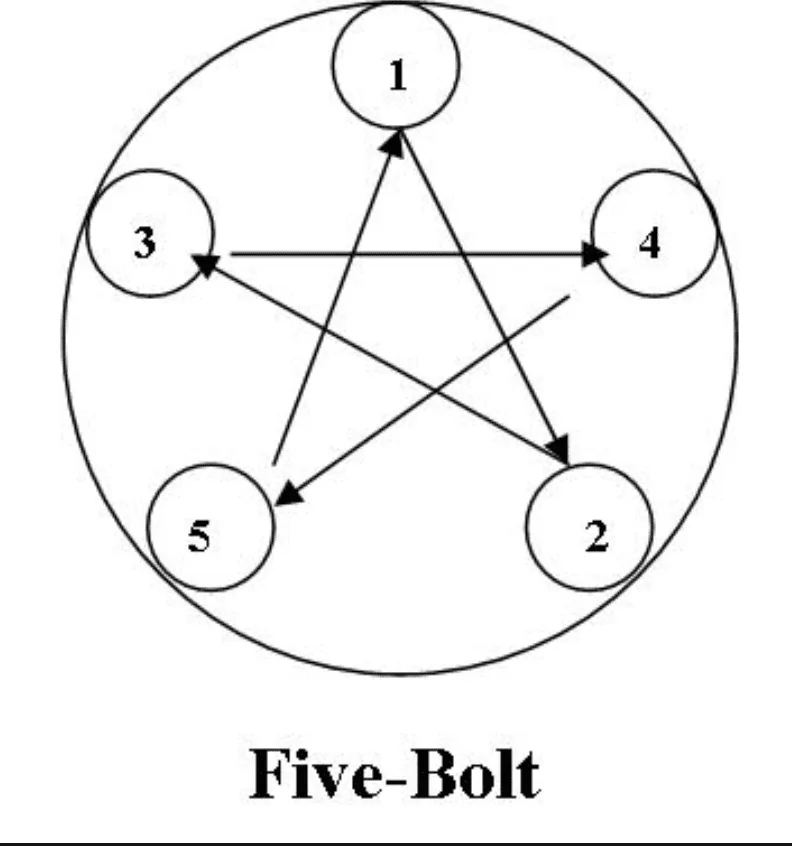
Always loosen lug nuts while the spare tire remains fully mounted and under tension. Position your socket securely on the lug nut, then push downward using your body weight rather than pulling (this gives you more control and reduces injury risk). Break each nut loose with about 1/4 turn counter-clockwise—don’t remove them completely yet. If nuts are extremely tight, spray penetrating oil around the base and let it sit for 10-15 minutes before retrying. Pro Tip: Loosen nuts in a star pattern (opposite corners) to prevent binding and potential damage to the mounting studs.
Removing Locking Lug Nuts Without the Original Key
Socket Method for Locking Nut Removal
The most effective DIY approach uses a standard impact socket that’s one size smaller than the locking nut. For a typical 21mm locking nut, use a 19mm socket. Place the socket squarely on the locking mechanism, then strike it firmly with a mallet to seat it deeply into the locking cap. Once fully seated, attach your ratchet and turn counter-clockwise to break the nut loose. This method usually destroys the locking nut cap but preserves the mounting stud integrity. Expect resistance—the first turn often requires significant force.
Alternative Removal Methods When Socket Fails
If the socket method doesn’t work, try these alternatives in order of least to most invasive:
-
Vise-Grip Technique: Partially deflate the spare tire to reduce tension on the mounting surface, then clamp heavy-duty vise-grip pliers onto the locking nut’s outer edge. Apply steady, increasing pressure while turning counter-clockwise.
-
Drilling Method: As a last resort before grinding, drill two small holes (1/8 inch) on opposite sides of the locking nut, then insert an appropriately sized Allen wrench to provide purchase for turning.
-
Angle Grinder Solution: When all else fails, carefully cut a flat surface on the locking nut with an angle grinder, then use a standard wrench. Critical Warning: Wear full eye protection and work slowly to avoid damaging the wheel or surrounding components—this method requires significant skill to execute safely.
Lowering and Detaching Your Jeep JL Spare Tire Properly
Safe Tire Lowering Procedure
With all lug nuts fully removed, you’re ready to lower the spare. Place one hand firmly on the top of the tire and the other supporting the bottom as you gently guide it away from the mounting studs. The tire will likely tilt forward as it comes free—control this movement to prevent it from swinging unexpectedly. If the tire seems stuck, gently rotate it side-to-side while applying downward pressure; never strike the tire or wheel to dislodge it.
Handling Heavy Spare Tires Safely
Jeep spare tires weigh between 50-70 pounds depending on size. To avoid back injury, bend at the knees with a straight back when lifting. If working alone, lower the tire onto a rolling floor jack or dolly rather than trying to carry it immediately. Pro Tip: Place a folded blanket or piece of plywood on your garage floor where the tire will land—this cushions the impact and prevents potential damage to concrete or the tire itself.
What Happens to the Rear Camera After Spare Tire Removal
Understanding the Integrated Camera System
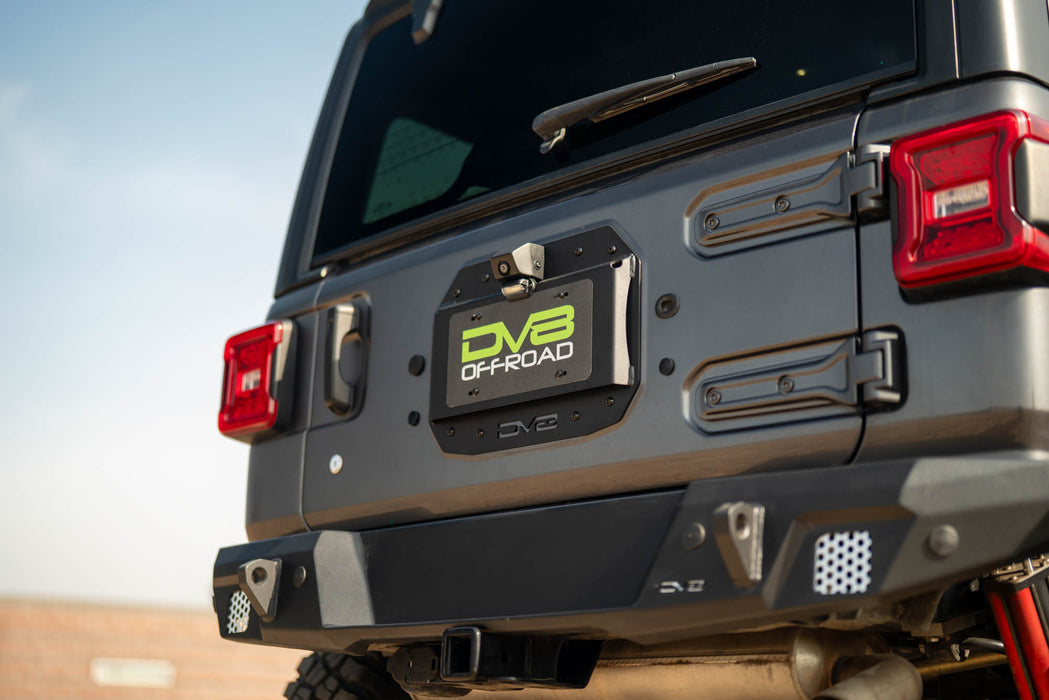
Unlike previous Jeep models, the JL’s rearview camera mounts directly to the spare tire carrier bracket, not the spare wheel itself. This means when you remove the spare tire, the camera remains fully mounted and operational but now protrudes awkwardly where your tire used to be. The camera housing typically extends 3-4 inches beyond the bumper line, creating both an aesthetic issue and a functional problem.
Camera Functionality Issues You’ll Encounter
Without the spare tire in place, your rear camera will continue operating but with a significant visual obstruction. The camera’s field of view now includes the mounting bracket itself and potentially part of the spare tire carrier mechanism, creating blind spots in your rearview display. This obstruction compromises safety features like parking assist and backup collision detection. Critical Warning: Do not ignore this issue—driving with an obstructed rear camera violates safety regulations in many states and creates genuine accident risks.
Installing Aftermarket Spare Tire Delete Kits for Clean Look

Top Delete Kit Options Compared
Several manufacturers offer complete solutions that replace the entire spare tire carrier assembly with a streamlined alternative:
- Artec Engineering: Known for precision fitment and clean integration with factory styling ($250-$350)
- Metalcloak: Offers delete kits with integrated camera relocation ($300-$400)
- American Adventure Lab: Provides budget-friendly options with basic functionality ($180-$250)
Installation Considerations for Delete Kits
Most quality delete kits include a replacement bracket that mounts directly to your JL’s existing holes, with a relocated camera position that sits flush with the bumper line. Installation typically requires transferring the camera wiring harness and securing the new assembly with provided hardware. Pro Tip: Before purchasing, verify whether the kit includes wiring extensions—some cheaper options require you to splice or extend your factory camera wiring, adding complexity to the installation.
Alternative Spare Tire Storage Solutions for Jeep JL
Under-Floor and Interior Storage Options
When removing your rear-mounted spare, consider these practical storage alternatives:
- Cargo Floor Compartments: Many JL owners install under-floor storage solutions that accommodate smaller spare tires (typically 31-32 inch diameter)
- Rear Seat Storage: Folding down the rear seats creates space for a deflated spare tire along the vehicle’s length
- Behind-Seat Solutions: Custom mounting brackets secure a spare vertically behind the front seats
Portable Emergency Solutions
For those who prefer not to carry a full spare, these emergency alternatives provide peace of mind:
- Tire puncture sealant kits with integrated air compressors
- Portable air compressors with multiple PSI settings
- Compact tire repair plugs for temporary fixes
- Emergency roadside assistance subscriptions as backup
Common Mistakes When Removing Jeep JL Spare Tires (And How to Avoid Them)
Camera-Related Errors to Prevent
The most frequent mistake JL owners make is removing the spare tire without addressing the camera system, leaving them with an awkward protrusion and obstructed view. Another common error is attempting to relocate the camera without proper wiring extensions, resulting in damaged harnesses or non-functional cameras. Pro Tip: Before removing your spare, test your camera functionality with the tire partially lowered—this reveals potential obstruction issues before you fully commit to removal.
Physical Damage Risks During Removal
Many DIYers damage their spare tire carriers by using excessive force when loosening lug nuts or improperly supporting the tire during removal. Stripped mounting studs require complete carrier replacement, costing hundreds of dollars. Always use the correct socket size and proper technique rather than brute force. If a nut won’t budge after reasonable effort, stop and seek professional help—forcing it will only create bigger problems.
Final Checklist: Complete Jeep JL Spare Tire Removal Process
Step-by-Step Verification Before Completion
Follow this sequence to ensure a successful removal:
- Confirm you have all necessary tools including locking lug key if applicable
- Loosen all lug nuts while spare remains mounted
- Remove lug nuts completely and safely lower spare tire
- Address camera functionality immediately (either install delete kit or plan modification)
- Store spare tire properly in designated location
- Test rear camera functionality before driving
Post-Removal Maintenance Tips
After removing your spare tire, check the mounting studs periodically for rust or corrosion, especially if storing the spare long-term. Apply anti-seize compound to the studs before reinstalling the spare to prevent future removal difficulties. If using an alternative storage location for your spare, rotate it quarterly to prevent flat spots and check inflation monthly—tires slowly lose pressure even when not in use.
Removing your Jeep JL spare tire properly gives you that crucial garage clearance while maintaining safety and functionality. By understanding the integrated camera system and preparing for both the removal process and its consequences, you avoid common pitfalls that leave JL owners with awkward protrusions and compromised safety features. Whether you’re storing your spare elsewhere or installing a sleek delete kit, this process transforms your JL’s rear profile while solving real-world parking challenges. Most importantly, you’ve gained that precious 4-6 inches of clearance that makes the difference between a stressful parking job and pulling into your garage with confidence.


