Your Honda Civic’s Tire Pressure Monitoring System alerts you when tire pressure drops below safe levels, but many drivers struggle to interpret these warnings or check pressure manually. Proper tire inflation directly impacts your vehicle’s handling, fuel economy, and safety on the road. Whether you’re seeing a warning light illuminate or simply want to verify your tire pressure, understanding how to access this critical information ensures you’ll never drive with dangerously underinflated tires. This guide explains exactly how to see tire pressure on your Honda Civic—both through the monitoring system and manual checks—so you can maintain optimal performance and safety.
Unlike some vehicles with direct pressure sensors that display exact PSI values, your Honda Civic uses an indirect monitoring system that compares wheel rotation characteristics to detect significant pressure loss. This means the system won’t show specific pressure readings for each tire but will alert you when one or more tires fall below recommended levels. Throughout this article, you’ll learn how to recognize warning signs, find your Civic’s specific pressure requirements, perform accurate manual checks, and calibrate the system after maintenance—giving you complete control over your tire pressure monitoring.
Recognize Your Honda Civic’s TPMS Warning Light
When your Honda Civic detects low tire pressure, the low tire pressure/TPMS indicator illuminates on your dashboard as an immediate visual alert. This symbol appears as an exclamation mark inside a U-shaped bracket, often with “TPMS” text nearby for clarity. Unlike some vehicles that display specific PSI readings, your Civic’s system only indicates when pressure has dropped significantly below recommended levels—typically 25% or more.
Several factors affect when this warning appears. The system requires driving at speeds above 15 mph for several minutes before it can detect pressure issues, meaning short trips around town might not trigger the warning even with underinflated tires. If you’ve recently driven through extreme temperature changes—such as moving from a heated garage to freezing outdoor conditions—the warning might appear temporarily as tire pressure adjusts. Pro tip: When the TPMS light comes on after cold weather, check your pressure after the tires have warmed up from driving for 15-20 minutes at highway speeds.
After battery replacement or disconnection, multiple dashboard indicators—including the TPMS light—may illuminate simultaneously. This is normal behavior, not an actual tire problem. Simply drive for a few minutes above 12 mph, and these indicators should turn off automatically. If the warning persists after this driving cycle, have your tires checked immediately.
Locate Your Honda Civic’s Recommended Tire Pressure
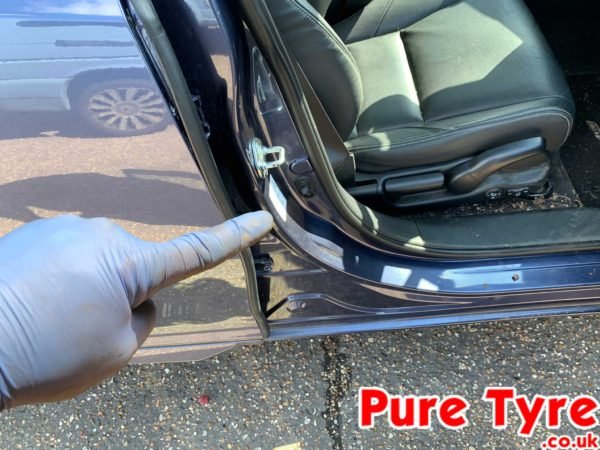
Finding your Civic’s exact pressure specifications is crucial for proper inflation and TPMS calibration. The manufacturer’s recommended cold tire pressure for all four tires appears on the tire and loading information label, typically located on the driver’s side door jamb. This label specifies pressure based on your vehicle’s configuration and the original tire size, not the maximum pressure listed on your tire’s sidewall.
Critical distinction: The maximum pressure on your tire’s sidewall represents the highest safe pressure the tire can hold, while the door jamb specification indicates the optimal pressure for your Civic’s handling, fuel economy, and tire wear. Always inflate to the door jamb recommendation, not the sidewall maximum.
“Cold” tire pressure means checking when tires haven’t been driven for at least three hours or have been driven less than one mile at moderate speed. Checking pressure when tires are warm can give readings 4-6 PSI higher than actual cold pressure, potentially leading to dangerous underinflation once tires cool. For accurate monthly checks, test pressure first thing in the morning before driving.
Perform Accurate Manual Tire Pressure Checks

Manual pressure checks remain essential despite your Civic’s TPMS, as the system doesn’t detect gradual pressure loss or overinflation. Follow these steps for reliable readings:
- Purchase a quality digital or analog tire pressure gauge ($5-$15 at auto parts stores)
- Remove the valve cap from each tire’s valve stem
- Press the gauge firmly onto the valve stem until the hissing stops
- Read the pressure display (digital) or measurement bar (analog)
- Compare to the door jamb specification
- Add or release air as needed, rechecking frequently
- Replace valve caps to prevent slow leaks
Common mistake: Many drivers add air until the gauge matches the recommended pressure without rechecking. Air compressors at gas stations often deliver inconsistent pressure, so always verify with your personal gauge after inflating. Check all four tires and your spare (if equipped with a TPMS sensor), as even one underinflated tire affects handling.
Calibrate Your TPMS After Pressure Adjustments
Your Honda Civic requires TPMS calibration after any tire pressure change, rotation, or replacement to reset the system’s baseline. Proper calibration ensures accurate future warnings. Before starting, confirm all tires are inflated to the exact door jamb specification when cold.
For Models with 7-Inch Touchscreen
- Press the home button to access the main menu
- Select Settings using the left selector wheel
- Scroll to “Vehicle Settings” and press to enter
- Find “TPMS Calibration” in the menu and select it
- Choose “Calibrate” (not “Cancel”) and confirm
- Drive 30 cumulative minutes between 31-62 mph
If “Calibration failed to start” appears, repeat steps 4-5. During calibration, the TPMS light may briefly illuminate when starting the car but should turn off while driving.
For Models with 9-Inch Touchscreen
- Set power mode to ON (do not start engine)
- Press the menu button to access main interface
- Select “Vehicle Settings”
- Navigate to “TPMS Calibration” and select it
- Choose “Calibrate” and confirm
- Complete the same 30-minute driving requirement
Pro tip: Calibration driving doesn’t need to be continuous—you can accumulate time during regular commutes. Maintain speeds between 31-62 mph for optimal calibration efficiency.
Understand TPMS Limitations and Special Cases

Your Civic’s TPMS has important limitations that affect when it can accurately monitor pressure:
- Compact spare tires: The system cannot function with a spare installed due to different size and rotation characteristics
- Tire chains: Remove chains before calibration, as they interfere with wheel rotation measurements
- Mixed tire types: Using different tire brands, models, or sizes prevents accurate comparison between wheels
- Overinflation: The system only warns about underinflation, never overinflation
If your TPMS light remains on despite properly inflated tires, potential causes include:
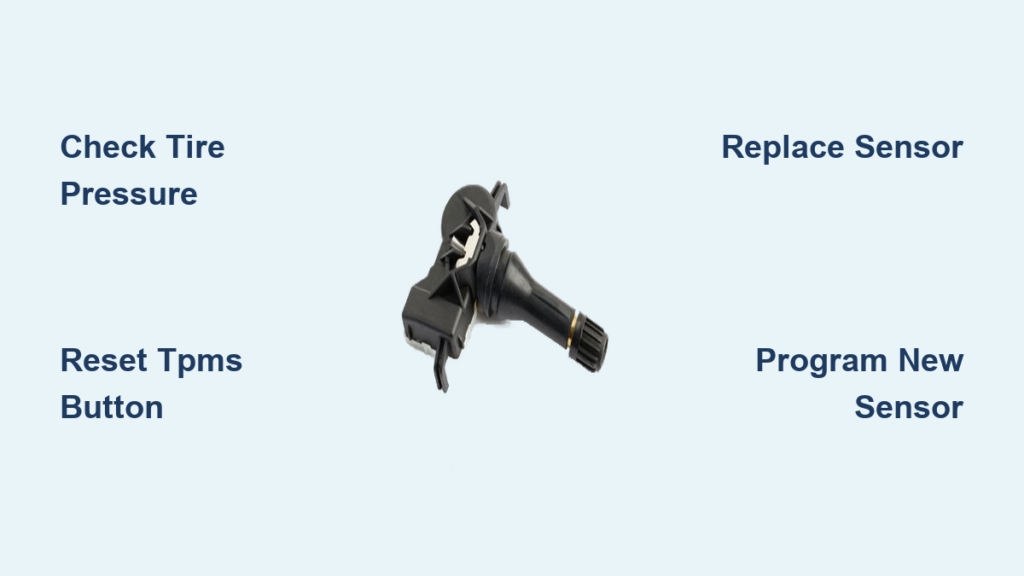
– A damaged or failed tire pressure sensor (battery life typically 5-10 years)
– Recent tire replacement with different specifications
– System requiring recalibration after seasonal tire changes
Expert note: Winter tire pressures may require slight adjustments from all-season recommendations—consult your winter tire manufacturer’s guidelines rather than assuming the door jamb specification applies directly.
Maintain Optimal Tire Pressure Year-Round
Tire pressure naturally fluctuates with temperature changes—approximately 1 PSI for every 10°F temperature change. Check pressure monthly and before long trips, especially during seasonal transitions. When temperatures drop significantly in fall, you’ll likely need to add air to maintain proper pressure.
Properly inflated tires deliver multiple benefits:
– Improved fuel economy: Underinflated tires can reduce MPG by up to 3%
– Enhanced safety: Correct pressure provides optimal braking and handling
– Extended tire life: Even tread wear prevents premature replacement
– Better ride comfort: Proper inflation absorbs road imperfections effectively
Critical maintenance habit: Combine monthly pressure checks with visual inspections for cuts, punctures, or embedded objects. Rotate tires every 5,000-7,500 miles as recommended by Honda to ensure even wear across all positions.
By understanding how to see tire pressure on your Honda Civic through both the monitoring system and manual checks, you’ll maintain optimal safety and performance while avoiding unnecessary tire wear. Remember that the TPMS is a warning system, not a replacement for regular manual pressure verification—combining both approaches keeps you driving safely with properly inflated tires year-round.