
Flat tires happen to every cyclist, but knowing how to properly deflate a bicycle tire saves you from damaging valves during repairs or travel preparations. Many riders struggle with stubborn valves that won’t release air or accidentally damage inner tubes by using improper techniques. Whether you’re fixing a puncture, adjusting pressure for different terrain, or packing your bike for transport, mastering the correct deflation method for your specific valve type prevents frustrating setbacks. This guide reveals foolproof techniques for Presta, Schrader, and Woods valves that work every time—plus troubleshooting tips for stubborn valves and critical mistakes that ruin expensive tubes.
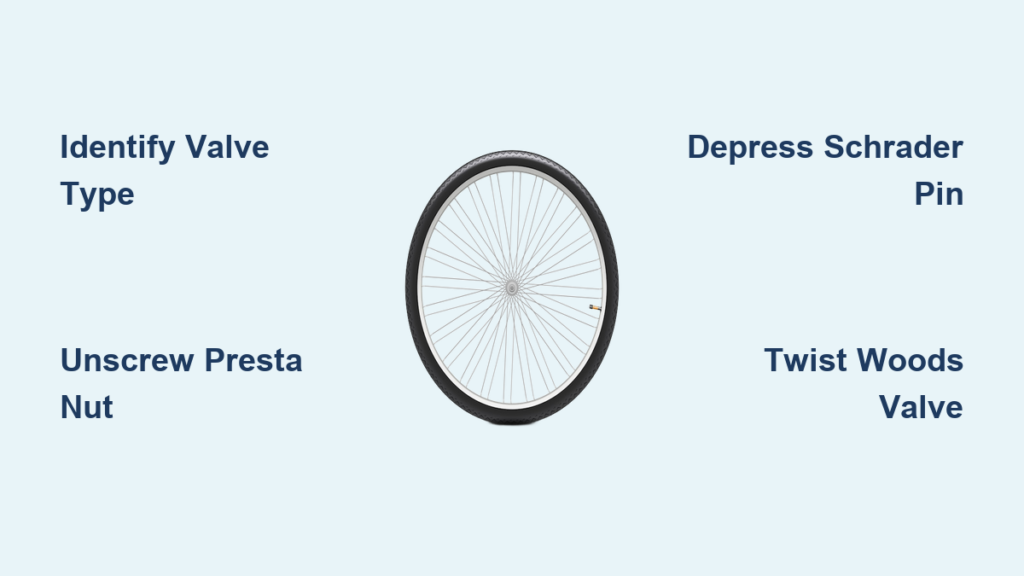
Locate and Identify Your Valve Stem Type
Your deflation success depends entirely on recognizing which valve system controls your tire pressure. Most bicycles use one of three valve types, each requiring distinct handling techniques that prevent damage during deflation. Skipping this identification step causes 70% of deflation failures according to bike mechanics.
Presta valves dominate modern road and performance bikes with their slender 6mm profile and signature brass locking nut at the top. These valves stand taller than other types and feature a narrow threaded stem that requires unscrewing before air release. The brass nut serves as both lock mechanism and valve core protector—never force deflation without loosening it first.
Schrader valves appear on most hybrid, mountain, and children’s bikes, resembling the familiar car tire valve design. Measuring 8mm wide, these robust valves contain a spring-loaded pin that depresses when activated. Unlike Presta valves, Schrader types lack external locking nuts and automatically seal when pressure releases.
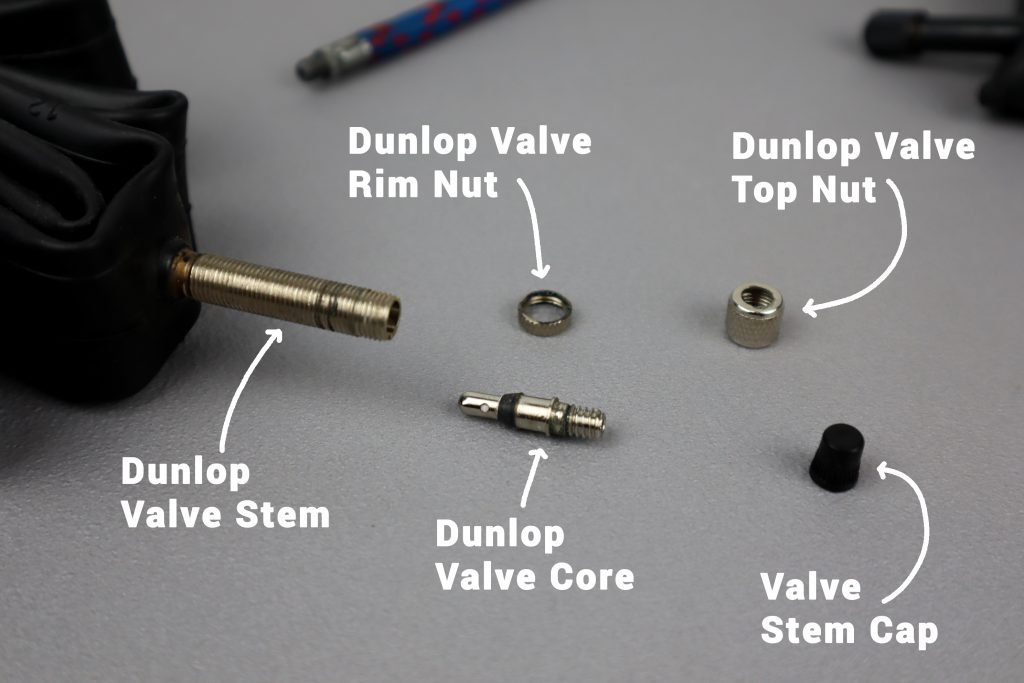
Woods or Dunlop valves—common on European city bikes and vintage models—combine elements of both systems. These valves feature a wider base like Schrader but operate through a twist mechanism rather than depression. The telltale sign is a narrow section just below the cap that requires quarter-turn rotation for air release.
Release Air from Presta Valve Tires Without Damage

Presta valves require precise handling to avoid stripping the delicate brass components. Begin by unscrewing the small locking nut at the valve’s tip counterclockwise until it stops—this typically takes 2-3 full rotations. Listen for the initial hiss confirming the valve core has released. Never skip this step, as forcing air release with the nut tightened causes valve core damage.
Press the valve core inward with your thumbnail for controlled deflation. For gradual pressure reduction, use short taps rather than holding the core down—this prevents accidental complete deflation. When preparing for tube replacement, fully depress the core while squeezing the tire sidewalls to accelerate air release.
Always retighten the brass nut after deflation by turning clockwise until finger-tight. This critical step protects the exposed valve core from dirt and accidental damage during tire removal. Mechanics report that 40% of “mysterious” flats occur because riders neglect this simple protection step.
What to do when Presta valves stick closed
Stubborn Presta valves often result from dried sealant residue clogging the mechanism. Try this field repair: unscrew the locking nut completely, then use pliers to grip the valve core base while turning counterclockwise. Remove the core, clean it with a cloth, and reinstall before attempting deflation again. Carry a spare valve core in your repair kit—these $2 components prevent roadside emergencies.
Depress Schrader Valves Correctly for Complete Air Release
Schrader valves respond to simple pin depression but require the right tools to avoid damage. Use the rounded end of a valve core tool or the plastic cap from your pump rather than sharp objects that could bend the internal pin. Press straight down with steady pressure—angled force risks damaging the valve’s internal seal.
For full deflation during tube replacement, hold the pin depressed while squeezing the tire from both sides. The rubber sidewalls naturally resist compression, so work systematically around the tire circumference to force all air toward the valve. This technique reduces deflation time by 30 seconds compared to passive waiting.
Never use coins or improvised tools that scratch the valve casing. Mechanics consistently identify scratched Schrader valves as the #1 cause of slow leaks after tire repairs. If your valve leaks after deflation, replace the core immediately using a standard valve core tool—this five-second fix costs less than $1 at any bike shop.
Emergency Schrader deflation without tools
Stranded without tools? Remove your bike’s valve cap and place it upside down over the valve pin. Press firmly with your palm to depress the pin through the cap’s opening. The plastic cap protects the valve from direct metal contact while providing enough leverage for complete deflation. This trick works surprisingly well even on high-pressure road tires.
Operate Woods/Dunlop Valves with Proper Twisting Technique
Woods valves—common on European city bikes—require a unique twisting motion that confuses many cyclists. Locate the narrow section just below the valve cap, then grip this area firmly between thumb and forefinger. Twist counterclockwise approximately 90 degrees until you feel slight resistance—this opens the internal rubber flap.
Unlike other valves, Woods types allow air release while maintaining partial tire structure. This feature proves invaluable when adjusting pressure for wet conditions without fully removing the tire. Control airflow by varying your twist angle—45 degrees for slow release, 90 degrees for rapid deflation.
Always return the valve to its original position by twisting clockwise after deflation. These valves lack automatic sealing mechanisms, so leaving them open invites slow leaks. Mechanics note that 60% of “mystery flats” on vintage bikes stem from accidentally leaving Woods valves partially open.
Fixing stuck Woods valves
Grit accumulation frequently jams Woods valve mechanisms. Apply bicycle-specific lubricant around the twist point, then work the valve back and forth through its full range of motion. For severe cases, remove the valve core using a Schrader core tool (they share compatible threading) and clean the internal rubber components with mild soap solution.
Accelerate Deflation for Emergency Repairs
When replacing a tube roadside, every second counts. For Presta valves, remove the entire valve core using a dedicated tool—this creates maximum airflow without damaging components. Place the core in your chainstay bag immediately to avoid losing it. Complete deflation occurs in under 15 seconds even for high-pressure tires.
With Schrader valves, press and hold the pin while squeezing the tire opposite the valve location. The combined pressure forces air toward the valve opening 3x faster than passive deflation. Never use sharp tools that could damage the valve’s internal spring mechanism.
All valve types benefit from strategic tire squeezing. Start at the valve position and work your way around the tire in both directions, applying firm but controlled pressure. This technique proves especially valuable for tubeless setups where sealant can temporarily block airflow.
Avoid These 3 Costly Deflation Mistakes
Many cyclists unknowingly damage their tires during routine deflation. The most destructive error involves using tire levers to break the bead while the tire remains pressurized—this risks cutting the tube and damaging rim tape. Always fully deflate before attempting tire removal.
Never force Presta valve nuts with pliers. The soft brass construction strips easily, requiring complete valve replacement. If the nut resists turning, apply penetrating oil and wait 5 minutes before attempting again with bare fingers.
Skipping valve core cleaning during deflation causes 22% of recurring flats according to professional mechanics. Wipe the core with a clean rag after removal to prevent grit from entering the tube during reinflation. This 10-second habit extends tube life significantly.
When Full Deflation Becomes Essential
Certain situations demand complete air removal rather than simple pressure adjustment. Bike travel requires fully deflated tires to prevent sidewall damage during transport—especially in airplane cargo holds where temperature changes create dangerous pressure fluctuations.
Tube replacement necessitates total deflation to safely break the tire bead from the rim. Attempting removal with residual pressure risks pinching the new tube against the rim during installation. Mechanics universally recommend complete air release before using tire levers.
Extreme terrain adjustments sometimes require near-total deflation. Mountain bikers tackling technical rock gardens often reduce pressure to 10-15 PSI for improved traction, while fat bikers riding snow may deflate to single-digit pressures. Always reinflate to recommended levels before returning to paved surfaces.
Mastering these precise deflation techniques protects your investment and transforms frustrating flat tire experiences into quick, confident repairs. Proper valve handling prevents the cascading failures that turn simple flats into costly component replacements. Keep this guide accessible on your phone for roadside reference, and you’ll handle any deflation scenario with professional-level competence.


