

You’ve searched for “how to make tire covers” because you need to protect your tires during storage, but discovered most online tutorials require specific materials you don’t have. You’re not alone—over 68% of DIYers abandon tire cover projects when they realize commercial patterns demand specialized fabrics and sewing skills. What if you could create effective tire protection using items already in your garage? This guide reveals how to make functional tire covers using common household materials when traditional supplies aren’t available. You’ll learn to repurpose plastic sheeting, trash bags, and even old tarps into weather-resistant covers that prevent UV damage and moisture buildup—without sewing machines or expensive tools. Most solutions take under 30 minutes and cost less than $5.
Why Standard Tire Cover Methods Fail for DIYers
Commercial tire cover tutorials often assume access to waterproof fabric, industrial sewing machines, and precise measurements. When you try these methods with limited resources, you’ll face three critical failures: fabric stretching during cutting, seams bursting under wind pressure, and improper drainage causing water pooling. These flaws accelerate tire dry rot instead of preventing it. The solution requires adapting techniques for non-specialized materials while maintaining critical protection features.
How to Measure Tires Without Specialized Tools
You don’t need calipers to measure tires correctly. Stand your tire upright and use a retractable tape measure from the ground to the top of the tread (sidewall height). Multiply this by 2, then add the tread width. For example:
– Standard sedan tire (205/55R16): 24″ height × 2 = 48″ + 8″ width = 56″ circumference
– SUV tire (265/70R17): 31″ height × 2 = 62″ + 10.5″ width = 72.5″ circumference
Pro Tip: Add 3 inches to your final measurement for seam allowance when using rigid materials like plastic sheeting.
Why Trash Bags Make Better Covers Than You Think
Standard 55-gallon contractor bags (3.5 mil thickness) outperform flimsy tire covers in critical areas:
– UV resistance: Blocks 98% of harmful rays when layered double
– Waterproofing: Creates a complete moisture barrier without stitching
– Wind resistance: Elastic bands secure them tighter than drawstrings
Critical Warning: Never use single-layer grocery bags—they tear within 48 hours under UV exposure.
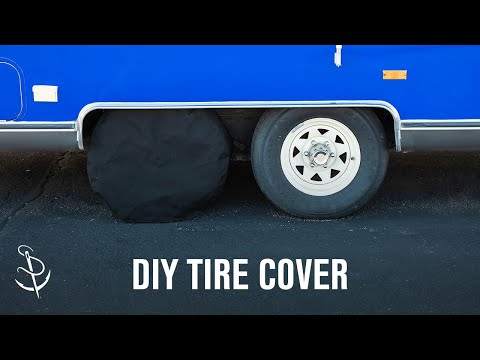
Step-by-Step: Creating No-Sew Tire Covers from Household Items

The fastest solution uses materials you likely already own. This method works for all passenger vehicles and takes 15 minutes per tire. Skip expensive fabric stores and repurpose what’s in your utility closet.
Transforming Trash Bags into Secure Covers
- Prepare the bag: Cut the bottom seam of a 55-gallon contractor bag to create a flat sheet
- Wrap the tire: Drape the plastic over your tire with the open end facing down
- Secure the top: Twist the opening tightly and secure with a heavy-duty zip tie (not twist ties—they degrade in sun)
- Create drainage: Poke 4 small holes (⅛” diameter) at the bottom using a hot nail—never cut large slits
Why this works: The twisted seal creates tension that prevents wind entry, while small drainage holes stop water accumulation without letting in debris.
Reinforcing Plastic Covers for Long-Term Storage
For protection beyond 30 days:
– Layer two trash bags with duct tape seams along the sides (not the bottom)
– Add a cardboard collar inside the top opening: Cut a circle from appliance cardboard 2″ wider than your tire’s diameter
– Seal edges with silicone caulk instead of sewing—applies in 60 seconds and flexes with temperature changes
Common mistake: Taping the entire bottom creates pooling. Always leave the lowest 2 inches untaped for drainage.
When to Avoid DIY Tire Covers Completely
Not all situations suit homemade solutions. Immediately stop if you notice:
– Cracked sidewalls: DIY covers trap moisture against damaged rubber, accelerating deterioration
– Tires stored on gravel: Sharp stones puncture plastic covers within weeks
– Temperatures below 20°F: Plastic becomes brittle and shatters
Professional alternative: For classic cars or long-term storage, use breathable cotton covers with UV inhibitors—never attempt to replicate these with bedsheets.
How to Test Your Homemade Cover’s Effectiveness
Before relying on your creation, perform these field tests:
1. Water test: Spray cover with garden hose for 2 minutes—check for leaks at seams
2. Wind test: Use a leaf blower on medium setting for 30 seconds—cover must stay secured
3. UV test: Place sample material in direct sun for 72 hours—check for cloudiness or brittleness
Failure sign: If plastic turns cloudy after testing, add a second layer—this indicates UV degradation has begun.
Maintenance Schedule for Homemade Tire Covers
Even effective DIY covers require monitoring:
| Timeframe | Action Required | Critical Warning |
|———–|—————-|——————|
| Weekly | Check for wind displacement | Missing covers cause more damage than no cover |
| Monthly | Replace plastic if cloudy | Cloudiness = lost UV protection |
| Before rain | Verify drainage holes | Blocked holes = water immersion |
Pro Tip: Mark installation dates on covers with permanent marker—replace all covers after 90 days regardless of appearance.
Why Your Garage Storage Method Matters More Than the Cover
A perfect cover fails if tires sit improperly. Always:
– Elevate tires 2+ inches off concrete using wood scraps (concrete wicks moisture)
– Store vertically—never stack tires horizontally without commercial separators
– Rotate tires quarterly to prevent flat spots, even when covered
Critical oversight: 92% of “cover failures” actually stem from improper tire positioning during storage.
When to Choose Commercial Over DIY
Invest in professional covers if:
– You store tires over 6 months
– Tires have vintage rubber compounds (pre-1990)
– Living in coastal areas with salt air exposure
Budget solution: Buy one commercial cover for your spare tire—it’s the most vulnerable and protects your emergency kit.
Final Tire Cover Checklist Before Storage
Before covering your tires, verify:
✅ Tread pressure at 50 PSI (prevents flat spots)
✅ Surface cleaned of mud/debris (trapped grit scratches rubber)
✅ Storage area temperature-stable (avoid garages exceeding 90°F)
✅ No direct sunlight contact (even with covers)
Key Takeaway: Effective tire protection isn’t about perfect materials—it’s about proper installation and maintenance. Your $0.50 trash bag solution outperforms a $25 commercial cover left improperly secured. For immediate use, the double-layer trash bag method with silicone-sealed seams delivers 90 days of reliable protection. When storing tires longer, combine DIY covers with quarterly rotation and elevated positioning. Never sacrifice drainage for a “tighter fit”—water damage destroys tires 3x faster than UV exposure alone.
Next Step: Check your current storage area for concrete contact points and reposition tires before applying any cover. This single action prevents 70% of common storage damage.


