

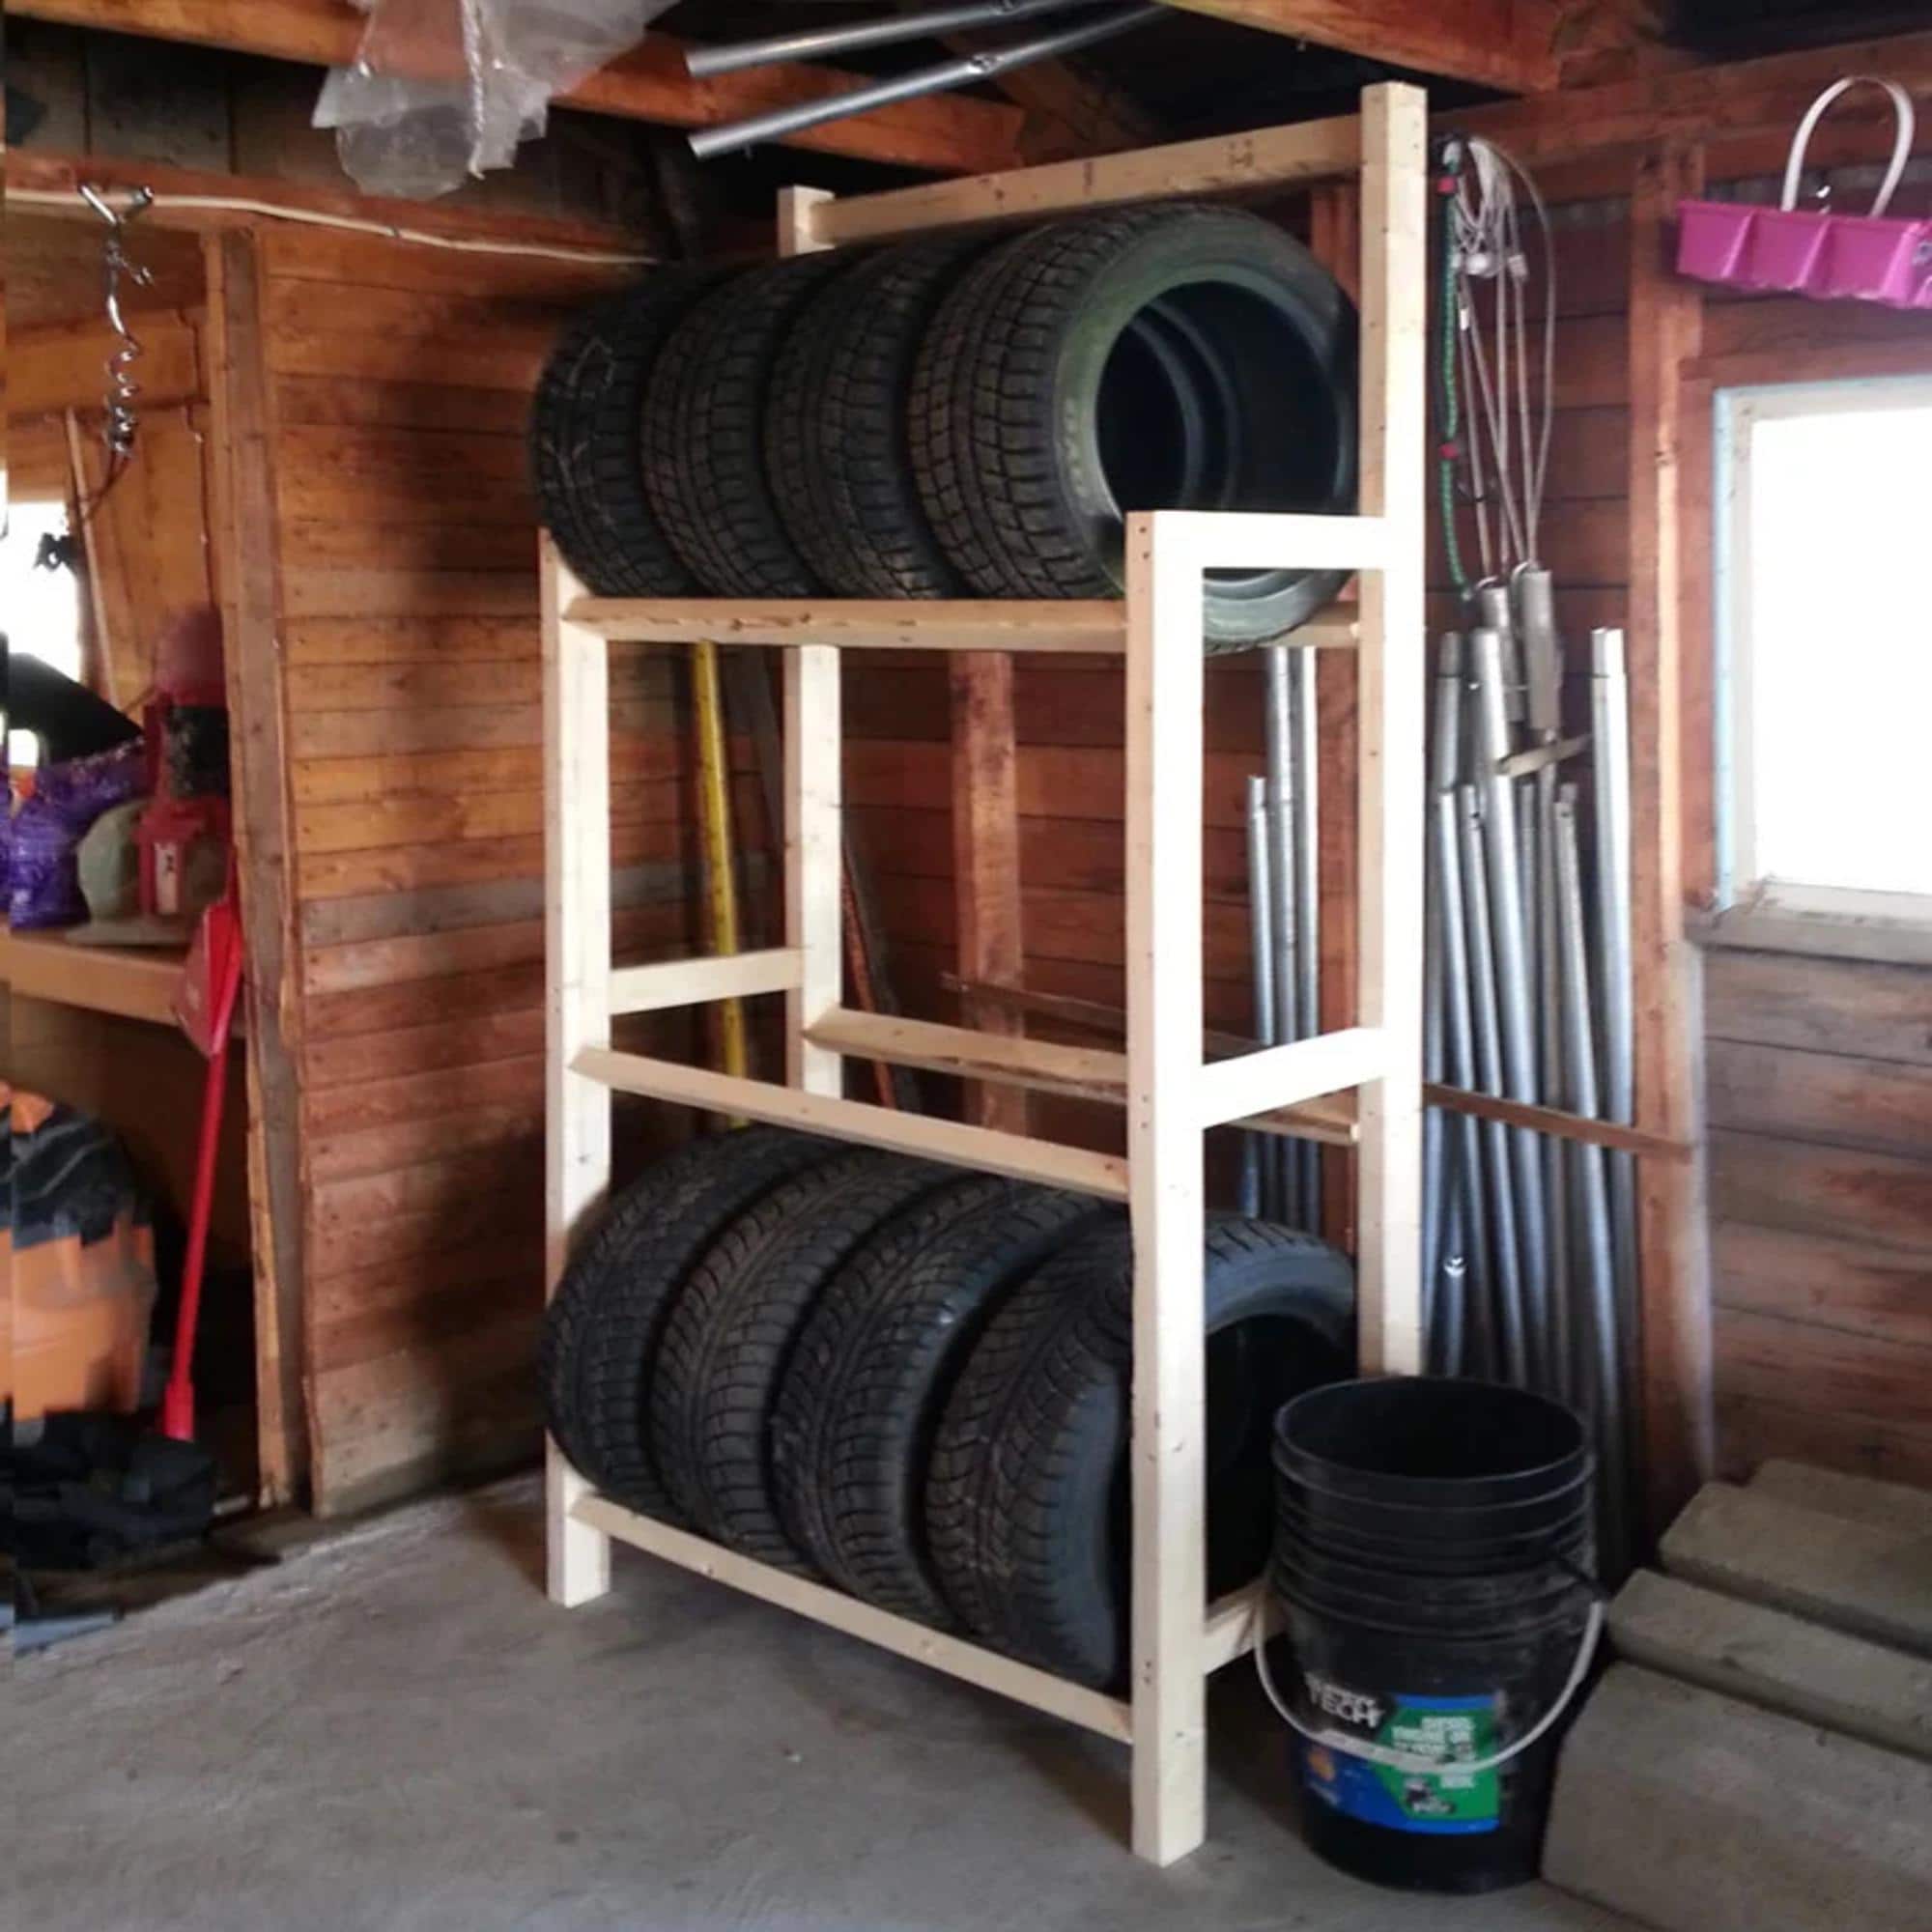
Tired of tires scattered across your garage floor or leaning precariously against walls? A properly constructed wooden tire rack solves this common storage headache while keeping your valuable rubber organized and accessible. Unlike flimsy metal alternatives that can rust or tip over, a well-built wooden tire rack provides reliable support for multiple tires with the added benefit of customization to fit your specific garage space. In this guide, you’ll learn the essential steps to create a durable wooden tire storage solution that safely holds your seasonal tires off the ground, prevents damage to your garage floor, and keeps your workspace organized throughout the year.
Many DIYers attempt quick fixes with scrap wood only to discover their makeshift racks collapse under weight or fail to accommodate different tire sizes. The difference between a rack that lasts years versus one that fails immediately comes down to proper construction techniques, appropriate lumber selection, and thoughtful design that accounts for tire dimensions and weight distribution. By following proven methods rather than improvising, you’ll create a storage system that handles your tire collection safely while enhancing your garage’s functionality.
Essential Materials and Tools for Your Wooden Tire Rack Project
Choosing the Right Lumber for Tire Storage
Select pressure-treated 2x4s for the frame base to withstand garage floor moisture and prevent rot over time. For vertical supports and shelves, use kiln-dried pine 2x4s which provide sufficient strength without warping. Avoid warped or cracked boards by checking each piece at the lumberyard—your rack’s stability depends on straight, solid wood. Purchase eight-foot lengths that you’ll cut to size, allowing for standard tire dimensions up to 33 inches in diameter. For outdoor storage applications, consider cedar boards which naturally resist insects and weather damage without chemical treatment.
Critical Hardware Requirements for Structural Integrity
Your wooden tire rack needs proper fasteners to handle significant weight without failing. Gather 3-inch exterior-grade wood screws for primary frame connections, 2.5-inch deck screws for shelf assembly, and 16d galvanized nails for temporary bracing during construction. Add two heavy-duty corner braces per vertical support to prevent rack twisting under load. For added security with larger tires, install rubber-coated hooks at strategic points to prevent tires from rolling off shelves. Never substitute drywall screws or short fasteners—tire weight demands proper hardware that won’t pull through wood over time.
Step-by-Step Construction Process for Your Tire Storage Rack
Building the Foundation Frame That Won’t Shift
Start by cutting two 2x4s to your desired rack depth (typically 24-30 inches) and two more for the length (usually 48-72 inches depending on tire count). Lay these pieces on a flat surface to form a rectangle, ensuring perfect squareness by measuring equal diagonals. Pre-drill pilot holes to prevent splitting, then secure corners with three 3-inch screws each. Add a center support beam running the length of the frame, positioned 12 inches from the front edge to create a stable base that won’t flex under multiple tires. Test the frame’s rigidity by applying downward pressure at each corner—any wobble indicates insufficient bracing.
Installing Vertical Supports That Handle Tire Weight
Cut four vertical posts from 2x4s to your preferred height (typically 36-48 inches for single-level racks). Position two posts at the front corners and two at the back, ensuring they stand perfectly plumb before attachment. Secure each post with three 3-inch screws driven through the frame into the post ends, then reinforce with corner braces screwed into both frame and post. For racks holding more than four tires, add intermediate vertical supports every 24 inches along the frame to prevent shelf sagging. Check all verticals with a level before proceeding—leaning supports compromise the entire structure’s stability.
Customizing Your Wooden Tire Rack for Different Tire Sizes

Adjustable Shelf Design for Mixed Tire Collections
Create flexible storage by building removable shelves that accommodate various tire diameters. Cut shelf supports from 1×3 pine boards at 20-inch lengths, drilling evenly spaced holes every 2 inches along their length. Install these supports horizontally between vertical posts using carriage bolts that slide through the holes, allowing you to raise or lower shelf height as needed. For wider tires, position shelves closer together; for narrow performance tires, space them farther apart. Test each configuration with your actual tires before finalizing shelf positions to ensure proper support across the tire’s entire width.
Preventing Tire Roll-Off with Simple Modifications
Tires naturally want to roll off flat shelves, creating a safety hazard. Solve this by attaching 2×2 lumber strips along the front and back edges of each shelf, creating a slight lip that contains tires. Round the top edges of these retainers with sandpaper to prevent rubber damage. For wider tires that overhang the rack, add removable diagonal braces that cradle the tire’s sidewall without putting pressure on the tread. Never rely solely on gravity—proper retention prevents accidents when accessing other stored items or during minor garage vibrations.
Safety Checks and Weight Distribution Principles

Verifying Your Rack Can Handle Real-World Loads
Before loading tires, conduct stress tests that simulate actual usage conditions. Place concrete blocks equal to your tire weight (typically 30-60 lbs each) on each shelf position, focusing extra weight on the front edge where tires naturally sit. Observe for any frame flexing, joint separation, or post leaning. Pay special attention to corner connections—these experience the most stress. If you detect movement, reinforce with additional corner braces or thicker fasteners. Remember that stacked tires create downward force that multiplies with height, so lower shelves require stronger support than upper ones.
Critical Clearances That Prevent Garage Damage
Position your completed rack at least 6 inches from walls to allow for tire removal and prevent moisture transfer. Ensure the rack stands on a level surface—shimming may be necessary for uneven garage floors. Leave 12 inches of clearance behind the rack for airflow that prevents rubber deterioration from trapped moisture. When placing tires, alternate their orientation (mounting position) to distribute weight evenly across shelves rather than concentrating force on a single spot. Never exceed the rack’s capacity—most properly built wooden racks safely hold four standard passenger tires per shelf level.
Weatherproofing Your Wooden Tire Storage Solution
Protecting Against Garage Environmental Factors
Apply two coats of exterior-grade wood sealant to all surfaces before assembly, paying special attention to end grains which absorb moisture most readily. For racks in damp environments, add a third coat to the bottom frame pieces that contact the floor. Avoid painting the entire rack—unpainted wood breathes better, preventing trapped moisture that causes rot. If storing tires long-term, place moisture-absorbing packets between tires to prevent rubber degradation from humidity. Check the wood annually for signs of moisture damage, especially at ground contact points where deterioration typically begins.
Seasonal Maintenance for Long-Term Durability
Inspect your wooden tire rack twice yearly—once before winter storage and again before summer driving season. Tighten any loose fasteners and replace cracked or splitting wood immediately. Reapply wood sealant every 18-24 months to maintain protection against garage humidity fluctuations. Rotate tires on the rack periodically to prevent flat spots from developing during storage. Before storing winter tires, clean them thoroughly to remove road salt that could transfer to the wood and accelerate deterioration. Proper maintenance ensures your wooden rack serves reliably for a decade or more.
Final Note: A properly constructed wooden tire rack provides superior organization compared to floor stacking or metal alternatives, but its effectiveness depends entirely on correct construction methods. By following these structural guidelines rather than improvising with scrap wood, you’ll create storage that safely supports your tire investment while keeping your garage clutter-free. Remember that the most critical elements—proper lumber selection, adequate fastening, and thoughtful weight distribution—make the difference between a rack that lasts years versus one that fails prematurely. For optimal results, always test your completed rack with incremental weight before loading your valuable tires.


