Your tubeless tire setup should provide smooth, puncture-resistant riding—but when air keeps leaking from the rim interface rather than through a puncture, frustration sets in quickly. Unlike sealant-friendly tire holes, tubeless tire rim leaks persist even after proper installation, causing that sinking feeling when you check your pressure the next morning only to find it’s nearly flat again. This specific failure point—where the tire bead meets the rim wall—creates a persistent air escape route that standard sealant often can’t fix. The good news is that most rim leaks respond to targeted solutions once you’ve correctly diagnosed the source. Whether you’re dealing with a stubborn rim seam leak on your mountain bike or a bead seal failure on your road wheels, this guide delivers specific, actionable fixes to stop your tubeless tire rim leak for good.
Pinpoint Your Exact Rim Leak Location
Before wasting time applying random fixes, you must identify precisely where your tubeless tire rim leak originates. Rim leaks behave differently than standard punctures—instead of air escaping through the tire tread, it’s seeping between the tire bead and rim wall. This distinction matters because the repair approach differs significantly. If your tire loses pressure overnight despite adequate sealant, or you hear hissing around the tire’s edge rather than from a specific puncture point, you’re almost certainly dealing with a rim interface problem.
Perform the Soapy Water Bubble Test for Leak Detection
The soapy water test delivers the most reliable diagnosis for your tubeless tire rim leak. Mix one teaspoon of dish soap with one cup of water in a spray bottle and generously coat the entire rim-tire interface while the tire is inflated to about 20 psi. Watch carefully for bubbles forming anywhere around the bead area—these pinpoint your exact leak location. For thorough testing, partially submerge your wheel in a bucket of water and rotate it slowly, watching for telltale bubbles. Pay special attention to three critical zones:
- Rim seam area (where the rim was joined during manufacturing)
- Valve stem interface
- Visible joints or imperfections in rim construction
Mark the leak point with colored tape so you can focus your repair efforts precisely where needed. This simple test prevents wasted effort on the wrong solution.
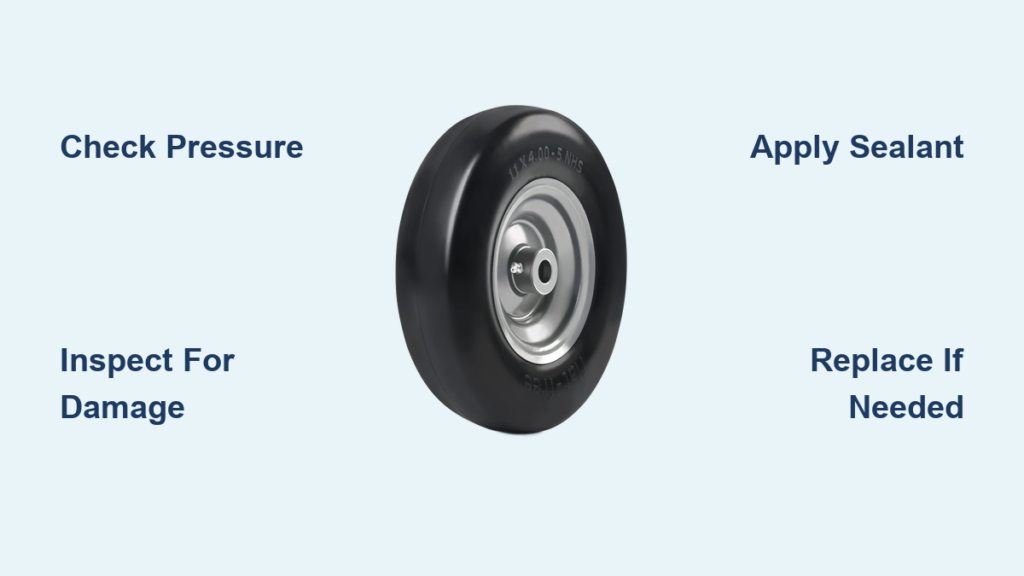
Check for Consistent Pressure Loss Patterns
Monitor your tire pressure over 24 hours to confirm you’re dealing with a rim leak rather than a slow puncture. Inflate to your normal riding pressure (typically 30-35 psi for mountain bikes, 40-60 psi for road), then check the pressure after 12 and 24 hours. A rim leak typically shows consistent pressure loss regardless of riding conditions, while a properly sealed system should hold pressure for several days. If you lose more than 10 psi overnight with no visible puncture, your tubeless tire rim leak requires attention before your next ride.
Apply Immediate Fixes for Tubeless Tire Rim Leaks
Many rim leaks respond to simple techniques that work with your sealant rather than against it. These solutions require no disassembly and can often be performed trackside or in your garage within minutes.
Execute the Two-Stage Pressure Management Technique
Most cyclists inflate to full pressure immediately after installation, but this actually prevents proper sealing by creating too much force before the sealant can set. Instead, follow this proven pressure management sequence:
- Inflate to 30-35 psi to properly seat the tire bead
- Immediately reduce pressure to 15 psi and let the wheel sit for 4-6 hours
- Check for leaks using the soapy water test
- If sealed, inflate to your normal riding pressure
This intermediate pressure allows sealant to properly migrate to gaps and cure without being forced away by excessive pressure. Many persistent rim leaks resolve completely after this simple process, saving you from unnecessary disassembly.
Optimize Sealant Distribution for Bead Sealing
Proper sealant placement makes all the difference when fixing a tubeless tire rim leak. After adding sealant through the valve, rotate the wheel deliberately in all directions to coat the entire internal rim-tire surface. Focus extra attention on the leak area you identified with the soapy water test. For stubborn leaks:
- Remove most of the air and lay the tire overnight with the leak point facing down
- Add a thicker sealant formula specifically designed for rim sealing (Finish Line or Never Flat work well)
- Mix standard sealant with a bead-specific formula for enhanced sealing power
Listen for the hissing sound to stop as the sealant works—it’s the best indicator that your rim leak is sealing properly.
Repair Specific Rim Leak Causes
When immediate fixes don’t resolve your tubeless tire rim leak, target the specific cause with these specialized repair techniques.
Fix Rim Joint and Seam Leaks with Precision Filing

If your soapy water test shows bubbles at a specific point around the rim—especially at the manufacturing seam—you likely have a rim joint issue. This common problem occurs when the rim joint has a small step, burr, or gap preventing complete bead contact. To fix it:
- Remove the tire completely
- Inspect the rim joint carefully using your finger to feel for high spots
- Gently file down any burrs or steps using a fine metal file
- Clean thoroughly with isopropyl alcohol to remove metal filings
- Reinstall tire and test with soapy water
Work slowly and check frequently—removing too much material can weaken the rim. Most rim seam leaks respond to this careful filing technique, creating a smooth surface for the tire bead to seal against.
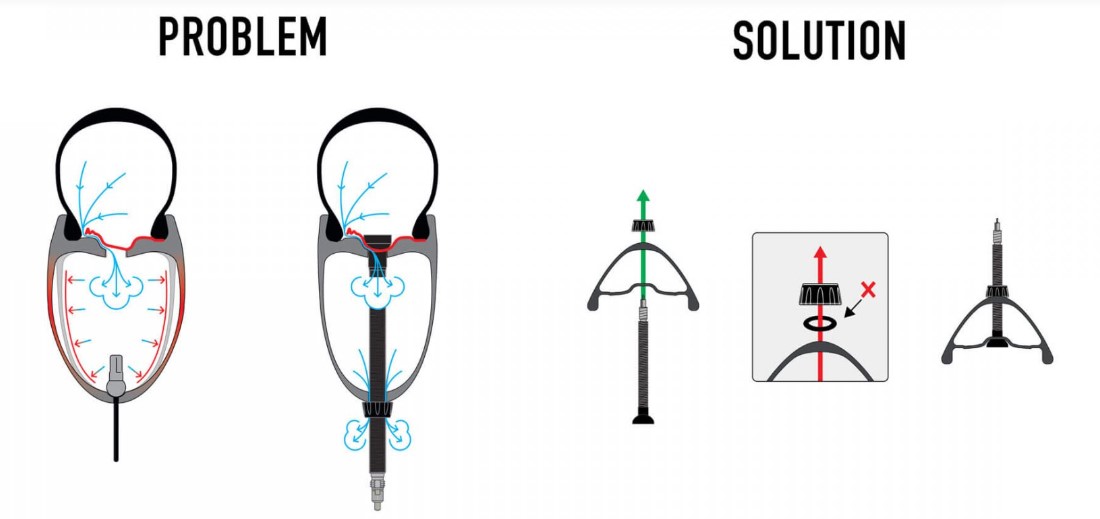
Replace Damaged Rim Tape for Complete Sealing
Rim tape failure causes some of the most persistent tubeless tire rim leaks. If your leak appears to come from the center of the rim rather than the bead edge, damaged tape is likely the culprit. To replace it properly:
- Remove tire completely and inspect existing tape
- Clean rim bed thoroughly with degreaser to remove old adhesive
- Apply new high-quality tubeless tape with consistent tension
- Overlap each layer by 50% for complete coverage
- Press firmly to eliminate air bubbles and wrinkles
For high-pressure applications, apply two layers of tape for added security. Ensure the tape covers all spoke holes completely and extends slightly up the rim walls—this creates the airtight foundation your tubeless system needs.
Address Valve Stem Interface Leaks Properly
Valve stem leaks often mimic rim leaks but require different fixes. If bubbles form specifically around the valve, try these targeted solutions:
- Tighten the valve core with a valve core tool (this fixes 60% of valve leaks)
- Check that the valve nut is snug against the rim—tight but not over-tightened
- Inspect the rubber base for cracks and replace if damaged
- Ensure the valve sits perpendicular to the rim during installation
A properly sealed valve stem should create an airtight connection without requiring excessive torque that could damage the rim.
When to Seek Professional Rim Leak Repair
Some tubeless tire rim leak situations require professional intervention:
- Severe rim damage from impacts that has bent the rim or created visible deformities
- Advanced corrosion that has eaten through rim material
- Persistent leaks after trying all DIY solutions with multiple tire brands
If you’ve replaced rim tape, filed the rim joint, optimized sealant, and still experience leaks, your rim may have fundamental compatibility issues with tubeless systems. A professional wheel builder can assess whether your rim can be salvaged or if replacement is necessary.
Prevent Future Rim Leaks with Smart Maintenance
Stop dealing with recurring tubeless tire rim leaks by implementing these preventive measures:
Establish a Sealant Refresh Schedule
Sealant dries out within 2-6 months depending on climate. Check levels every 2-3 months by removing the valve core and peering inside. Inject fresh sealant before the old compound completely dries—dried sealant can’t flow to seal new leaks. This simple maintenance task prevents 80% of rim leaks from developing.
Check Tire Pressure Weekly to Maintain Bead Seal
Develop the habit of checking pressure before every ride. Low pressure stresses the bead seal and makes air escape more likely. Proper inflation maintains optimal performance and prevents rim interface failures. Keep a portable pump with you to top up pressure when needed.
For immediate results with a new tubeless setup, always use the two-stage pressure technique. For persistent rim seam leaks, combine precision filing with a bead-specific sealant formula. And remember—regular sealant refreshes and pressure checks prevent most rim leaks before they start. With these proven techniques, you’ll spend less time troubleshooting and more time riding with confidence that your tubeless system is properly sealed.