
You’ve just discovered tire chalk on your vehicle—whether it’s parking enforcement marking your tread, a technician’s identifier from a recent tire change, or lingering marks from new tire installation. These seemingly temporary markings often prove surprisingly stubborn, clinging to your rubber for weeks despite rain, miles of driving, and countless curious glances. Knowing exactly how to remove tire chalk saves you frustration and protects your tires from damage caused by harsh chemicals or aggressive scrubbing techniques. The right approach depends on what type of chalk you’re dealing with, where it’s located on your tire, and how long it’s been there.
Why Tire Chalk Clings to Rubber Longer Than Expected
Tire chalk isn’t designed to wash away with the first rainstorm—that’s why you’re struggling to remove tire chalk from your vehicle. Technicians apply tire crayon during installation to identify wheel positions with markings like “LF” for left front or “RR” for right rear. These semi-permanent marks are engineered to survive months of storage, thousands of miles of driving, and repeated exposure to the elements. One driver reported their tire crayon markings remained “bright as ever” after several months of storage, 3,000 miles of driving, and multiple rainstorms. The crayon contains binding agents that allow it to adhere firmly to rubber surfaces and resist normal wear.
Parking enforcement chalk presents a different challenge with its wax-based formula. Officers apply either liquid chalk with a wax base or powdered chalk to mark tires, with the wax-coated varieties being particularly difficult to remove. These marks typically appear on the tread area where they’re designed to wear off through normal driving, but this process can take hours or days depending on your driving distance. The wax component creates a barrier that repels water and resists simple washing—explaining why you can’t just hose off tire chalk like regular dirt.
The chemical composition matters when you’re trying to remove tire chalk effectively. True chalk is typically made of calcium sulfate, though some varieties contain limestone or carbonate compounds. This distinction becomes relevant when considering acidic cleaning solutions, though most household removal methods focus on dissolving the binding agents rather than reacting with the chalk itself.
Quick Household Solutions That Actually Remove Tire Chalk

Before spending money on specialized products, try these household remedies that many drivers have confirmed effective for removing tire chalk.
WD-40 consistently ranks among the most recommended solutions for how to remove tire chalk. The solvent works by breaking down the waxy binding agents that allow chalk to adhere to rubber surfaces. Spray the affected area, allow it to sit for thirty seconds, then wipe clean with a rag. However, this recommendation comes with important caveats—automotive experts warn that petroleum-based products like WD-40 can cause rubber to absorb petroleum and change properties over time, potentially compromising tire integrity.
Magic Erasers require no additional chemicals and work through gentle physical abrasion. Simply dampen the eraser and rub the chalk mark in circular motions. The melamine foam removes surface debris without requiring aggressive scrubbing, making it ideal for users concerned about damaging their tire’s appearance. This method works best on fresh marks but can handle older chalk with repeated applications.
Peanut oil combined with a toothbrush offers a gentle yet effective approach. Apply a small amount of oil to the mark, scrub gently with the toothbrush, then wipe away the dissolved residue with a clean cloth. The oil helps break down waxy or oily components in the chalk while the toothbrush provides targeted mechanical agitation—perfect for stubborn tire chalk in tread grooves.
Isopropyl alcohol dissolves binding agents without affecting rubber in most cases. Apply with a clean rag, rub the mark gently, and repeat as necessary until the chalk transfers to the cloth. This method works particularly well on sidewall markings where you need to remove tire chalk without damaging the tire’s appearance. For best results, use 90% or higher concentration alcohol and allow it to dry completely before driving.
Commercial Cleaners for Stubborn Tire Chalk Marks
When household remedies fall short, these specialized products deliver proven results for even the most persistent tire chalk.
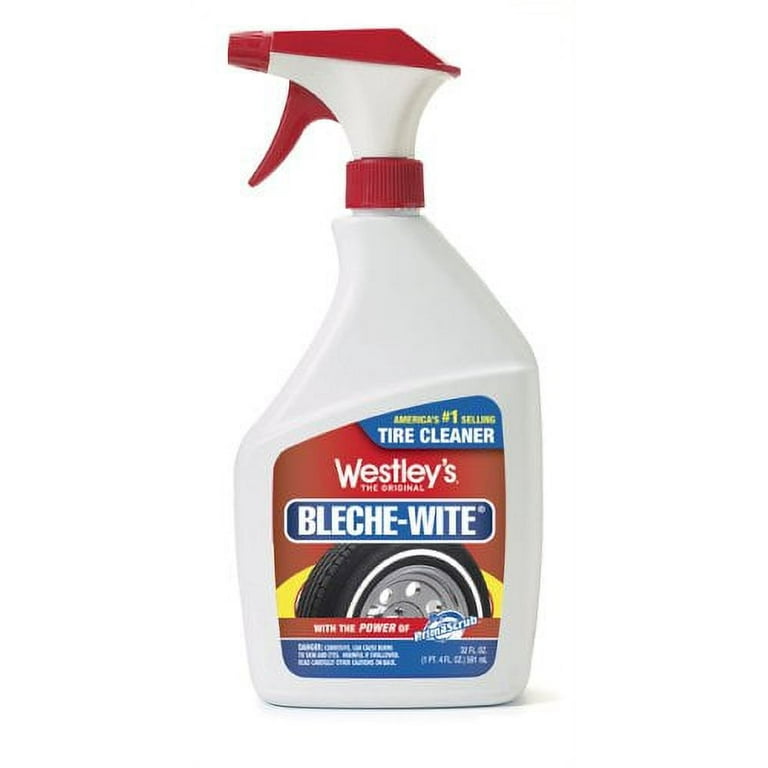
Westley’s Bleche-White consistently receives strong recommendations, particularly for white walls and white lettering on tires. One enthusiast declared it “Best stuff ever for white walls/white lettering,” while another confirmed agreement after years of use. This product has served the automotive community for decades specifically for how to remove tire chalk from delicate surfaces. Apply according to package directions, scrub with a stiff brush, and rinse thoroughly for best results.
Simple Green provides an environmentally friendly alternative that has proven effective for many users. The concentrated degreaser breaks down chalk compounds without harsh chemicals that might damage rubber. Dilute according to package directions (typically 1:1 with water), apply to the chalked area, and scrub before rinsing clean. This method works well for both parking enforcement chalk and technician markings.
Paint thinner shows effectiveness on new racing slicks, particularly when chalk has been improperly contained within lettered areas. One user reported success: “Got a rag and paint thinner and it came right off. Washed the tires with Dawn after I finished.” This method works well for Hoosier racing tires where “they really don’t do a good job of keeping the white inside the lines.” Always use in a well-ventilated area and wear gloves to protect your skin.
Mechanical Methods for Physical Chalk Removal
Physical agitation provides reliable chalk removal without chemical concerns, making these methods ideal for users who prefer to avoid solvents entirely.
Tennis balls offer an unexpected but practical solution for how to remove tire chalk quickly. Users explain that nothing beats a tennis ball for quick chalk removal—simply rub the ball over the marked area and watch the chalk disappear. Keep a spare in your vehicle for parking enforcement situations. The rubber surface of the tennis ball provides gentle abrasion that lifts chalk without damaging your tire. One user described using this method to gain “an extra hour or 2 parking” by quickly removing enforcement chalk.
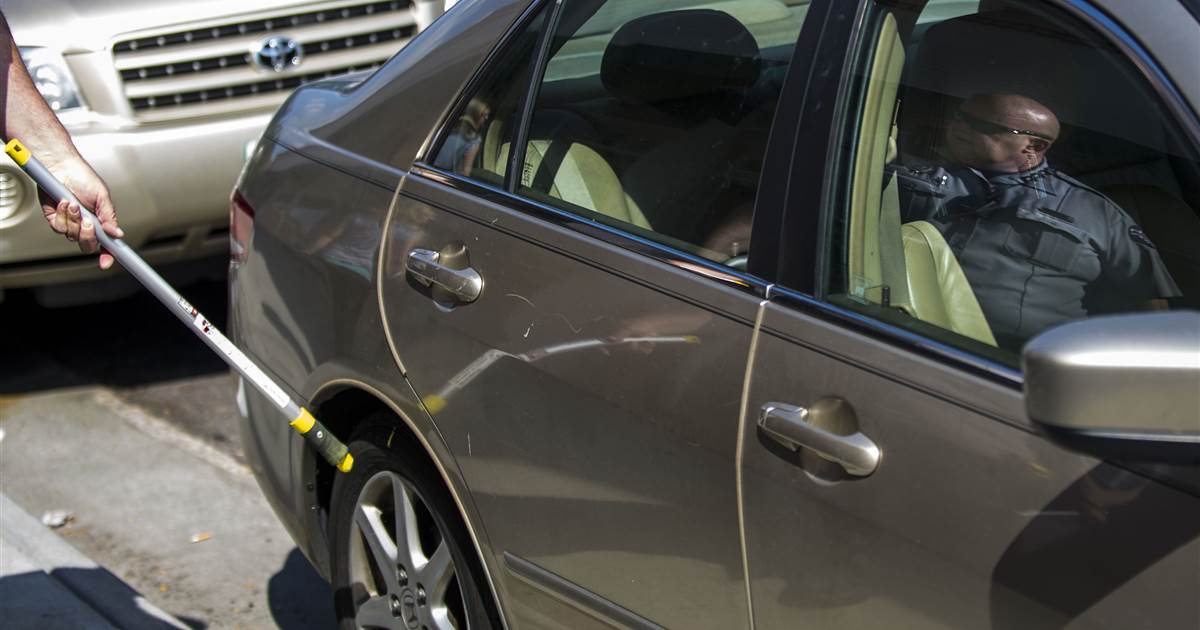
Pressure washing delivers thorough cleaning for those willing to visit a self-service car wash. A few dollars invested in pressure washing cleans not only your tires but your entire vehicle. Focus the wand on chalked areas, holding it several inches from the surface to avoid damaging rubber. The high-pressure water penetrates treads and lifts embedded chalk that scrubbing might miss—perfect when you need to remove tire chalk from deep tread patterns.
Fine sandpaper serves as a last resort for extremely stubborn marks. Use light pressure and fine-grit paper (400+ grit), working carefully to avoid removing too much rubber. One expert suggested holding this method back “if the alcohol doesn’t work” and using it only when necessary. Test on an inconspicuous area first, and stop immediately if you notice the sandpaper removing too much material.
What NOT to Use When Trying to Remove Tire Chalk
Certain products damage your tires or create safety hazards. Knowing what to avoid protects both your rubber and your vehicle’s performance.
Petroleum-based products pose serious risks to tire rubber. An automotive expert provided a critical warning: “DO NOT use ANYTHING petroleum based—and that includes WD40. The rubbers used in tires absorb petroleum and change properties because of that absorption—sometimes to the point where they will fail.” This warning carries particular significance for tires where structural integrity matters. The petroleum compounds cause rubber to swell and degrade over time, potentially leading to premature failure.
Silicon-based tire shines create their own hazards beyond traction reduction. While these products repel future chalk application, they simultaneously reduce your tire’s grip on the road. One user cautioned: “That will cause you to have lower traction, and you could end up in a smash.” If you use silicon-based products, understand that you’re trading some safety for convenience and appearance.
Excessive abrasion damages tire sidewalls even when it successfully removes chalk. Avoid steel wool, very coarse sandpaper, or power grinding tools that remove too much rubber. The goal is chalk removal, not tire restoration through aggressive material removal.
Parking Enforcement Chalk: Special Considerations
Parking enforcement chalk presents unique challenges beyond stubborn adhesion—removing it may create evidentiary issues that complicate your situation.
Understanding how enforcement works helps you decide whether to remove the chalk. Officers photograph your vehicle with chalk visible, documenting its position and the presence of the mark. If you clean the tire and return to the same spot, the clean section of rubber becomes immediately obvious. One forum member explained the risk: “Clean-sole will certainly work… BUT it will leave a shiny black rubber where the chalk used to be, and with parking officers these days, a photo is taken of the car with the chalk on it.”
This creates a potential evidentiary trail that could support parking violation claims. The before-and-after comparison shows your vehicle moved and the mark disappeared—evidence that might be used against you in disputes. Consider whether removing the chalk is worth potential complications, especially if you plan to return to the same location.
Protect Tires After Successful Chalk Removal
Successful chalk removal deserves protection against future marks. Proper post-cleaning treatment extends your results and improves your tire’s appearance.
Apply tire coating or dressing after any cleaning session to restore the natural appearance and create a protective barrier. These products repel water, dirt, and future chalk application while giving your tires a deep, uniform black finish. Apply evenly across the sidewall, allowing the product to dry before driving to prevent sling onto your vehicle’s paint.
Regular maintenance washing prevents chalk from bonding permanently to your rubber. Monthly cleaning with appropriate tire cleaner removes contaminants before they penetrate the surface. This ongoing care keeps your tires looking their best while making future chalk removal significantly easier.
Removing tire chalk doesn’t require expensive professional treatment—household items and consumer products handle most situations effectively. Start with the least aggressive methods (hot water, soap, Magic Erasers) and progress to stronger solutions as needed. For tire crayon on sidewalls, petroleum solvents work quickly but carry long-term risks to rubber. For white-walled tires, Westley’s Bleche-White provides specialized cleaning. Alcohol-based cleaners offer a middle ground between effectiveness and safety. Always finish with protective coating to restore appearance and prevent future bonding. With the right approach and a little patience, your tires can look as though chalk never touched them.


