
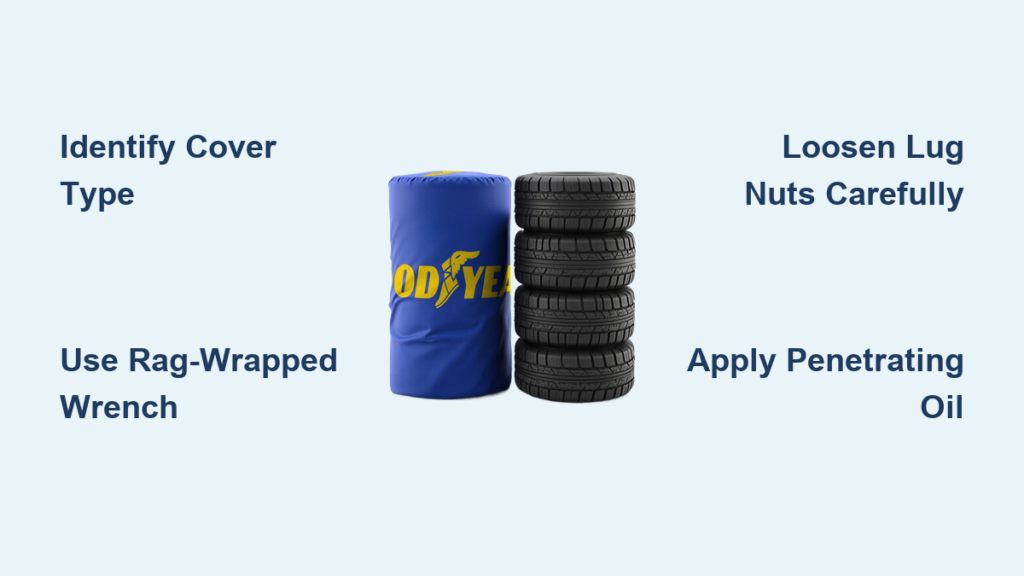
Ever stared helplessly at your car’s stubborn tire cover, hands scraped and cover still firmly in place? You’re not alone. Millions of drivers struggle with plastic wheel covers that refuse to budge despite aggressive prying. The key isn’t brute force—it’s understanding exactly how your specific cover attaches and using the right technique. This guide delivers proven methods to remove any tire cover without damaging expensive components or your knuckles. Whether you drive a Toyota Camry Hybrid with snap-on covers or a Class C motorhome with RV wheel covers, you’ll learn exactly how to remove tire cover safely and efficiently.
Identify Your Exact Wheel Cover Type First
Before touching a single tool, correctly identifying your wheel cover type prevents wasted effort and damage. Three main attachment systems exist, each requiring a specific removal approach.
Snap-On Plastic Covers (Most Passenger Vehicles)
Your Toyota Camry, Honda Accord, or similar sedan likely uses snap-on plastic covers that engage retention clips along the wheel rim. These covers sit flush with minimal edge clearance, making removal challenging. Look for subtle notches around the cover’s perimeter—these indicate where retention clips lock into the rim’s groove. The cover’s entire security depends on these hidden clips, not friction alone. Attempting to pry at random points often cracks the plastic without releasing the actual retention points.
Lug Nut Retention Systems (RVs and Trucks)
Recreational vehicle wheel covers and some trucks use actual lug nuts as attachment points. These covers appear to have numerous “nuts,” but only specific ones secure the cover. Look for small dimples on genuine fasteners—these markers distinguish functional lug nuts from decorative covers. The tap test confirms identification: solid, resonant sounds indicate real nuts, while hollow sounds mean purely decorative components. Common sizes include 42mm for decorative nut covers and 33mm or 42mm for actual lug nuts on Workhorse chassis motorhomes.
Screw Fastener and Pressure-Fit Designs
Some aftermarket hubcaps use visible screws hidden beneath small plastic covers. Others rely entirely on pressure-fit connections with no visible fasteners. Examine the cover’s edge carefully—screw fasteners reveal small access points requiring a screwdriver, while pressure-fit designs show seamless edges requiring strategic prying. This distinction determines whether you’ll need a screwdriver or specialized prying tools for removal.
Remove Snap-On Plastic Wheel Covers Without Damage
Plastic snap-on covers cause the most frustration because they provide no obvious grip points. The correct technique works with the cover’s retention system rather than fighting against it.
Execute the Lug Wrench and Rag Method
Your vehicle’s lug wrench wrapped in a thin rag creates the perfect removal tool. Start by locating the retention notches—small gaps around the cover’s edge where clips engage the rim. Insert the rag-wrapped end of the lug wrench into one notch, positioning it to apply downward and outward pressure against the cover’s interior.
Apply steady, controlled pressure rather than sudden force. The cover may feel like it’s about to break—this is normal as clips approach release point. Work methodically around the circumference, repeating the prying action at multiple notches. This gradual approach typically takes 3-5 minutes per cover but prevents cracking from aggressive force. Remember: patience beats broken plastic every time.
Reinstall Snap-On Covers Properly
After successful removal, proper reinstallation prevents future headaches. Clean the rim groove thoroughly with a dry cloth to remove dust and debris that could compromise the seal. Position the cover with the valve stem cutout aligned correctly before starting.
Tap lightly around the circumference with a rag-covered hammer, distributing force evenly. Continue tapping until you hear distinct clicking sounds indicating each clip has engaged. Check the entire edge to confirm uniform seating—any gaps mean some clips haven’t locked properly. Proper reinstallation often proves more challenging than removal, requiring careful attention to detail.
Take Off RV Wheel Covers Safely
RV wheel covers require fundamentally different techniques than passenger vehicles. Attempting standard prying methods on these substantial covers leads to frustration and potential damage.
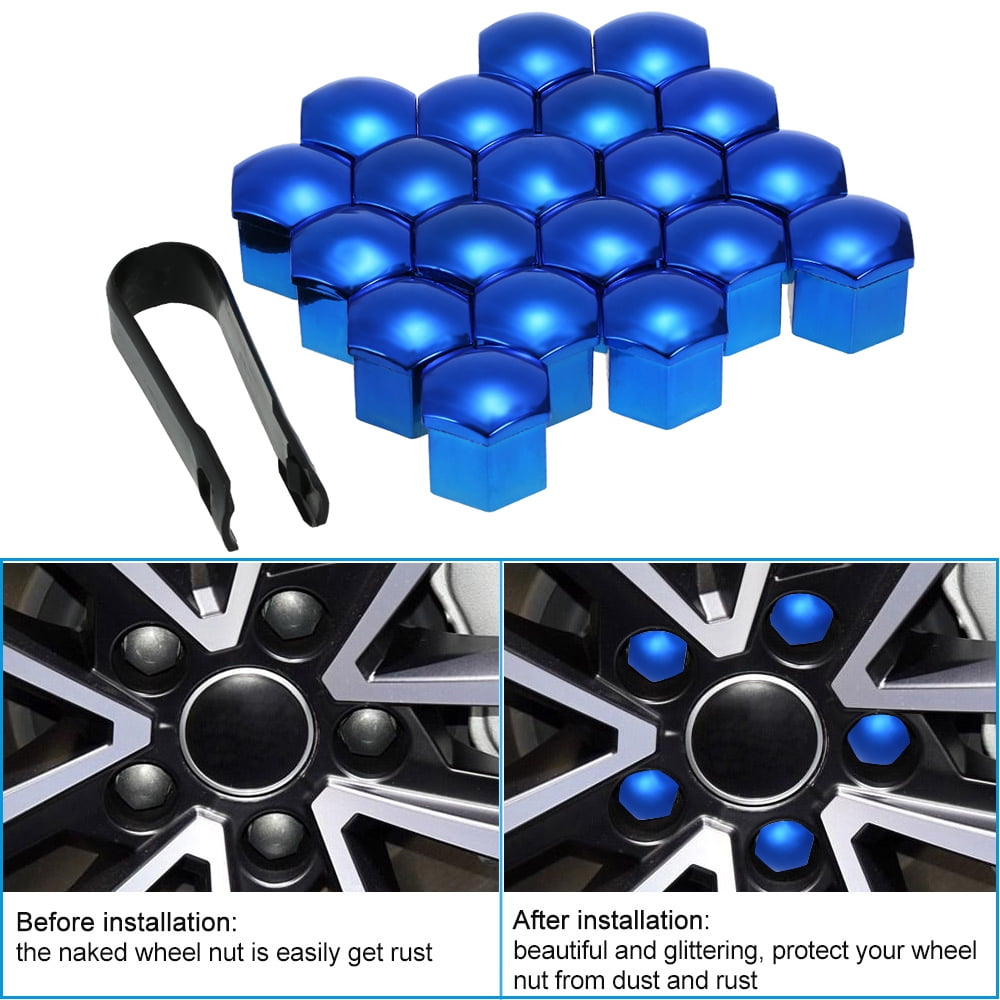
Remove Decorative Nut Covers First
Identify which nuts actually secure the cover using dimple markers or the tap test. Remove decorative covers from functional lug nuts before attempting to loosen the actual fasteners. Many RV owners waste time trying to remove decorative covers that serve no structural purpose.
Use a dedicated decorative cover removal tool if available—these provide secure grip without scratching chrome finishes. If unavailable, carefully pry with a plastic trim tool to avoid damaging the decorative surface.
Loosen Actual Lug Nuts with Correct Tools
Most RV wheel covers use 2-4 actual lug nuts for attachment. Use a 42mm socket for decorative fasteners and either 33mm or 42mm for underlying lug nuts depending on your chassis. Standard socket sets rarely include these sizes, so invest in a T-handle light duty socket wrench specifically for RV maintenance.
Loosen nuts in a star pattern to prevent warping, removing them completely once loose. The entire wheel cover should lift away cleanly, revealing the standard lug nuts beneath that secure your wheel to the vehicle.
Fix Stubborn Cover Removal Problems
Certain situations require specialized approaches when standard techniques fail.
Free Covers Stuck From Age or Debris
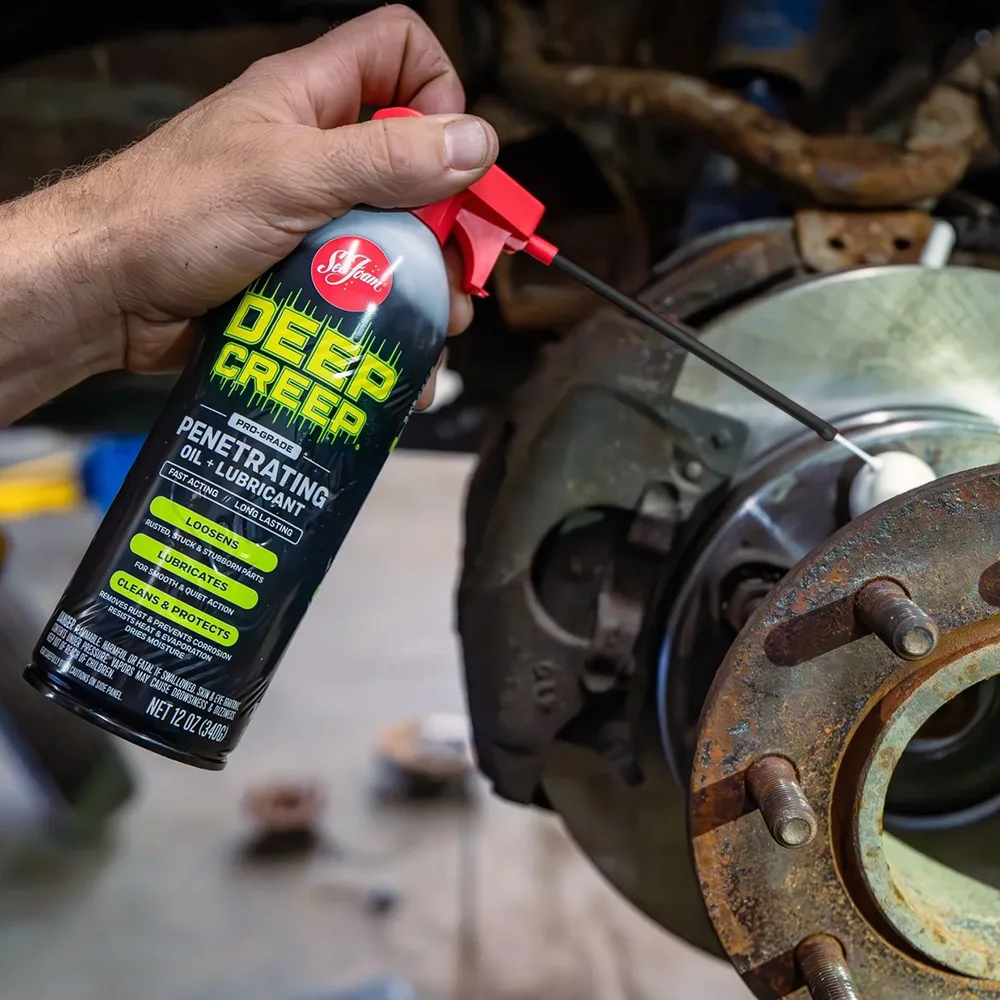
Covers that haven’t been removed for years often develop corrosion or debris buildup at attachment points. Apply penetrating oil sparingly to external attachment areas only—never near brake components. Allow 5-10 minutes for the oil to penetrate before attempting removal again.
Work the rag-wrapped lug wrench into retention notches with steady pressure rather than attempting to pry straight off. The repeated pressure fatigues retention clips while allowing the oil to work its way into stuck areas. For RV covers, tap around the cover’s perimeter with a rubber mallet to break loose corrosion before attempting nut removal.
Handle Minimal Clearance Situations
Some vehicles like the Toyota Camry Hybrid position wheel covers extremely close to the rim, eliminating finger access. In these cases, the lug wrench technique at retention notches becomes essential—it works with the cover’s design without requiring edge clearance.
Insert the wrench at the deepest point of each notch and apply downward pressure toward the wheel center. This technique creates maximum leverage where the cover needs it most, releasing clips without requiring the clearance that finger methods demand.
Maintain Wheel Covers for Easy Future Removal

Proper maintenance prevents many removal headaches before they start.
Clean wheel covers monthly, focusing on edges and retention points where road grime accumulates. Use a soft brush and mild detergent for plastic covers—avoid harsh chemicals that degrade plastic over time. For chrome or stainless RV covers, use specialized cleaners that won’t damage the finish.
Inspect retention clips periodically for damage or wear. Covers that have been removed multiple times may develop weakened clips that no longer hold securely. Replace worn covers before they fail completely—driving with a loose cover risks damage to the cover, wheel, and potentially other vehicle components.
When reinstalling any cover, ensure the rim groove is clean and dry. Take time to align the cover perfectly before pressing it into place, and work around the circumference evenly to engage all clips simultaneously. This simple step prevents uneven seating that makes future removal exponentially more difficult.
Removing tire covers doesn’t have to mean scratched knuckles, damaged plastic, or expensive mechanic visits. By identifying your specific cover type first, selecting appropriate tools, and applying steady, controlled force that works with the retention mechanism rather than against it, you’ll gain reliable access to your wheels for any maintenance need. Remember the golden rule: patience and precision always beat brute force when it comes to how to remove tire cover successfully. With these techniques in your toolkit, you’ll never again waste time fighting a stubborn wheel cover that simply requires the right approach.


