
Every driver faces a flat tire at some point, and knowing how to pull a tire off your car could mean the difference between a quick roadside fix and waiting hours for help. Whether you’re dealing with a sudden puncture on the highway or performing routine maintenance like rotating your tires, mastering this fundamental skill puts you in control of your vehicle’s upkeep. This comprehensive guide walks you through the entire process—from gathering the right tools to safely removing a tire from your wheel studs—ensuring you can handle this common automotive challenge with confidence and ease.
The process of removing a tire involves several interconnected steps that work together to ensure your safety and prevent damage to your vehicle. Understanding how lug nuts secure your wheel, where to position your jack correctly, and how to handle stubborn components makes the entire procedure smoother and more efficient. By following the steps outlined in this guide, you’ll gain the knowledge needed to pull a tire off your car properly, whether you’re tackling a flat on the side of the road or preparing to install new rubber in your driveway.
Identify Your Vehicle’s Lug Nut Configuration
Before attempting to pull a tire off your car, you must understand your specific wheel attachment system. The number of lug nuts on your vehicle determines the proper loosening pattern and affects how much force you’ll need to apply during removal.
Four-lug and five-lug patterns dominate passenger vehicles, with some trucks and SUVs featuring six or eight lug nuts. Locate your lug nuts and count them before starting—this simple step prevents missed fasteners and ensures you follow the correct star pattern when loosening. For example, a five-lug wheel requires a star pattern where you skip every other lug, while a four-lug pattern uses a simple cross pattern. Skipping this identification step could lead to uneven pressure distribution that makes the wheel difficult to remove or, worse, causes damage to your hub assembly.
Recognize Problematic Lug Nut Conditions
Lug nuts can present unexpected challenges that complicate your attempt to pull a tire off your car. Rust buildup between the lug nut and wheel surface creates a bonding effect that requires extra force to break. Some tire shops overtighten lug nuts beyond manufacturer specifications, making removal difficult even with proper technique. If you notice discoloration or corrosion around the lug nuts, prepare to use rust penetrant spray before beginning the removal process.
Gather Your Tire Removal Toolkit
Having the right equipment before you need to pull a tire off your car transforms a stressful situation into a manageable task. Your vehicle likely came with basic tools, but upgrading your kit makes the process significantly easier and safer.
Essential Equipment Checklist
Your tire removal toolkit must include these critical items:
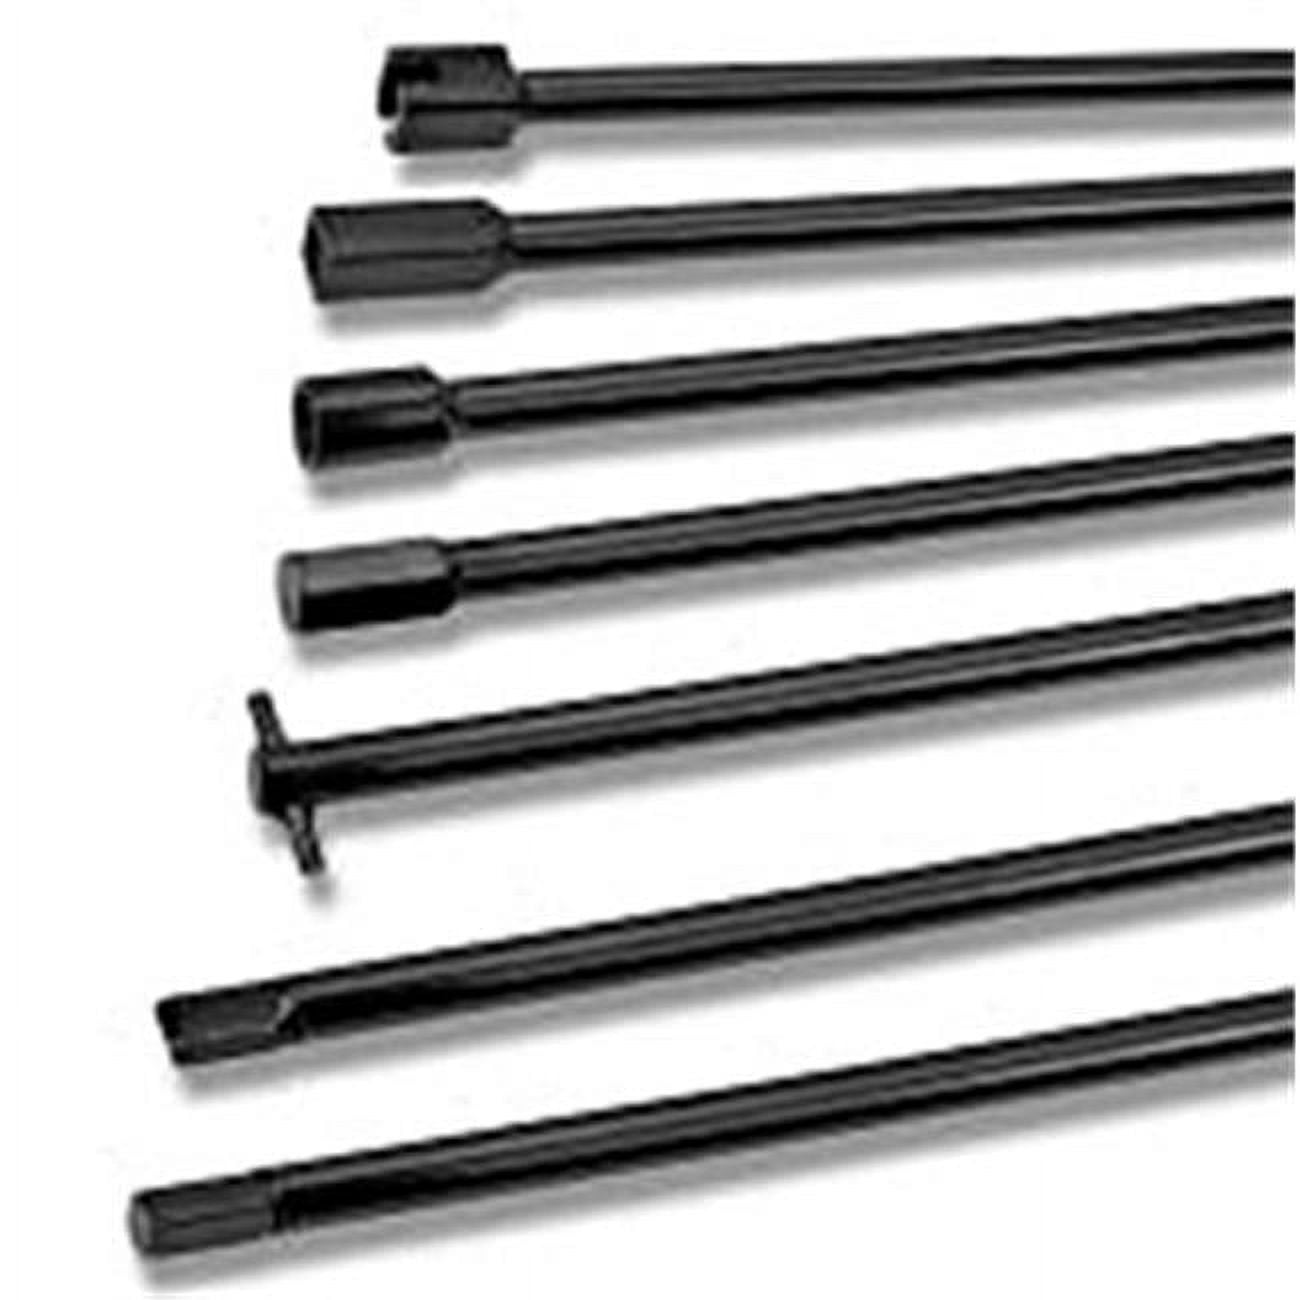
– Proper jack: Scissor jack (included with vehicle) or hydraulic trolley jack
– Lug wrench: Must match your lug nut size (typically 17-21mm)
– Wheel chocks: Blocks of wood or specialized wedges to prevent rolling
– Gloves: Heavy-duty work gloves protect your hands from sharp edges
– Small container: For organizing lug nuts during removal
Without these basics, you risk damaging your vehicle or compromising your safety. Many drivers discover too late that their factory jack is bent or their lug wrench doesn’t fit modern locking lug nuts—a situation that leaves you stranded when you need to pull a tire off your car.
Power Tools for Stubborn Components
When dealing with rusted or overtightened lug nuts, these specialized tools prove invaluable:
– Impact wrench: Delivers high-torque impacts to break loose stubborn nuts
– Breaker bar: Provides extended leverage without requiring you to stand on tools
– Rust penetrant spray: Breaks down corrosion bonds (allow 5-10 minutes to work)
– Rubber mallet: Loosens seized wheels without damaging rims
Investing in these tools saves time and prevents injury from excessive force. A quality cordless impact wrench (around $100) can remove even the most stubborn lug nuts in seconds—a wise investment for anyone who regularly maintains their vehicle.
Execute Proper Safety Protocol Before Lifting
Your safety depends entirely on proper preparation before you attempt to pull a tire off your car. Cutting corners during this phase risks serious injury or vehicle damage.
Secure Your Vehicle on Stable Ground
Park on level, hard surface—never on grass, gravel, or slopes. Engage your parking brake firmly and shift into park (automatic) or first gear (manual). Place wheel chocks behind the tires opposite the flat (for front tire changes, chock rear tires; for rear changes, chock front tires). This double safety system prevents rolling even if one measure fails. Many drivers skip chocking wheels, creating dangerous conditions when the vehicle shifts during jacking.
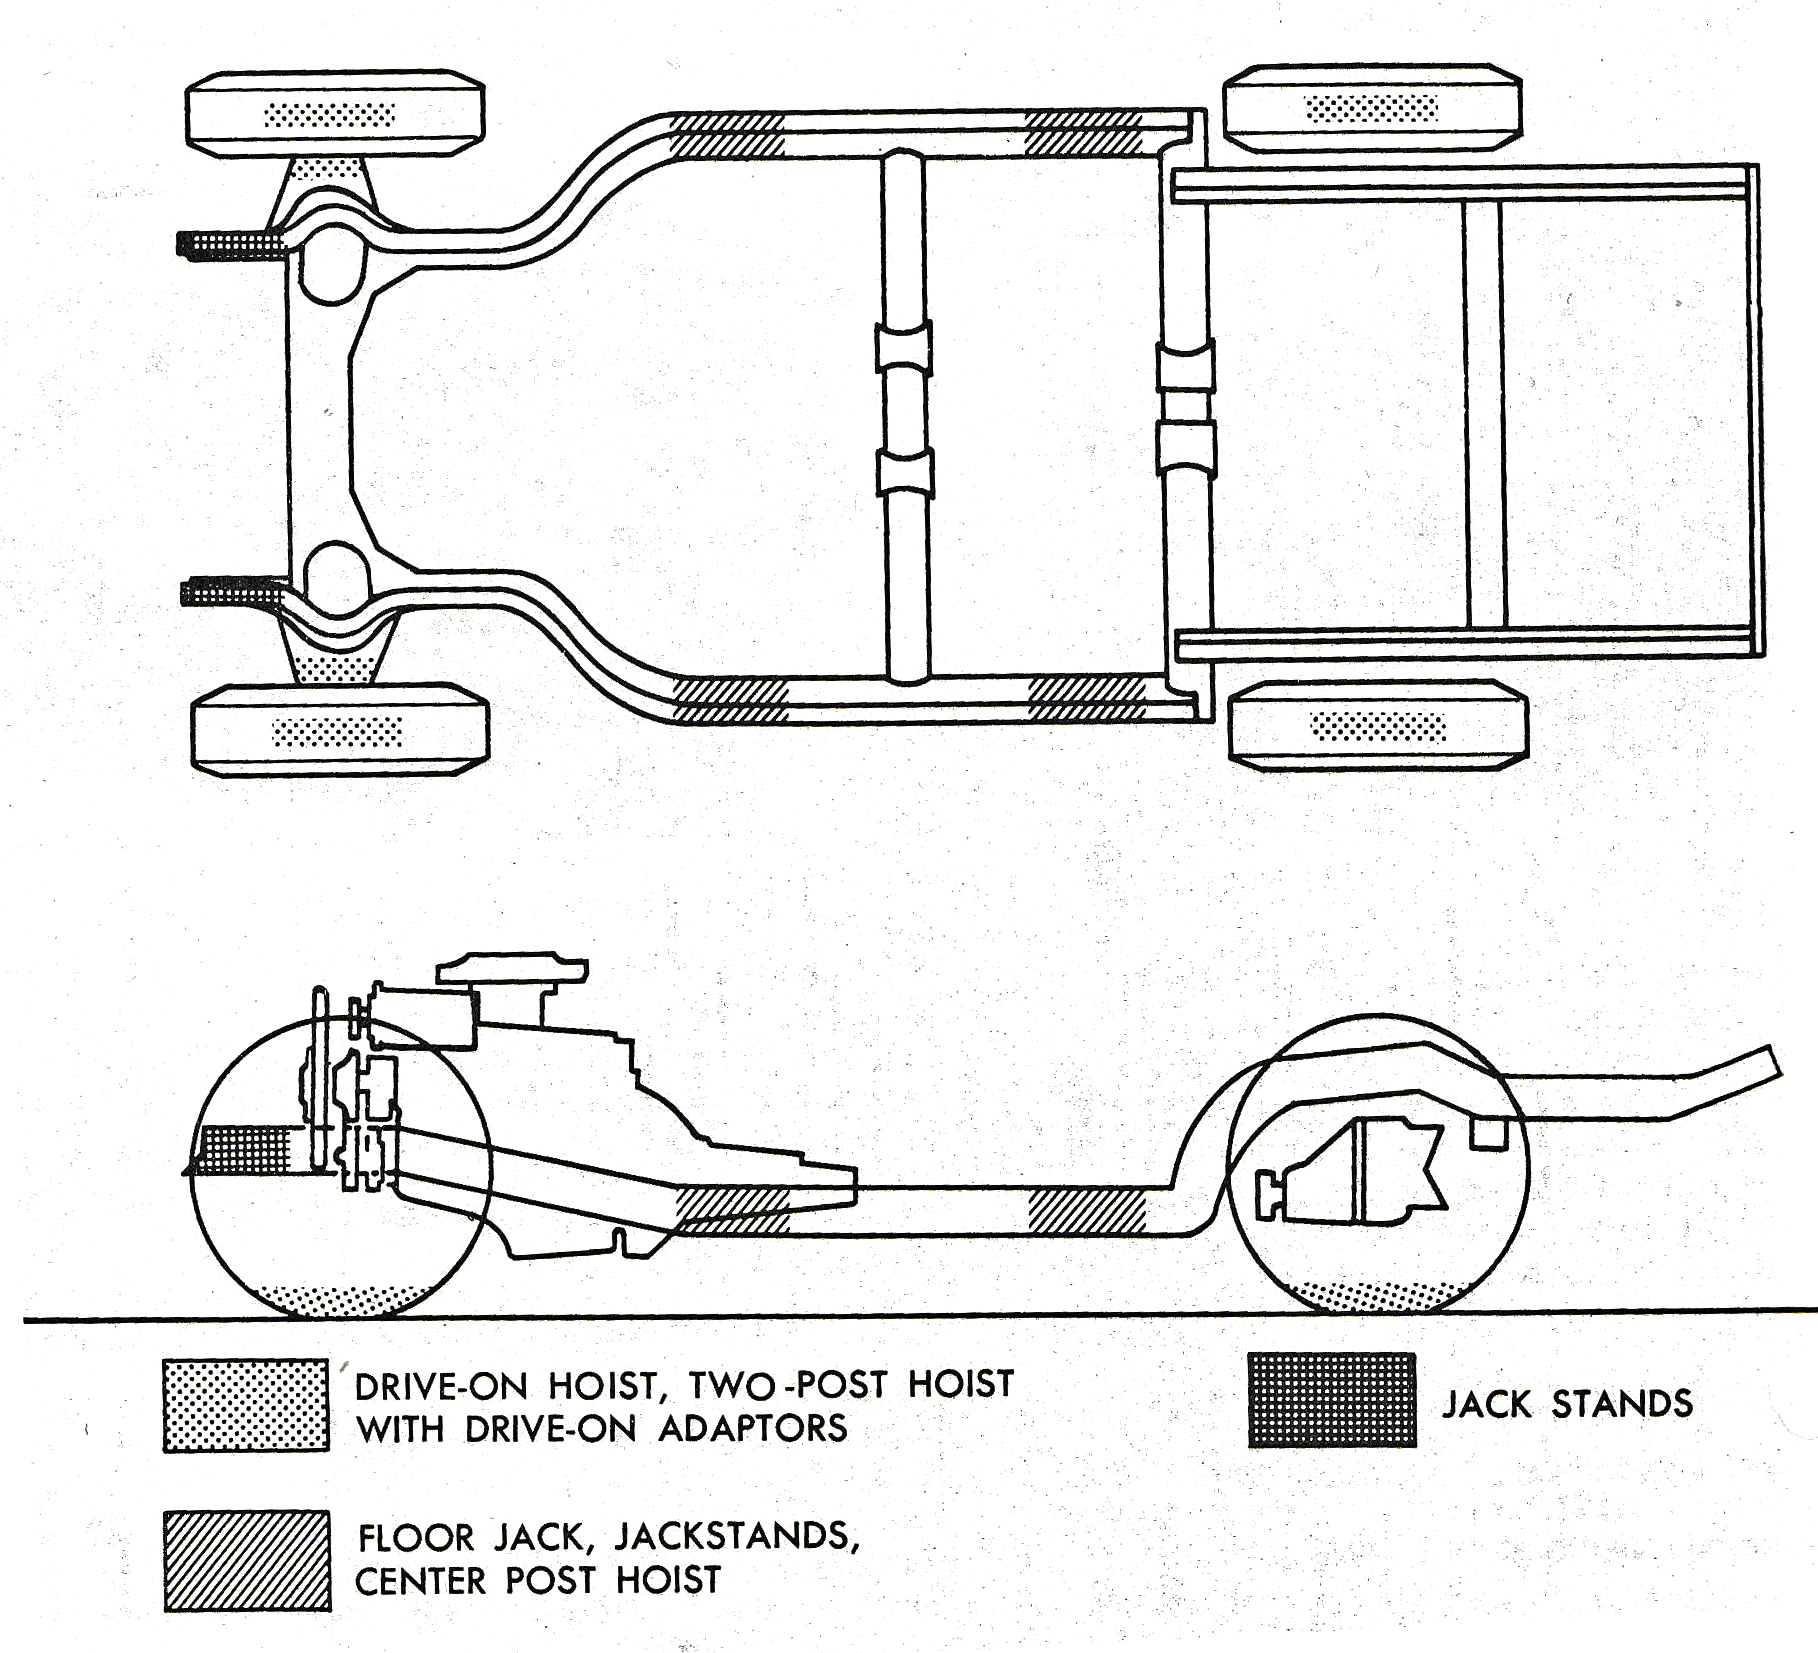
Locate Manufacturer-Approved Jack Points
Consult your owner’s manual to identify the specific jack points designed to support your vehicle’s weight. These reinforced areas appear as notches, marked pads, or frame rails beneath your car. Jacking at improper points can bend or puncture your vehicle’s frame, causing expensive damage. Most sedans have jack points just behind the front wheels and ahead of the rear wheels along the frame rails. SUVs often feature reinforced points near the suspension mounts.
Loosen Lug Nuts While Tire Remains Grounded
This critical step—often skipped by beginners—makes the difference between an easy tire removal and a frustrating struggle when you try to pull a tire off your car.
Apply your lug wrench and rotate each nut counterclockwise approximately one-quarter turn. The vehicle’s weight prevents the wheel from spinning, giving you maximum leverage. Use your body weight—stand on the wrench handle if necessary—to break loose stubborn nuts. Work in the proper star pattern for your lug configuration to prevent wheel binding. If nuts resist movement, spray rust penetrant around the base and wait five minutes before trying again. Never fully remove lug nuts at this stage—simply break them loose enough for final removal once elevated.
Handle Overtightened Lug Nuts Safely
When standard force fails, use these techniques to loosen stubborn lug nuts:
– Position the wrench horizontally and drop your body weight onto the end
– Apply steady pressure while gently bouncing on the handle
– Use a pipe extension over the wrench for additional leverage
– Allow rust penetrant to work for 10 minutes before retrying
If a lug nut still won’t budge after multiple attempts, professional assistance may be necessary. Forcing it risks stripping the nut or breaking the wheel stud—problems requiring expensive repairs before you can successfully pull a tire off your car.
Lift Vehicle Correctly for Safe Tire Removal
With lug nuts loosened, it’s time to elevate your vehicle using proper jack techniques that prevent damage and ensure stability.
Position your jack precisely under the manufacturer-specified jack point, ensuring the saddle contacts solid metal. Pump or crank slowly while watching for any unusual movement or sounds. Lift until the tire clears the ground by 2-3 inches—enough for removal but minimizing fall risk. Never place any body part under the vehicle during lifting. If using a scissor jack, maintain a 90-degree angle to the ground for maximum stability. Hydraulic jacks require slower operation to prevent sudden lifts that could dislodge the jack point.
Complete Lug Nut Removal and Tire Extraction
With your vehicle securely elevated, finish removing all lug nuts and extract the wheel using proper technique.
Remove Lug Nuts Systematically
Turn each lug nut counterclockwise until free, placing them in your container in the order removed. This organization helps during reinstallation and prevents loss. When removing the final nut, brace the wheel with your other hand to prevent it from falling unexpectedly. If nuts resist after initial loosening, tap the wrench handle with a rubber mallet to break the remaining tension.
Pull Tire Off Wheel Studs Safely
Grip the tire firmly at 3 and 9 o’clock positions, then pull straight toward you in a smooth motion. If the wheel resists due to corrosion or pressure, strike the tire sidewall with a rubber mallet around the circumference to break the seal. Never hammer directly on the rim—this can cause cracks or bends requiring expensive repairs. For added safety, position the flat tire under the vehicle’s frame before removal as a backup support in case the jack fails.
Handle Common Removal Challenges
Even with proper technique, you may encounter obstacles when trying to pull a tire off your car. Knowing how to address these issues prevents damage and frustration.
Free Seized Wheels Without Damage
When corrosion bonds the wheel to the hub, use these safe methods to separate them:
– Strike the tire sidewall (not the rim) with a rubber mallet around the entire circumference
– Apply steady outward pressure while someone taps the opposite side of the tire
– Spray rust penetrant between the wheel and hub, waiting 10 minutes before retrying
– Never use metal hammers directly on aluminum rims—this causes irreparable damage
Address Broken Lug Nuts Immediately
If a lug nut head breaks during removal, stop working and assess the situation. A broken lug means your wheel isn’t properly secured, making driving unsafe. In this scenario, professional assistance is required—you cannot safely pull a tire off your car with compromised fasteners. Attempting removal with broken lugs risks damaging wheel studs or creating an unbalanced wheel that could come loose while driving.
Reinstall Tire Properly After Removal
After successfully pulling a tire off your car, correct reinstallation ensures your safety and prevents future problems.
Hand-tighten all lug nuts in the proper star pattern before lowering the vehicle. Lower until the tire just touches the ground, then tighten further with your wrench. Finally, lower completely and perform a final tightening sequence. Use a torque wrench if available—most passenger vehicles require 80-100 foot-pounds of torque. Without proper tightening, lug nuts can loosen during driving, potentially causing the wheel to detach—a catastrophic failure that endangers everyone on the road.
Critical Safety Reminders for Tire Removal
Never place any body part under a vehicle supported only by a jack—always use jack stands for working beneath the car. Keep bystanders and pets at a safe distance during the procedure. If working roadside, wear high-visibility clothing and set up emergency flares. After completing your tire change, check lug nut tightness again after driving 50-100 miles, as initial driving can cause slight settling that loosens fasteners.
Taking time to practice tire changes in your driveway before an emergency occurs builds confidence and ensures you’re prepared when you actually need to pull a tire off your car. Familiarize yourself with your vehicle’s specific requirements, check your spare tire’s condition monthly, and keep your emergency kit fully stocked. This preparation transforms a potentially stressful roadside situation into a manageable task you can complete safely and efficiently.


