
Your vehicle’s tires are its only point of contact with the road, and tread depth directly determines how well your car grips the surface, brakes efficiently, and resists dangerous hydroplaning. Knowing how to measure tire tread depth is a fundamental skill that every driver should master—not only for safety but also for avoiding costly repairs and potential accidents. Whether you’re preparing for a long road trip, performing routine maintenance, or trying to decide if your tires need replacement, accurate tread depth measurement gives you the critical information needed to make informed decisions. This comprehensive guide walks you through every measurement method available, explains what the numbers mean, and helps you understand when tire replacement becomes necessary.
Required Tools for Accurate Tire Tread Depth Measurement
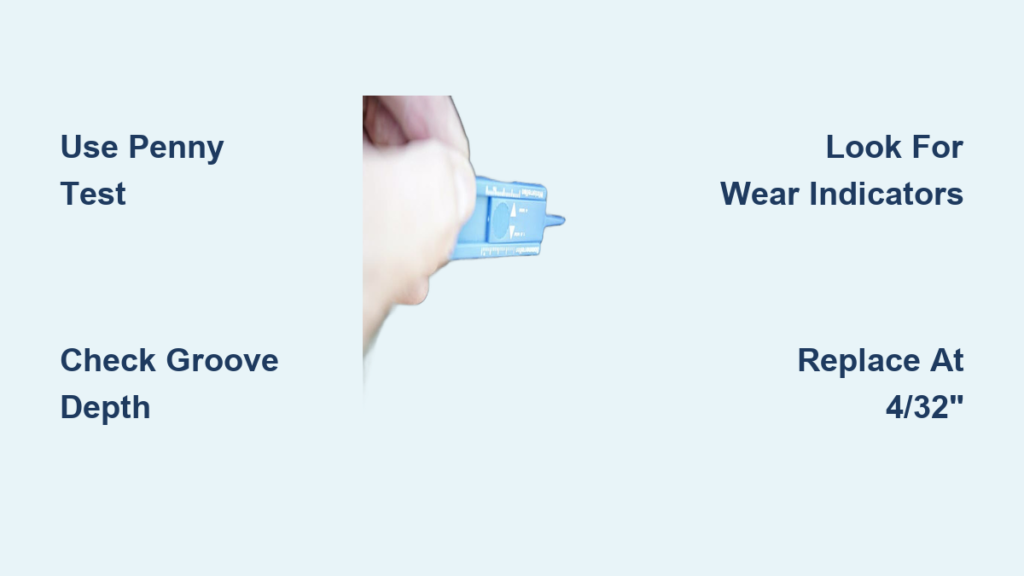
Before you can properly measure tire tread depth, you need the right tools. The most accessible method requires nothing more than a standard U.S. penny, making tire tread measurement available to anyone without purchasing additional equipment. The penny test provides an immediate yes-or-no answer about whether your tires have reached a dangerous wear threshold, though it lacks precision for measuring exact tread depth.
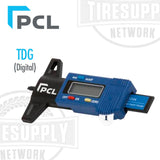
For more accurate measurements, dedicated tread depth gauges offer precise readings in both millimeters and 32nds of an inch. Analog gauges—resembling small rulers with sliding metal pins—typically cost between $5 and $20. You simply press the gauge flat against the tire surface, push the pin into the groove, and read the measurement where the pin stops. Digital gauges provide even greater precision with electronic readouts, often displaying measurements to one decimal place. While professional-grade digital gauges can cost up to $100, most consumers find adequate accuracy in models priced between $15 and $40.
Many modern tires include built-in tread wear indicators that eliminate the need for any measurement tool. These small rubber bridges sit between tread grooves at exactly 2/32″ (1.6 mm) depth, creating continuous bands across the tire’s circumference when the tread wears down to this level.
How to Use the Penny Test for Quick Tread Depth Check
The penny test remains the most widely recognized informal method for checking tread depth because it requires no specialized equipment and provides instant results. To perform this test, take a standard U.S. penny and insert it into your tire’s tread groove with Abraham Lincoln’s head facing downward. If the top of Lincoln’s head remains visible because the tread doesn’t reach his forehead, your tread depth has reached 2/32″ (1.6 mm) or less, indicating that immediate tire replacement is necessary.
This method works because Lincoln’s head extends approximately 2/32″ below the coin’s edge, creating a natural measurement gauge. Some drivers prefer using a quarter for a less stringent check. When the top of George Washington’s head becomes visible, approximately 4/32″ (3.2 mm) of tread remains. This higher threshold gives drivers more warning before reaching the legal minimum, allowing additional time to shop for replacement tires.
While convenient, coin tests lack the precision needed for comprehensive tire maintenance. They only indicate whether you’ve reached specific thresholds—they don’t tell you how much tread remains beyond those points or reveal whether wear is occurring evenly across the tire.
Step-by-Step Guide: Measuring Tire Tread Depth at Home
Learning how to measure tire tread depth properly requires following a consistent process that accounts for normal wear variations. Begin by parking your vehicle on a level surface and ensuring the tires are cool—driving even short distances generates heat that causes rubber to expand slightly, potentially adding half a millimeter to measured depth.
Remove any stones, debris, or objects lodged in the tread grooves that could interfere with the gauge reaching the groove bottom. Tire wear rarely occurs uniformly across the tire’s circumference, which is why taking measurements at multiple points is essential. Measure at a minimum of three points across each tire’s width: the outer third, center, and inner third of the tread area.
When using an analog gauge, press it flat against the tire surface with consistent pressure before pushing the sliding pin into the groove. Inconsistent pressure can compress the rubber temporarily, giving falsely low readings. With digital gauges, follow the manufacturer’s instructions for proper placement. Record all measurements immediately in a logbook or phone app, including the date, mileage, and exact depth at each measurement point.
Decoding Tread Depth Measurements: What 4/32″ Really Means for Safety

Understanding tread depth measurements requires familiarity with both measurement systems used in the automotive industry. Most drivers encounter both systems, so knowing how to interpret them ensures you can understand information from any source.
A new passenger car tire typically arrives with 10/32″ to 11/32″ of tread depth (approximately 8 to 9 mm). Light truck and SUV tires often start with deeper treads, ranging from 12/32″ to 15/32″ (approximately 9.5 to 12 mm). Two 32nds equals 1/16″ and approximately 1.6 mm, which represents the legal minimum in most jurisdictions. Four 32nds equals 1/8″ and approximately 3.2 mm, a threshold where many manufacturers recommend replacement for optimal performance.
As tread depth decreases, performance characteristics degrade in predictable ways. At 8/32″ (6.4 mm), tires perform close to original specifications for dry and wet braking. At 6/32″ (4.8 mm), wet braking distances begin increasing noticeably. At 4/32″ (3.2 mm), hydroplaning resistance diminishes significantly, and emergency braking distances can extend by 20% or more compared to new tires.
Legal Tire Tread Depth Minimums and Why 2/32″ Is Dangerously Low
In the United States, the legal minimum tread depth is 2/32″ (1.6 mm) measured in any two adjacent grooves across three separate locations on the tire. This federal standard applies to all passenger vehicles, light trucks, and SUVs operating on public roads. Driving below this threshold is illegal and voids tire warranties.
While 2/32″ represents the legal minimum, safety experts strongly recommend replacement well before reaching this point. Many tire manufacturers suggest replacing tires at 4/32″ (3.2 mm) depth, particularly for vehicles driven in regions with significant rainfall, snow, or high-speed highways. The performance degradation between 4/32″ and 2/32″ is substantial—wet braking distances increase noticeably even at 4/32″, and hydroplaning resistance diminishes significantly as depth decreases.
The consequences of driving on worn tires extend beyond longer stopping distances. Worn tires generate more heat at high speeds because reduced tread depth allows less air circulation around the tire. They provide less grip in emergency maneuvering situations and channel water less effectively, increasing the risk of hydroplaning at highway speeds.
How to Identify Built-in Tread Wear Indicators on Your Tires
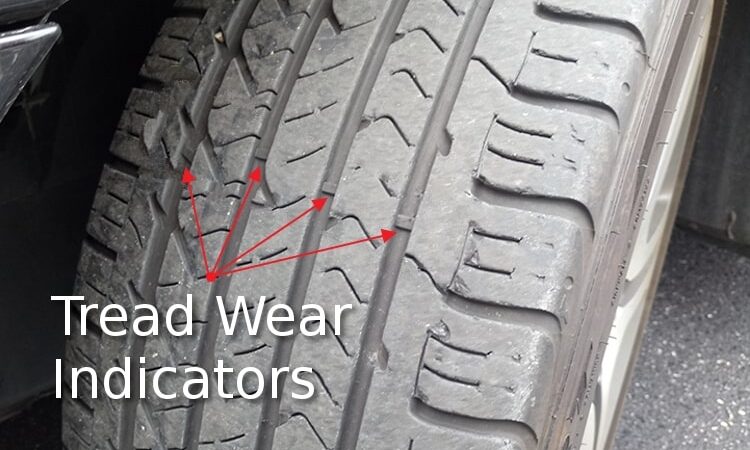
Modern tires incorporate built-in tread wear indicators that provide visual confirmation of wear level without requiring any measurement tools. Tread wear bars are small rubber bridges positioned between the tread grooves at exactly 2/32″ (1.6 mm) depth across the tire’s circumference. As the tread wears down through normal use, the grooves become shallower until they match the height of these indicator bars.
To find the tread wear indicators on your tires, run your finger across the tread grooves until you feel a small raised section that sits lower than the surrounding tread blocks. Alternatively, examine the tire sidewall for tiny triangles or other symbols that point to the indicator locations. Most tires have six to eight indicators positioned around the circumference, giving you multiple points to check for consistent wear.
The presence of visible wear indicators doesn’t mean you should wait until they appear before replacing your tires. By the time indicators become visible, your tires have lost most of their performance capability and are operating at the absolute minimum legal depth.
When to Replace Tires: Critical Tread Depth Thresholds by Driving Condition
Replace passenger car tires when any tread groove reaches 2/32″ (1.6 mm), regardless of remaining tread elsewhere on the tire. However, consider replacement at 4/32″ (3.2 mm) if you frequently drive in rain, snow, or on highways with high speed limits. Performance tires and vehicles driven aggressively should replace at 5/32″ (4.0 mm) to maintain handling characteristics and stability at speed.
Time-based considerations sometimes override tread depth measurements. Rubber compounds degrade over time regardless of tread depth, with most manufacturers recommending tire replacement after six to ten years. Check the Department of Transportation (DOT) code on your tire sidewall—the last four digits indicate the week and year of manufacture (for example, “1223” means the 12th week of 2023). Tires manufactured more than ten years ago should be inspected professionally and likely replaced.
Uneven wear patterns also indicate replacement needs even when overall depth remains adequate. If one tire on an axle has significantly less tread than its mate, the pair should be replaced together to avoid drivetrain stress and unpredictable handling behavior.
Common Mistakes to Avoid When Measuring Tire Tread Depth
Even experienced drivers make measurement errors that lead to incorrect conclusions about tire condition. Measuring at wrong locations produces misleading readings—avoid measuring at the very edge of the tread or in shallow grooves that don’t represent the tire’s primary tread depth.
Temperature effects catch many drivers off guard. Cold tires measure differently than warm tires, with rubber expanding slightly when hot and potentially adding 0.5 mm to measured depth. Always measure tires at consistent temperature conditions for accurate comparison.
Some novice measurers mistake tread wear indicators for measurement points. These indicators sit below the tread surface and are designed to become visible at 2/32″ depth, but they shouldn’t be used as measurement reference points. Measure the tread depth in the grooves, not the indicator height.
Inconsistent measurement pressure when using analog gauges introduces significant error into your readings. Practice applying consistent pressure by taking multiple measurements in succession and comparing results to ensure accuracy.
Mastering how to measure tire tread depth gives you a powerful tool for maintaining vehicle safety and maximizing tire investment. Regular measurement, combined with proper interpretation of results, ensures your tires provide reliable performance throughout their service life. Whether you use the simple penny test for quick checks or invest in precision gauges for detailed tracking, making tread depth measurement part of your regular maintenance routine pays dividends in safety, performance, and cost savings.


