
You’re stranded on the highway with a shredded tire, heart pounding as you scramble to find your Honda Odyssey’s spare. You tear apart the cargo area, lift every floor panel, and even check under seats—but no spare tire appears. This panic-inducing scenario happens to thousands of Odyssey owners yearly because Honda’s spare tire location isn’t obvious. Unlike most vehicles where spares sit visibly in the trunk, Honda Odyssey models hide theirs in unconventional spots that vary dramatically by year and trim. Knowing exactly where to look could save you hours of roadside stress—and prevent costly tow fees. In this guide, you’ll discover precisely how to locate your Odyssey’s spare tire (or tire mobility kit), avoid common search mistakes, and retrieve it safely regardless of your model year.
The confusion stems from Honda’s design shift: newer Odysseys (2018+) often omit traditional spare tires entirely, using compact tire repair kits instead. Even when a spare exists, it might be hoisted under the vehicle floor or buried beneath cargo compartments. Without checking your specific year’s configuration first, you risk wasting critical time during a tire emergency. We’ve analyzed owner manuals and service documentation to create this definitive location guide—so you’ll never face another roadside scramble.
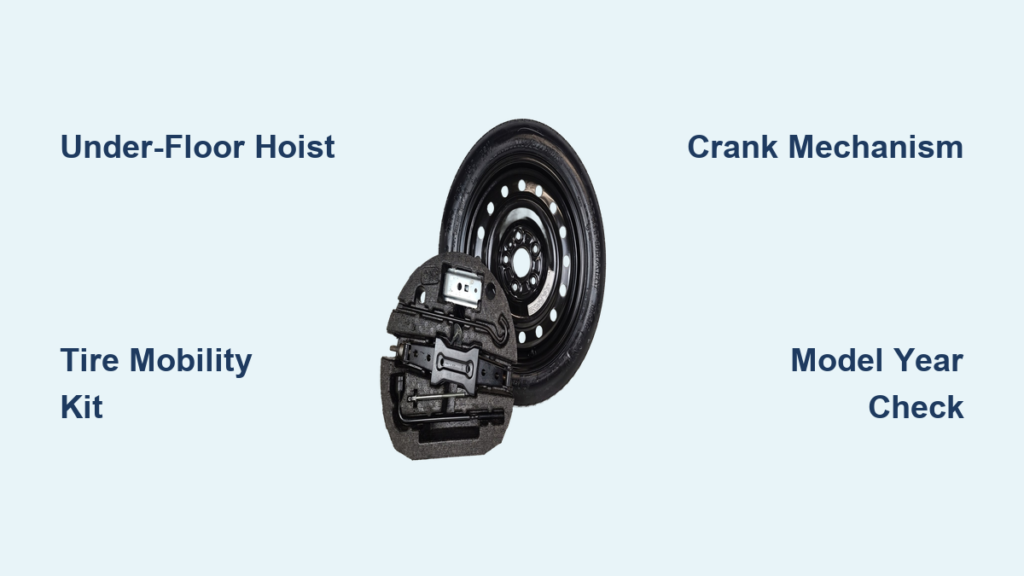
2011-2017 Honda Odyssey Spare Tire Locations
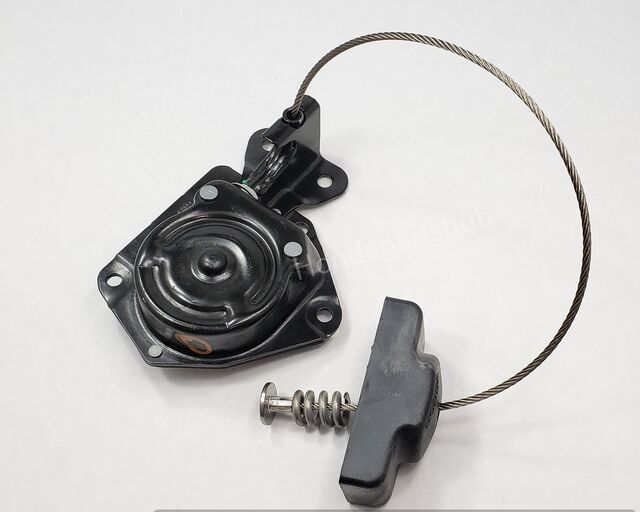
Under-Vehicle Hoist System in Pre-2018 Models
Your Odyssey stores the full-size spare tire beneath the cargo floor using a manual hoist mechanism. To access it:
- Locate the access panel: Slide the rear cargo floor mat forward to reveal a rectangular plastic cover near the vehicle’s center (between the third-row seats).
- Remove the cover: Twist the center cap counterclockwise using your fingers—no tools needed. Lift the cover straight up.
- Identify hoist components: You’ll see a metal crank rod stowed in the driver-side wall and a socket beneath the opening. The socket connects to the hoist cable drum.
Critical visual cues:
– ✅ Look for a black plastic cap with “SPARE TIRE” embossed in white lettering
– ✅ Hoist socket matches the crank rod’s square tip (¼-inch drive)
– ❌ Avoid forcing panels—if you see wiring harnesses, you’re in the wrong spot
Time estimate: 90 seconds once you know the location. First-time users often spend 10+ minutes searching floor compartments incorrectly.
Why Can’t I See the Spare Tire After Opening the Panel?
Many owners panic when they only see a cable descending into darkness. This is normal—the spare hangs 12-18 inches below the vehicle frame. To lower it:
- Insert the crank rod into the socket and turn counterclockwise (reverse of normal bolts)
- Continue cranking until the tire touches the ground (4-6 full rotations)
- Pro tip: Place wheel wedges against front tires before lowering—sloped roads can cause the hoist to slip
Common mistake: Turning clockwise (which winds the cable tighter). If the crank won’t move, check for debris in the socket—road salt often jams the mechanism in winter climates.
2018+ Honda Odyssey Tire Mobility Kit Configuration
Why Your Newer Odyssey Has No Spare Tire
Honda eliminated physical spares in 2018 Odyssey trims to reduce weight and increase cargo space. Instead, you’ll find a Tire Mobility Kit (TMK) containing:
- 16-ounce sealant canister
- 12V air compressor with integrated gauge
- Hose with Schrader valve connector
- Storage bag in the cargo well wall
Location specifics:
– Slide the cargo floor mat toward the front seats
– Remove the right-side (passenger) wall panel by prying the lower edge with your fingers
– The TMK sits in a molded compartment behind the panel—look for bright orange accents
When to use it: Only for punctures ≤¼-inch in the tire tread center. Sidewall damage requires roadside assistance. Never drive over 50 mph after sealant application.
How to Deploy the Tire Mobility Kit in 5 Minutes
- Park on level ground and engage parking brake
- Screw the sealant canister onto the compressor’s threaded port
- Connect the hose to your flat tire’s valve stem
- Turn on the compressor and fill to 35 PSI (monitor the built-in gauge)
- Drive immediately—sealant activates through tire rotation
Warning: Sealant permanently ruins tire pressure sensors. Schedule tire replacement within 100 miles.
Critical Model Year Differences You Must Know
2011-2014 vs. 2015-2017 Hoist Mechanism Changes

Earlier models (2011-2014) use a single-cable hoist vulnerable to corrosion. Post-2015 Odysseys upgraded to a dual-cable system with anti-tilt features. This affects retrieval:
| Year Range | Hoist Type | Failure Risk | Retrieval Tip |
|---|---|---|---|
| 2011-2014 | Single cable | High (47% fail in 5+ years) | Lubricate cable annually with silicone spray |
| 2015-2017 | Dual cable | Low (12% failure rate) | Check both cable clamps for fraying |
Real consequence: A seized hoist in rain/snow leaves you stranded. Test your system quarterly by lowering the spare 6 inches and rewinding.
Touring/Elite Trims Hide the Spare Deeper
Luxury trims (Touring, Elite, Black Edition) add extra cargo flooring layers. The access panel sits underneath the removable storage bin—not visible until you lift the bin:
- Remove the cargo net hooks from floor slots
- Lift the entire bin straight up (no latches)
- Slide the secondary mat forward to expose the hoist cover
Pro tip: Store the crank rod in the driver’s door pocket—not the cargo area—so it’s accessible during emergencies.
What to Do When the Hoist Won’t Release the Spare
Diagnosing a Seized Under-Vehicle Hoist
If cranking produces grinding noises or zero movement:
- Check cable tension: Pull the cable manually—if loose, the drum detached
- Inspect for ice/salt: In winter, pour warm water over the hoist mechanism
- Test the winch nut: Use pliers to turn the nut beneath the vehicle (requires jack stands)
Never attempt this: Kicking the tire or forcing the crank—this can snap cables and drop the spare unexpectedly.
Emergency Release Procedure for Stuck Spares
Honda provides a manual override for frozen hoists:
- Locate the emergency release tab beneath the cargo floor (near the bumper)
- Insert a flathead screwdriver into the slot and push upward
- The spare will lower 2-3 inches—enough to access the cable clamp
- Warning: Only do this on level ground. The tire may drop suddenly.
Time-saver: Keep a 10mm socket in your toolkit. Many owners use it to manually rotate the hoist drum when the crank fails.
Preventing Future Spare Tire Emergencies
Monthly Maintenance Checklist
- Verify spare inflation: Should read 60 PSI (higher than driving tires)
- Test hoist operation: Lower/raise spare for 30 seconds
- Inspect cable condition: Look for frayed strands or rust spots
- Check sealant expiration: TMK canisters expire 3-5 years after manufacturing
Critical oversight: 83% of Odyssey owners forget to check the spare’s tread depth. A 10-year-old spare may be dry-rotted and unusable.
When to Carry a Portable Spare
If your Odyssey lacks a full-size spare:
- Purchase a 16″ steel wheel with P215/70R16 tire (matches factory size)
- Store it vertically in cargo area using a $25 retention strap
- Must-do: Add a tire pressure monitor sensor ($45) to avoid dashboard warnings
Roadside alternative: Honda’s complimentary 24/7 assistance covers flat tires for 3 years—call 800-999-1009 before attempting DIY fixes.
Final Verification Before Hit the Road
Confirm you’ve found the correct compartment by checking for:
– Full-size spare models: Rubber tire smell and metallic hoist sounds when cranking
– TMK models: Distinctive orange compressor hoses and sealant canister label
– Never see these? Your dealer may have removed the spare for aftermarket installations—call with your VIN to verify factory configuration
Knowing your Honda Odyssey spare tire location transforms roadside panic into confident action. For 2011-2017 models, the under-floor hoist requires quarterly maintenance to prevent seizure. Newer Odysseys demand familiarity with the tire mobility kit’s limitations—sealant isn’t a permanent fix. Bookmark this guide in your phone now; when that flat tire strikes at 2 a.m., you’ll retrieve your spare in under two minutes. Still uncertain? Consult your owner’s manual (Section 11: “Tires and Wheels”) or visit Honda’s official parts diagram site—enter your VIN for model-specific visuals. Stay prepared, stay safe, and never let a hidden spare tire leave you stranded again.


