
Your spare tire isn’t just emergency equipment—it’s a potential projectile in a collision if improperly stored. When you’re stranded with a flat, the last thing you need is a loose 40-pound tire rolling under the brake pedal during transport. Most drivers attempt to “wing it” when reinstalling spares, risking damage to trunk components, tire degradation, or even injury. Yet fewer than 12% of vehicle owners consult their manual for spare storage procedures, according to industry safety reports. This guide cuts through the guesswork with universally applicable safety protocols—always verified against your specific vehicle manual. You’ll learn critical positioning techniques, weight distribution principles, and manufacturer-agnostic securing methods that prevent costly mistakes.
Improper spare storage causes two recurring nightmares: tires shifting during transit (damaging trunk liners or latch mechanisms) and critical mounting hardware going missing after roadside changes. We’ll focus on fundamental safety frameworks that apply across all vehicle types—whether you drive a sedan with an underfloor well, an SUV with a rear-mounted carrier, or a compact with a temporary “donut” spare. Never force-fit components or improvise with bungee cords; what seems like a quick fix today could trigger a warranty void tomorrow. Let’s transform that trunk chaos into a secure, accessible emergency system.
Critical Pre-Storage Safety Checks Before Handling
Verify Your Vehicle’s Weight Limits and Clearance Requirements
Before lifting the spare, confirm two non-negotiable specs from your owner’s manual:
– Trunk floor weight capacity (typically 100-200 lbs for sedans, 300+ lbs for SUVs)
– Required clearance around tire edges (usually 1-2 inches minimum from walls/hinges)
Ignoring these risks permanent trunk deformation. Compact “donut” spares often exceed sedan weight limits when combined with jack tools—stacking them vertically against the backseat creates dangerous leverage points. If your trunk floor visibly flexes when stepping on it, redistribute weight immediately. Full-size spares in SUVs must never contact the rear hatch latch mechanism; even 1/4-inch interference can prevent door closure.
Essential Inspection: Is Your Spare Tire Road-Safe?
A damaged spare stored improperly becomes a liability. Before reinstalling:
– Check tread depth – Temporary spares require minimum 2/32″ depth; full-size must match other tires
– Examine sidewalls – Bulges, cracks, or embedded debris indicate immediate retirement
– Confirm inflation – 60 PSI for donuts (never exceeds 50 mph); full-size at door-jamb pressure
Driving on an underinflated temporary spare for just 10 miles can overheat the tire, causing tread separation. If your spare shows any dry rot (whitish cracking) or was stored in extreme temperatures, replace it—no storage method fixes compromised rubber.
Universal Spare Tire Storage Methods by Type

Securing Compact “Donut” Temporary Spares in Sedan Trunks
Most sedans use a recessed underfloor well with a central retaining bolt. Never skip these steps:
1. Clean the well thoroughly – Remove sand, salt, or debris that prevents flush seating
2. Align the valve stem – Point it toward the front bumper (avoids hose kinking during inflation)
3. Engage the retention mechanism – Hand-tighten the central bolt before lowering the tire; use a socket wrench for final 1/4 turn (overtightening strips threads)
Pro Tip: Place a thin rubber mat under the spare if your well has metal edges. This prevents vibration damage and absorbs moisture. If your bolt mechanism is missing (common after roadside changes), do not drive—visit a dealership for OEM hardware. Tape or bungee cords won’t withstand collision forces.
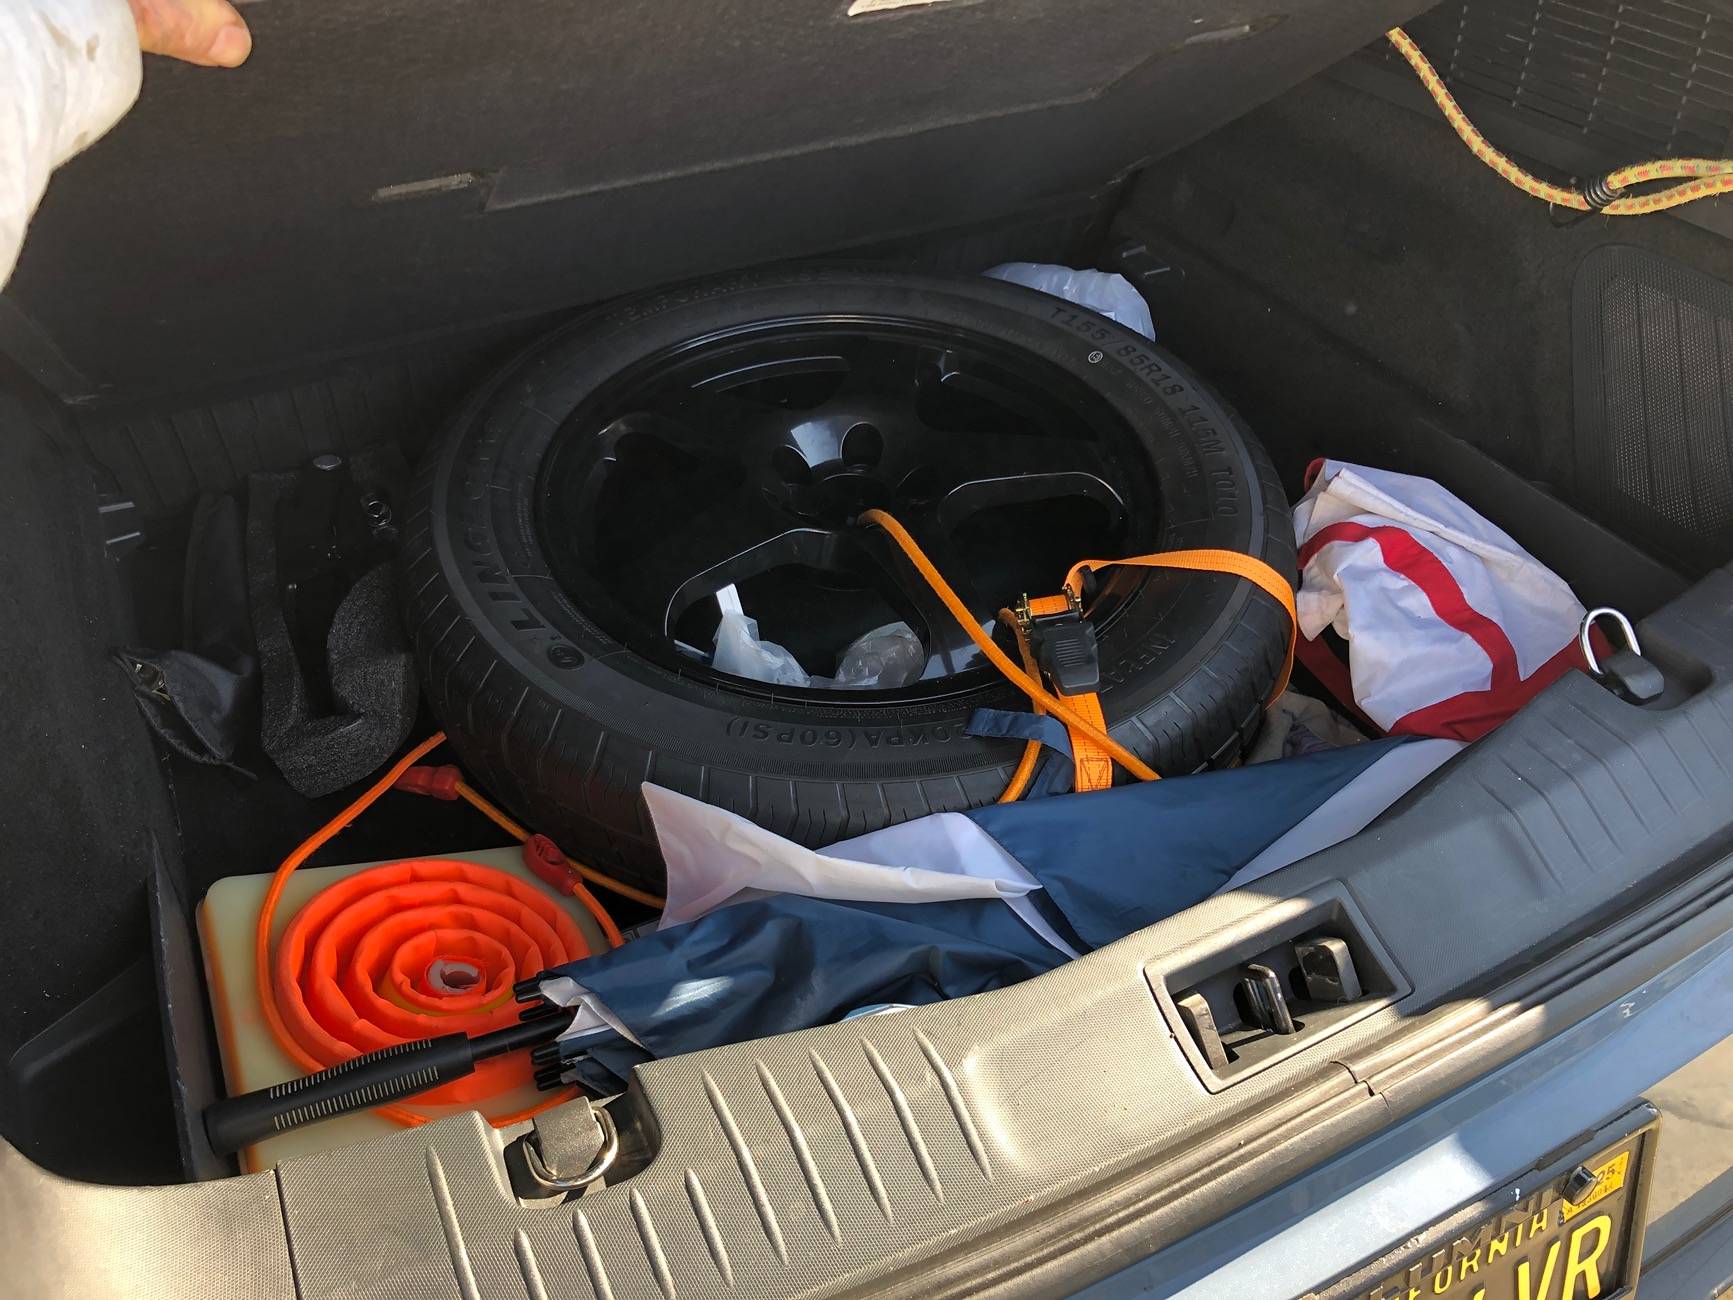
Installing Full-Size Spares in SUV/Crossover Trunks
SUVs often use vertical mounting against the rear hatch. Critical mistake to avoid: Forcing the tire against the hatch glass. Instead:
– Position the tire centered on the mounting plate—off-center weight cracks plastic retainers
– Use all factory hardware – Missing one of four mounting bolts creates dangerous wobble
– Check hatch operation – Open/close 3 times before driving to confirm no interference
If your spare rattles during test drives, add rubber washers between the wheel and mounting plate. Never stack cargo on top of the spare—this shifts the vehicle’s center of gravity.
Troubleshooting Common Storage Failures
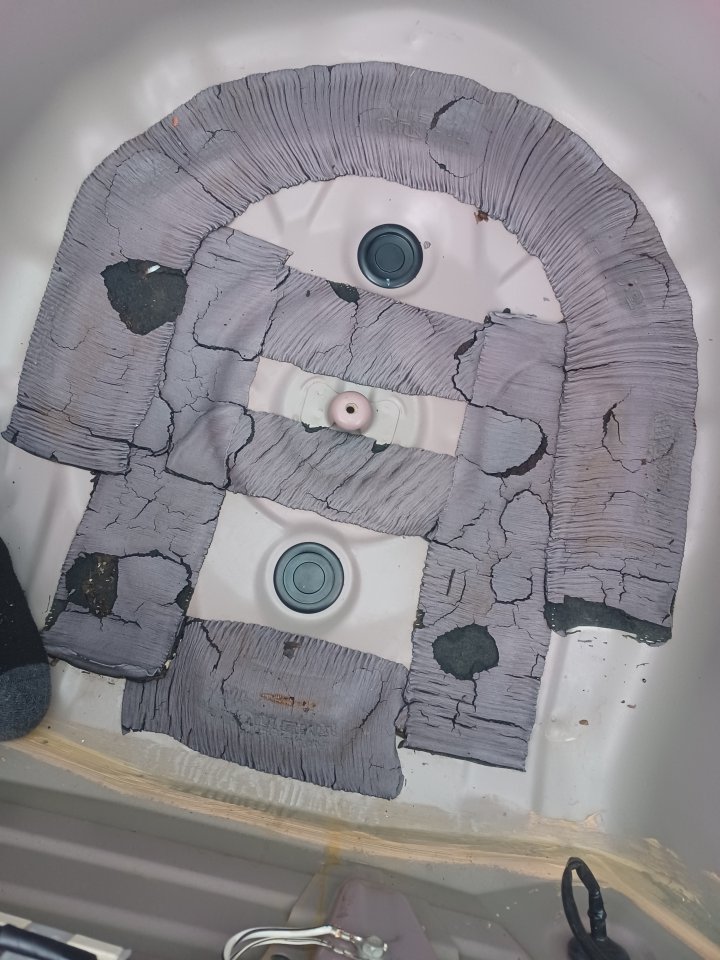
Why Your Spare Won’t Seat Flat in the Trunk Well
This usually indicates hidden damage from previous improper storage:
– Worn retaining bolt threads – Causes tire to sit at an angle (replace bolt immediately)
– Deformed trunk floor – Visible dents under the spare prevent flush contact (requires body shop repair)
– Missing rubber grommets – Allows metal-on-metal contact that vibrates the tire loose
Do not drive if the spare rocks visibly. Temporary fix: Place a 1/4-inch rubber pad (from auto parts stores) under the high side—but this is a stopgap until OEM parts are installed.
Emergency Fix for Missing Retention Hardware
If you lost the central bolt after a roadside change:
1. Park on level ground with parking brake engaged
2. Wedge wheel chocks against front/rear tires
3. Use a ratcheting strap through the trunk well opening (anchor to rear seat latches)
4. Tighten until zero movement is possible (test by shaking the tire firmly)
This is only for immediate transport to a dealership. Never exceed 35 mph, and drive less than 10 miles. Straps can slip during hard braking—your manual’s diagram shows exact anchor points for safe temporary securing.
Preventing Future Storage Disasters
The 30-Second Post-Storage Verification Test
After reinstalling, always perform this sequence:
1. Press down firmly on the tire’s center with both palms
2. Rock it side-to-side with 20 lbs of force
3. Open/close the trunk 3 times while listening for clicks or rattles
If you feel movement or hear noise, re-secure immediately. A properly stored spare should feel immobile—like part of the vehicle structure.
Seasonal Maintenance Your Manual Doesn’t Mention
Extreme temperatures degrade storage systems:
– Summer: Check rubber grommets monthly for dry rot (replace if brittle)
– Winter: Spray bolt threads with silicone lubricant to prevent ice-locking
– Every 6 months: Rotate the spare 90 degrees in its well to prevent flat spots
Store the jack and lug wrench separately from the spare. Tool weight against the tire sidewall creates permanent indentations that cause imbalance.
When to Stop DIY and Call Professionals
Immediately consult a dealership if:
– Your trunk floor sags visibly under spare weight
– Mounting hardware shows rust or cracks
– The tire contacts any electrical components (common in hybrids with underfloor batteries)
Dealership retention kits cost $15-$50 but include torque specifications your manual omits. For example, Honda CR-V bolts require exactly 18 ft-lbs—over-tightening cracks the plastic housing. One certified technician told us: “We see stripped wells weekly from owners using impact wrenches on hand-tight bolts.”
Final Note: Your spare tire is a safety device—not storage clutter. Proper reinstallation takes 8 minutes but prevents $300+ in trunk repairs from a single oversight. Always prioritize your vehicle manufacturer’s diagrams over online videos; a Ford F-150’s well differs radically from a Toyota Camry’s. Keep a photo of your manual’s spare storage page in your phone for roadside reference. If hardware is missing, drive directly to a dealership—never compromise on this critical safety system. For model-specific illustrations, search “[Your Year/Make/Model] spare tire storage diagram” on your manufacturer’s official YouTube channel. Stay safe, stay prepared.


