
Proper tire pressure significantly impacts your vehicle’s safety, fuel efficiency, and tire longevity—yet most drivers neglect this critical maintenance task. When you test tire pressure regularly, you prevent approximately 90% of preventable tire failures while improving gas mileage by up to 3% for every PSI maintained at optimal levels. This comprehensive guide delivers actionable techniques for testing tire pressure correctly, interpreting readings accurately, and avoiding common mistakes that compromise your vehicle’s performance. Whether you drive a compact car, SUV, or truck, these proven methods will help you maintain ideal tire inflation with professional precision.
Essential Tools for Reliable Tire Pressure Testing
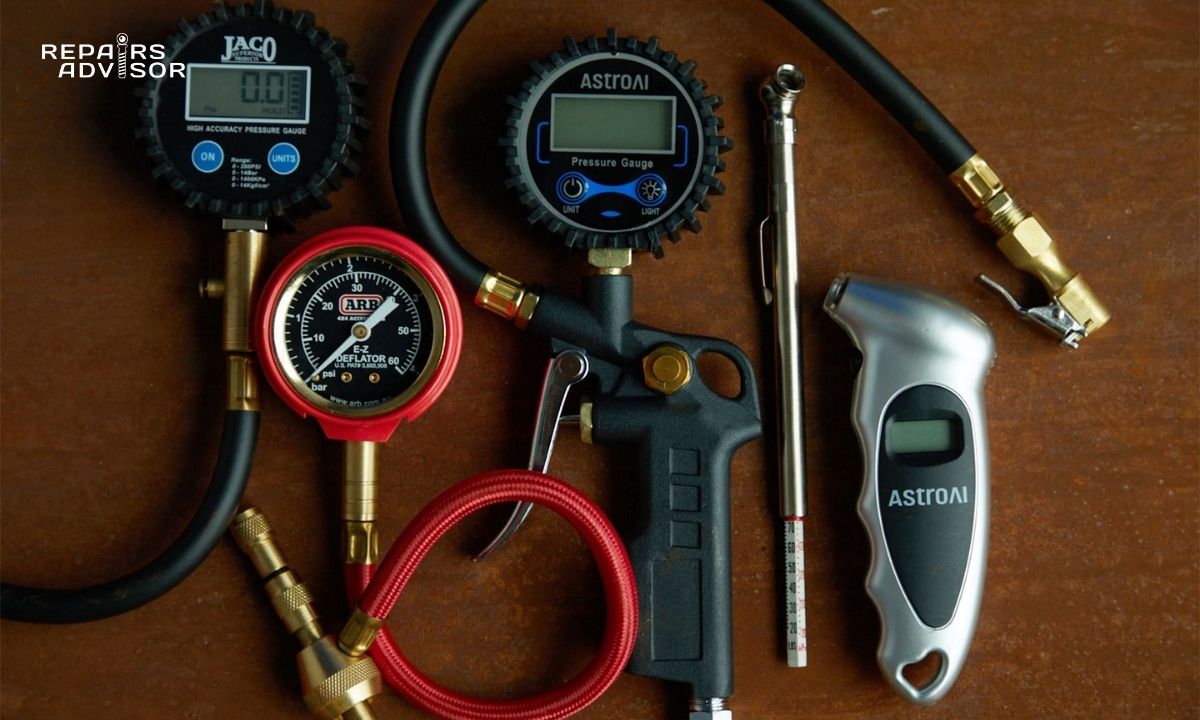
Investing in quality equipment transforms testing tire pressure from a frustrating chore into a quick, accurate process. Professional mechanics rely on dial or digital gauges that maintain accuracy within 1 PSI, unlike cheap pen-style gauges that often read 5-10 PSI off-specification.
Dial gauges feature mechanical pointers that withstand drops and temperature extremes better than electronic alternatives. Look for models with reinforced chrome-plated brass construction and a swivel head for easier valve stem access. Digital gauges offer backlit displays for nighttime use but require battery replacements and can malfunction in extreme temperatures.
Always carry your own gauge when using public air pumps—station meters frequently read high by 2-5 PSI, leading to dangerous over-inflation. Before testing tire pressure at service stations, verify the pump’s accuracy with your gauge and clean the valve stem of debris to ensure a proper seal. For emergency roadside use, a compact digital gauge with a built-in light provides the best balance of accuracy and convenience.
Step-by-Step Tire Pressure Testing Procedure
Testing tire pressure properly requires following a specific sequence that accounts for temperature variables and measurement accuracy. Begin by locating your vehicle’s recommended pressure specifications, typically found on a sticker inside the driver’s door jamb or in your owner’s manual—never rely on the maximum pressure printed on the tire sidewall.
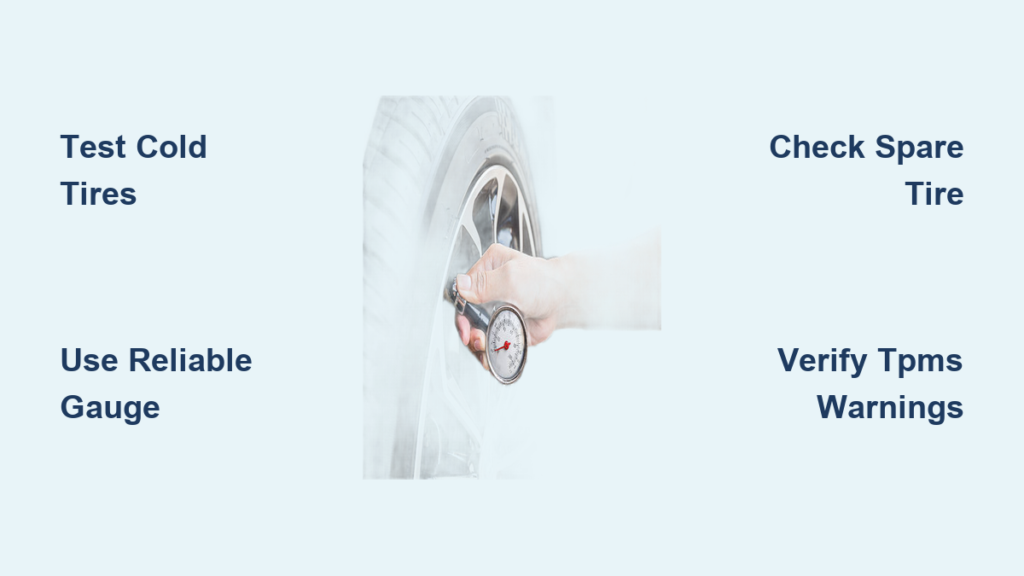
Prepare for Accurate Cold Readings
Test tires when they’re cold—meaning the vehicle has been parked for at least three hours or driven less than one mile. Driving generates heat that artificially inflates pressure readings by 3-8 PSI. If you must test after driving, add 3-4 PSI to your readings to approximate cold pressure, but schedule a proper cold test for the following morning.
Execute Proper Measurement Technique
- Remove the valve cap and press your gauge firmly onto the valve stem until you hear air stop escaping
- Hold the gauge steady for 1-2 seconds until the reading stabilizes
- Record the pressure and repeat for all tires, including the spare
- Compare readings against manufacturer specifications
A proper seal is critical—insufficient pressure on the gauge chuck allows air to escape, producing false low readings. If your gauge has a bleeder button, use it to release pressure gradually if overfilled. For digital gauges, ensure the display stabilizes before recording readings.
Adjust Pressure to Specifications
Add air in short 3-4 second bursts, checking pressure after each addition. Overfilling requires bleeding air through the valve stem, which introduces moisture and contaminants into the tire system. When adjusting warm tires, add approximately 2-3 PSI extra to compensate for heat expansion, but verify cold pressure the next day.
Interpreting Pressure Readings Correctly

Testing tire pressure reveals patterns that indicate specific vehicle conditions requiring different responses. Understanding these patterns prevents unnecessary adjustments and identifies genuine problems.
Consistent Low Pressure Across All Tires
If all tires read 3-5 PSI below specification, this typically indicates normal seasonal pressure loss rather than leaks. Tires naturally lose 1-2 PSI monthly through permeation. Add air to reach specifications and monitor pressure over the next few weeks. If pressure continues dropping rapidly, investigate potential slow leaks or valve stem issues.
Single Under-Inflated Tire
A single tire reading significantly lower than others warrants immediate inspection. Apply soapy water to the tire sidewalls, tread, and valve stem while watching for bubbles. Small punctures from nails or screws may hold air temporarily but require professional repair. If no leak appears visible, monitor the tire daily—slow bead seal leaks often develop between the tire and rim.
Over-Inflation Readings
Persistent over-inflation results from enthusiastic filling, heat expansion, or gauge malfunction. Bleed excess air to specification and verify with a second gauge. If readings remain high, replace your gauge before making further adjustments. Modern tires perform best within 3 PSI of manufacturer specifications—exceeding this range compromises handling and accelerates wear.
Temperature Effects on Pressure Testing Accuracy
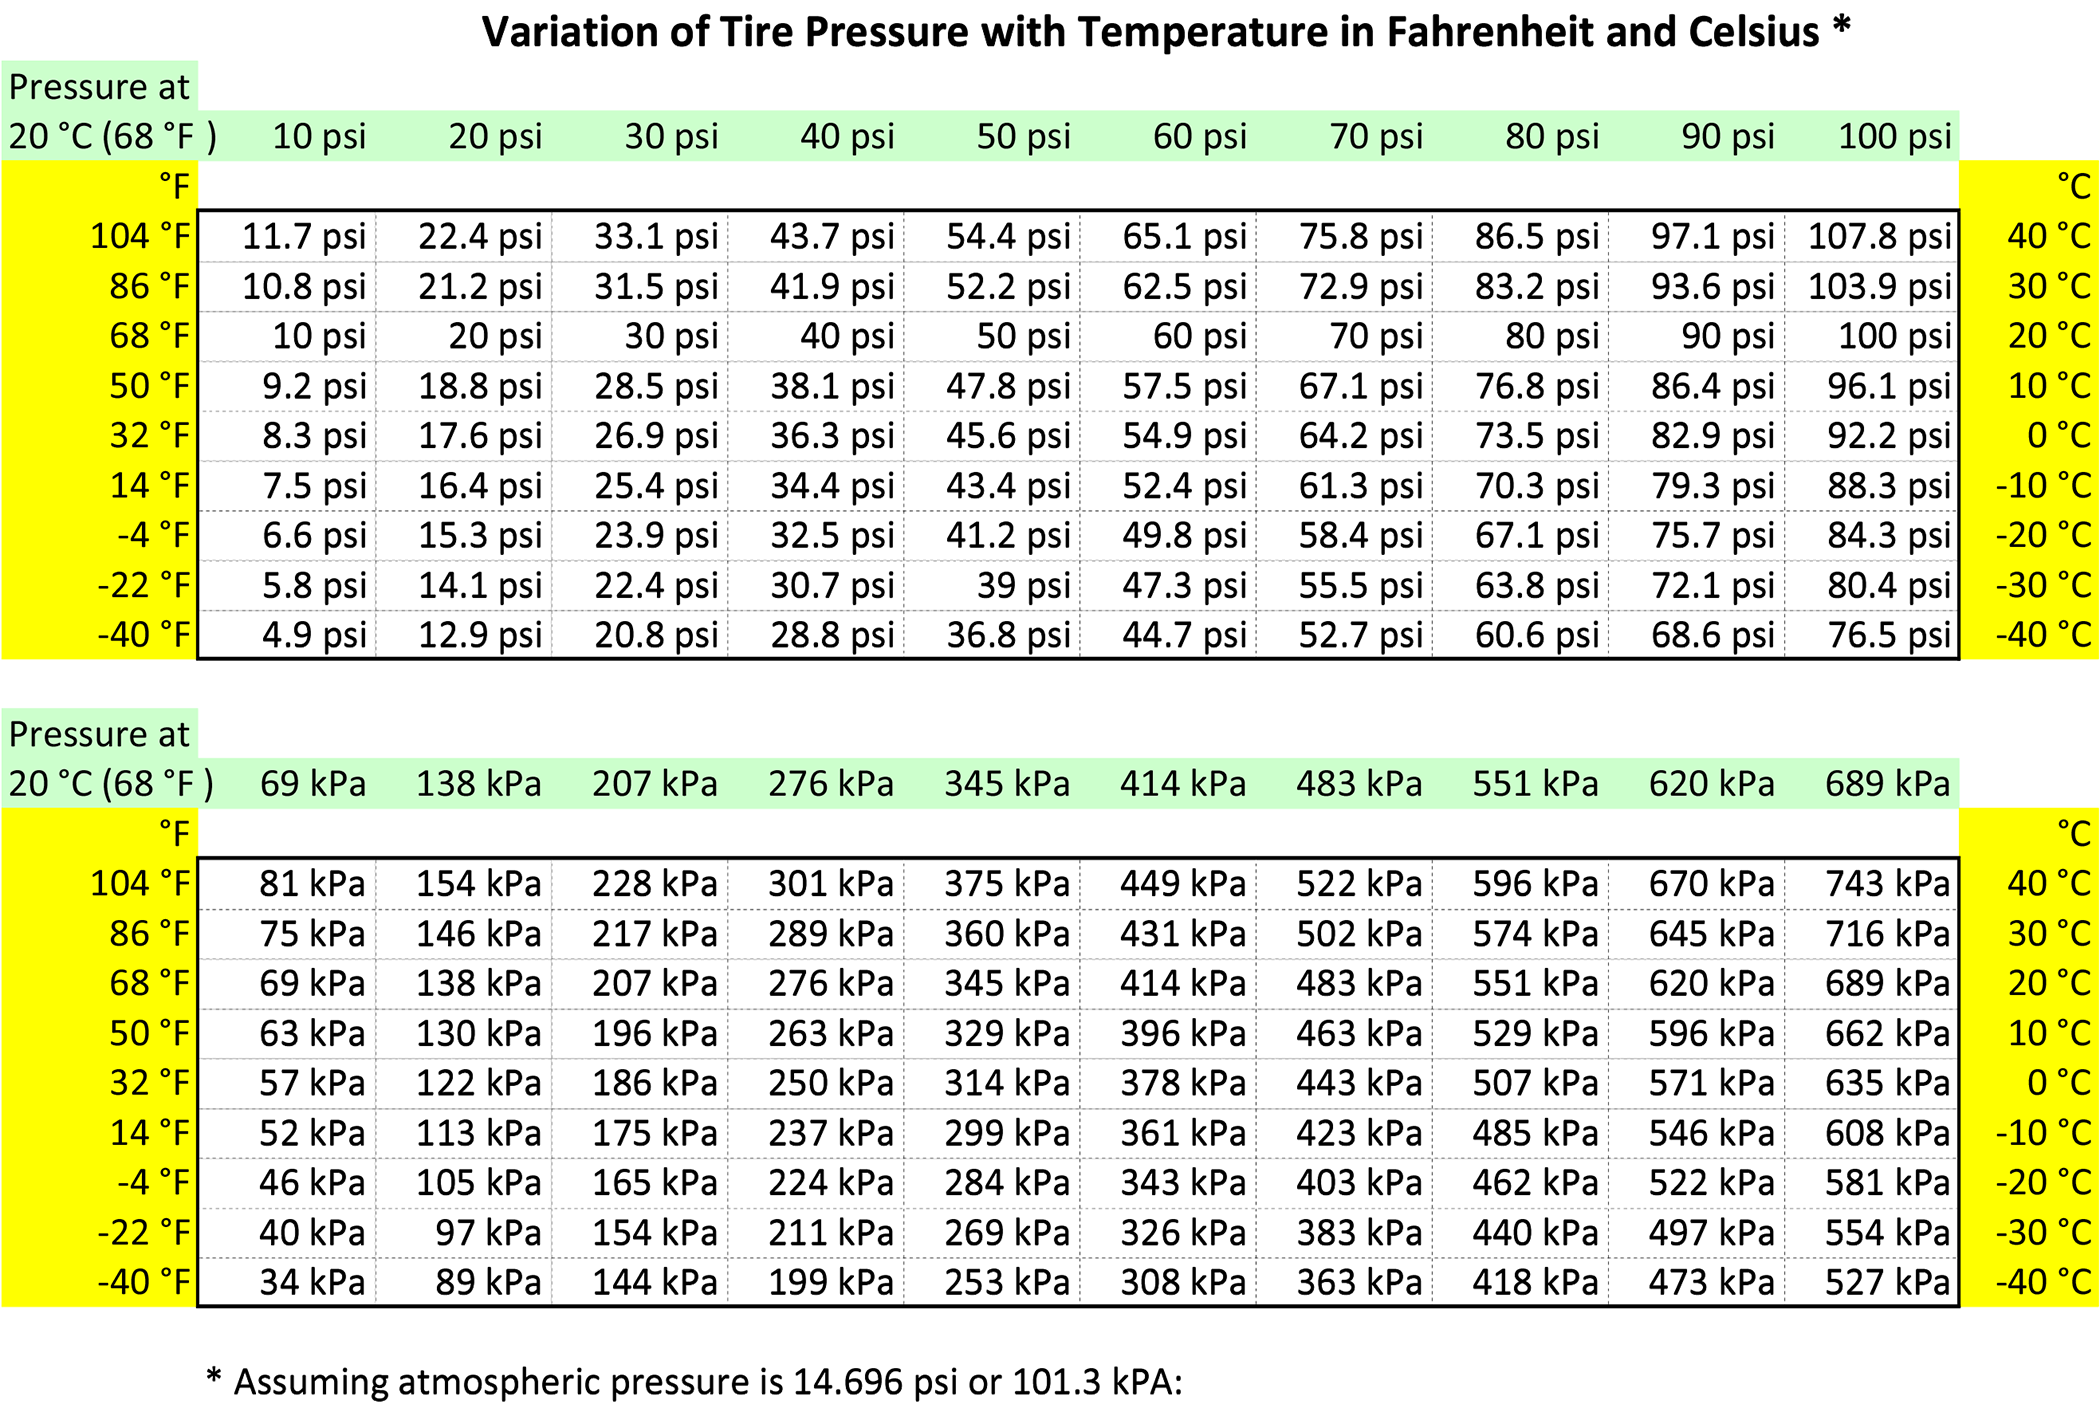
Temperature fluctuations dramatically impact testing tire pressure results, requiring seasonal awareness for accurate interpretation. For every 10°F temperature change, tire pressure varies by 1-2 PSI—meaning a 40°F temperature drop between summer and winter causes approximately 4-8 PSI pressure loss.
Seasonal Adjustment Strategies
Northern climate drivers should test tire pressure monthly during extreme temperature transitions. Many mechanics recommend adding 4-6 PSI to winter pressures in cold regions, then reducing as temperatures warm. However, always prioritize manufacturer specifications over seasonal rules of thumb—some vehicles have different requirements for all-season versus winter tires.
Heat Expansion Considerations
Highway driving at 70+ mph generates significant heat, raising tire pressure 5-10 PSI above cold readings. Testing tire pressure immediately after long drives without accounting for this heat leads to chronic under-inflation. Wait at least one hour after driving before conducting accurate pressure tests, or apply the 3-4 PSI heat correction factor when emergency checks are necessary.
Avoiding Common Tire Pressure Testing Mistakes
Even experienced drivers make critical errors when testing tire pressure that compromise accuracy and safety. Recognizing and avoiding these mistakes ensures reliable results every time.
Gauge Calibration Errors
Dropped gauges often lose calibration without visible damage. Verify gauge accuracy monthly by testing against a known reference at an auto shop. Professional mechanics rotate between multiple gauges to identify when one becomes inaccurate. Replace gauges showing inconsistent readings or after significant impacts.
Ignoring the Spare Tire
Approximately 80% of drivers never test spare tire pressure, leaving them stranded when emergencies occur. Compact “donut” spares require 60 PSI, while full-size spares need standard vehicle pressure. Test spare pressure monthly—you can’t rely on TPMS warnings for stored spares.
Misinterpreting TPMS Warnings
Tire Pressure Monitoring Systems activate when pressure drops 25% below specification, but they don’t indicate over-inflation or gradual pressure loss within acceptable ranges. Testing tire pressure manually confirms whether TPMS warnings indicate real problems or temperature effects. If your TPMS light flashes briefly then becomes solid, test immediately—this indicates intermittent pressure issues that may resolve temporarily but require attention.
Maintaining Optimal Pressure Between Tests
Establishing simple habits between testing tire pressure sessions extends tire life and prevents emergencies. Visually inspect tires weekly for obvious deflation, particularly after extreme temperature changes or rough road encounters. While visual inspection can’t detect small pressure losses, significant deflation becomes immediately apparent.
Address TPMS warnings promptly rather than ignoring dashboard indicators. Warning lights often flash before becoming solid, indicating intermittent pressure issues that may resolve or worsen. Testing tire pressure immediately upon warning activation helps diagnose whether problems are real or sensor-related.
Consider marking your tires with chalk after proper inflation—this visual indicator shows if tires are losing pressure between tests. Simply draw a line across the tread and sidewall; if the line separates as the tire deflates, you’ll know pressure has dropped significantly.
Final Maintenance Recommendations
Testing tire pressure should take less than five minutes monthly but delivers significant safety and financial benefits. A quality gauge costing $15-25 pays for itself within months through improved fuel efficiency and avoided tire replacements. Always test tires cold for accurate readings, verify public air pump accuracy with your gauge, and never ignore TPMS warnings.
For optimal safety, establish a routine: test tire pressure on the first of each month, before long trips, and after significant temperature changes. Include the spare tire in your monthly checks—most vehicles require 30-35 PSI for standard tires and 60 PSI for compact spares. By making pressure testing part of your regular vehicle maintenance, you’ll enjoy safer driving, lower operating costs, and fewer roadside emergencies throughout your vehicle’s lifespan. Properly inflated tires not only save you money but could literally save your life during emergency maneuvers when every fraction of a second counts.


