
You’re stranded at a remote trailhead with overinflated tires after topping off at a gas station, but your tire pressure gauge is nowhere to be found. That sinking feeling hits when you realize precise pressure adjustments are critical for off-road traction or highway safety—yet you have no way to measure. This exact scenario traps thousands of drivers annually, especially adventure seekers and delivery drivers operating beyond urban centers. While professional mechanics always insist on using gauges for accuracy, there are verified emergency techniques to carefully release air when you’re truly without tools. This guide details safe, temporary methods to reduce tire pressure using only everyday objects, while emphasizing critical limitations and risks. You’ll learn exactly how to prevent dangerous underinflation, recognize visual cues for approximate pressure, and understand why these approaches should never replace proper measurement.
Why You Might Need Emergency Tire Deflation Without Tools
Overinflation occurs more frequently than drivers realize—especially after using gas station air pumps with inaccurate pressure settings. Trail riders intentionally lower tire pressure for rocky terrain or sand, but miscalculations happen when gauges fail or get lost mid-adventure. Commercial drivers face similar risks when servicing vehicles in remote locations without proper equipment. The consequences of improper pressure are severe: overinflated tires reduce traction and increase blowout risks on hot pavement, while underinflated tires cause excessive sidewall flexing that generates dangerous heat. Without measurement tools, you’re navigating a critical safety threshold blindly. These emergency techniques exist solely for temporary pressure reduction when immediate gauge access is impossible, not as routine practice. Always verify pressure with a proper gauge within 10 miles of using these methods.
Critical Risks of Deflating Without Measurement
Underinflation causes 90% of tire-related blowouts according to transportation safety studies, making guesswork extremely dangerous. Releasing air without measurement risks dropping below the minimum safe pressure threshold—typically 20 PSI for most passenger vehicles—where the tire can separate from the rim during turns. Even slight underinflation increases rolling resistance by 5%, accelerating wear and reducing fuel efficiency. The most common mistake is releasing too much air too quickly; once air escapes, you cannot add precise amounts back without a gauge. Never attempt these methods if you’re near your vehicle’s recommended PSI (found on the driver’s door jamb sticker), as overshooting could create hazardous conditions within seconds. These techniques are strictly for reducing pressure that’s clearly excessive—like 5+ PSI above recommended levels—when no other option exists.
Using Your Tire’s Built-In Valve System Safely
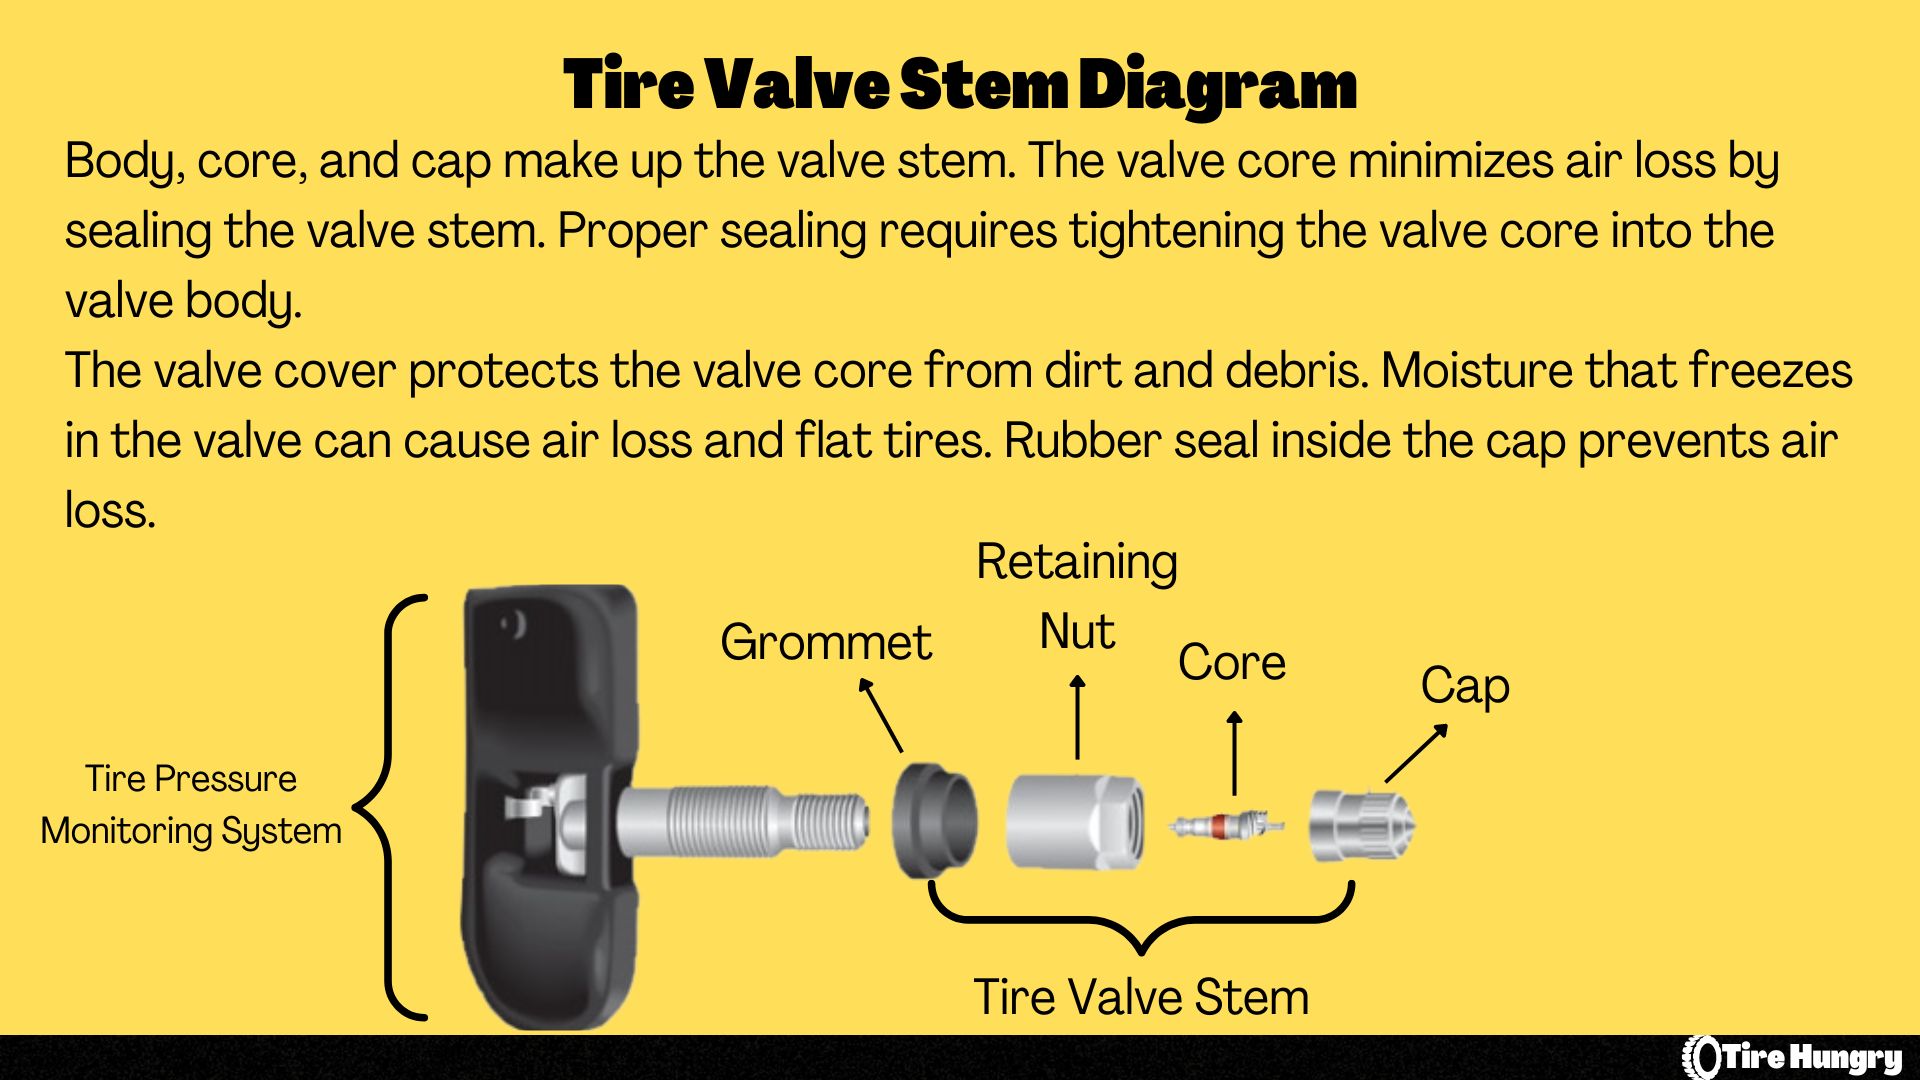
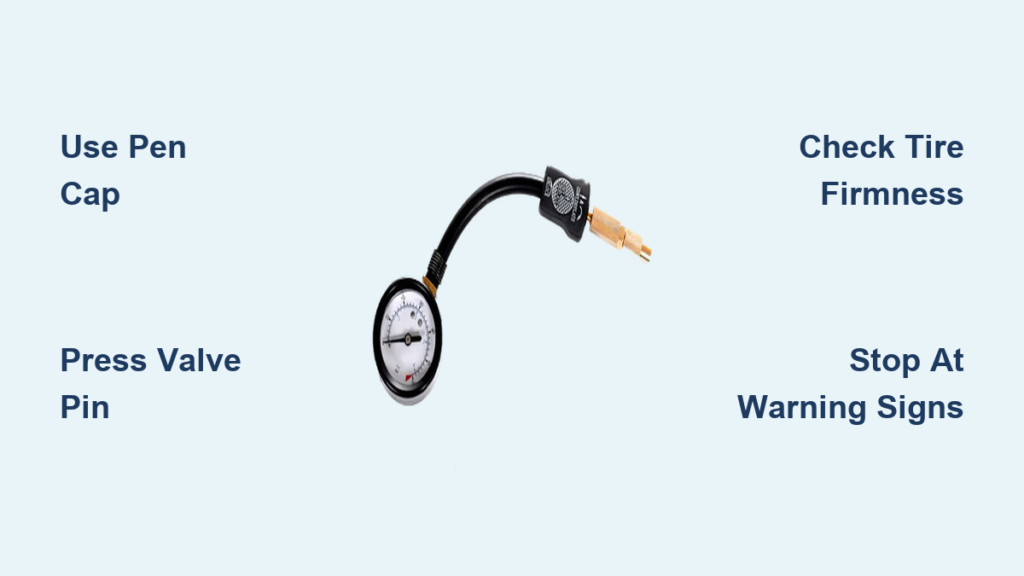
Every car tire uses a Schrader valve stem that contains a spring-loaded pin capable of releasing air when depressed. This mechanism requires no tools and is designed for manual operation. Locate the small metal pin protruding from the valve cap center—this is your primary release point. Successful deflation depends on controlled, partial depression rather than full removal. Never unscrew the entire valve core, as this causes rapid, uncontrolled air loss and allows debris to enter the valve mechanism. The core removal tool is built into most valve caps, but using it here would be catastrophic. Instead, you’ll use household objects to gently press the pin while monitoring tire response. This method works for 99% of passenger vehicles, light trucks, and SUVs manufactured after 1950. Motorcycles and specialty tires may use different valves—do not attempt these techniques if unsure.
The Pen Cap Technique for Controlled Air Release
Remove any standard plastic pen cap and press it firmly over the valve stem. The hollow center naturally aligns with the pin. Apply steady downward pressure while listening for a faint hissing sound. Release immediately if you hear rapid airflow—this indicates excessive pressure. For finer control, use the cap’s edge to nudge the pin sideways rather than pressing straight down. Check progress every 5 seconds by pressing the tire sidewall with your palm; it should feel firm but yield slightly under medium pressure. Critical warning: If the tire feels soft or “spongy” when pressed, you’ve released too much air—stop immediately and drive slowly to the nearest air pump. This method typically reduces pressure by 2-3 PSI per 10-second interval when done correctly.
Key or Screwdriver Precision Method
Use a flat-head screwdriver or house key to carefully press the valve pin. Position the tool’s edge against the pin’s side, not the center, to avoid accidental full depression. Apply gentle, incremental pressure while watching the tire tread contact patch. As pressure drops, the tread will gradually flatten against the ground—stop when the contact area widens by about 1 inch from its overinflated state. Never leave the tool unattended on the valve stem; accidental bumps could cause dangerous over-deflation. This approach requires intense focus: pause every 3 seconds to recheck tire firmness. If using a metal tool, wrap the handle with cloth to prevent valve stem damage. Most drivers release 1 PSI every 8-12 seconds with this technique when executed carefully.
Visual and Tactile Pressure Estimation Cues
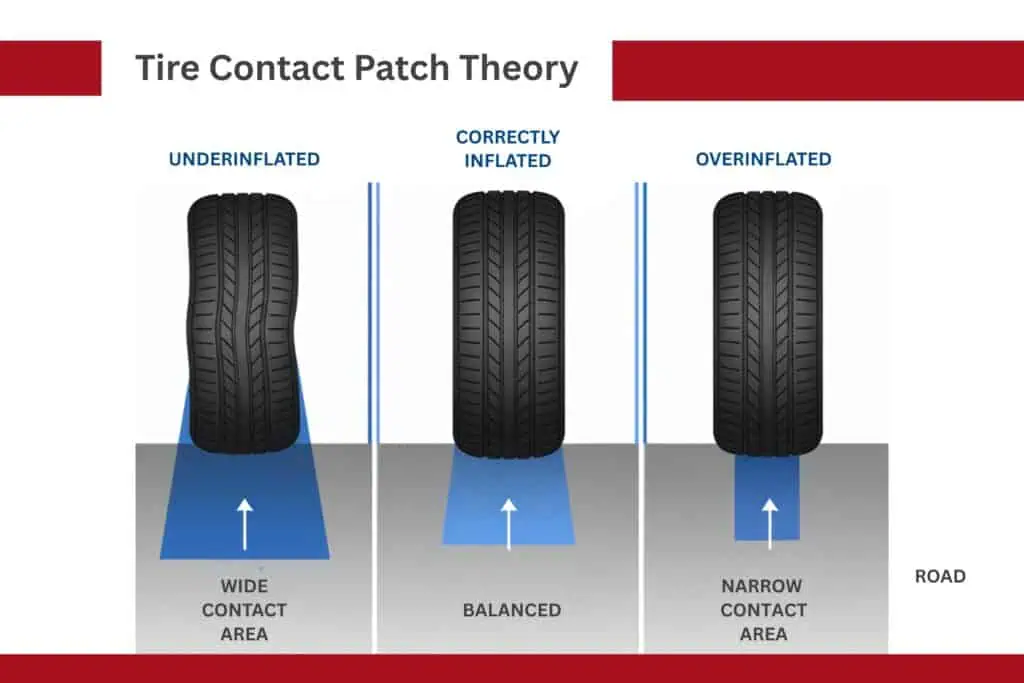
Without measurement tools, you must rely on physical indicators. Stand facing the tire’s sidewall and observe the bulge where it meets the road. Properly inflated tires show a slight, even curve. If the bulge disappears entirely (tire looks “square” at the contact point), pressure is dangerously low—likely below 25 PSI. For overinflated tires, the contact patch appears narrow with pronounced sidewall rounding. Another test: press your thumb firmly against the tread blocks. At correct pressure (typically 32-35 PSI), you should feel definite resistance but slight give—like pressing a ripe avocado. No give indicates overinflation; excessive sinking suggests underinflation. These methods have a 5-7 PSI margin of error but provide critical safety thresholds.
Recognizing the “Point of No Return” During Deflation
Watch for three immediate stop signals: 1) The tire sidewall begins vibrating visibly at idle speeds, 2) Steering feels unnaturally light or “floaty” during slow maneuvers, 3) You detect a rhythmic thumping sound while driving under 25 mph. These indicate pressure has fallen below 22 PSI—dangerously low for highway speeds. If any occur, drive immediately to the nearest air pump without exceeding 15 mph. Never continue deflating once you hear distinct airflow changes; the shift from steady hiss to turbulent rushing means pressure is dropping too fast. Keep tools ready to cover the valve stem instantly if over-deflation happens—your hand can temporarily seal the valve while you find air.
Damage Prevention During Emergency Deflation
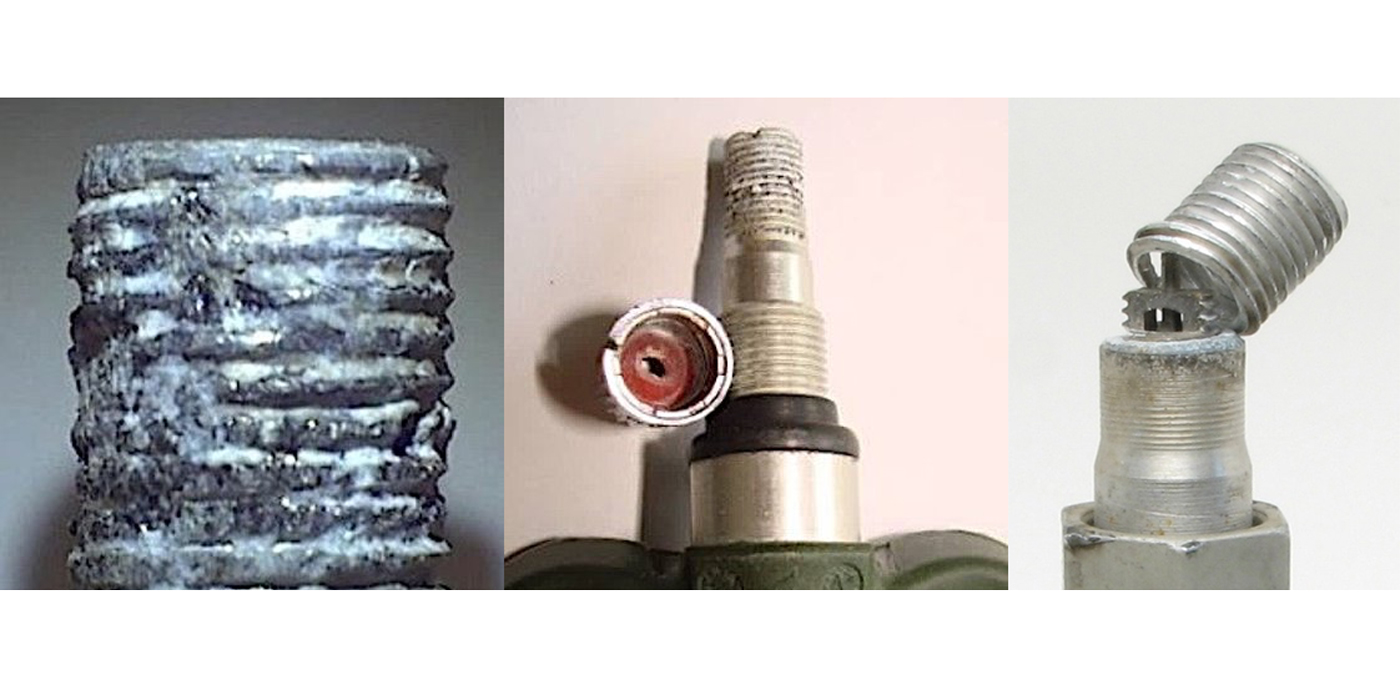
Valve stem damage causes slow leaks that ruin tires within weeks. Always clean debris from the valve area with your shirt sleeve before starting—dirt accelerates core wear. Never use sharp objects like knives or nails near the valve; even minor scratches create leak paths. If the valve cap is missing, cover the stem with duct tape after deflation to prevent contamination. After releasing air, drive 100 feet and recheck tire appearance; uneven bulging indicates bead separation requiring immediate inflation. Critical mistake to avoid: Using the valve core removal tool. This bypasses the pin’s safety mechanism, causing air loss 5x faster than pin depression and often stripping the valve threads. If you accidentally remove the core, place your finger tightly over the stem until reaching an air pump.
When to Abandon Deflation and Seek Help
Stop all attempts if: Your vehicle lists noticeably to one side, the tire shows visible sidewall cracks, or pressure feels inconsistent around the tread. These indicate structural damage where further pressure changes could cause immediate failure. Commercial drivers with dual rear tires should never adjust single tires without gauges—mismatched pressure risks catastrophic blowouts. In remote areas, it’s safer to drive slowly (under 35 mph) with overinflated tires than risk underinflation. Most modern TPMS systems trigger warnings below 28 PSI, providing crucial feedback if your vehicle has this feature. If uncertain, call roadside assistance—many services provide free pressure checks.
Making This a One-Time Emergency
Carry a $5 digital tire gauge in your center console—not the glovebox where it gets forgotten. These last for years and fit in a coin purse. For off-road enthusiasts, mount a magnetic gauge holder inside your trailer hitch cover. After any emergency deflation, visit a tire shop within 24 hours for professional pressure verification and valve inspection. Technicians can detect early damage from improper deflation that you might miss. Remember: Properly inflated tires improve fuel economy by up to 3% and extend tire life by 15,000 miles. The five minutes spent checking pressure prevents hours of roadside danger.
Final Note: These emergency techniques are temporary crisis measures with significant limitations. They cannot replicate gauge accuracy and should only be used when professional tools are genuinely inaccessible. Never rely on estimation for daily driving—your safety depends on precise pressure maintenance. Keep a compact gauge in every vehicle and check pressures monthly, especially before long trips. If you’ve used these methods, treat them as a warning to always verify with proper equipment immediately. Your tires are the only connection between your vehicle and the road; respect them with accurate care.


