A failing valve stem can transform a routine drive into a dangerous situation almost instantly. When your tire’s valve stem develops a leak, air slowly escapes, causing uneven tire wear, poor fuel efficiency, and potentially catastrophic blowouts at highway speeds. Many drivers waste money on unnecessary tire replacements when the real culprit is a simple, inexpensive valve stem issue. This guide shows you exactly how to diagnose and repair valve stem problems safely and effectively, whether you’re at home or stranded roadside. Within minutes, you’ll learn to identify stem damage, choose the right replacement parts, and complete repairs that keep your tires properly inflated for safe driving.
Spot Valve Stem Damage Before It Causes Trouble
Before you waste time and money on tire repairs, confirm whether your valve stem is actually the problem. Many drivers assume a slow leak means a punctured tire, but valve stems are a frequent yet overlooked source of air loss.
Check for Visible Warning Signs
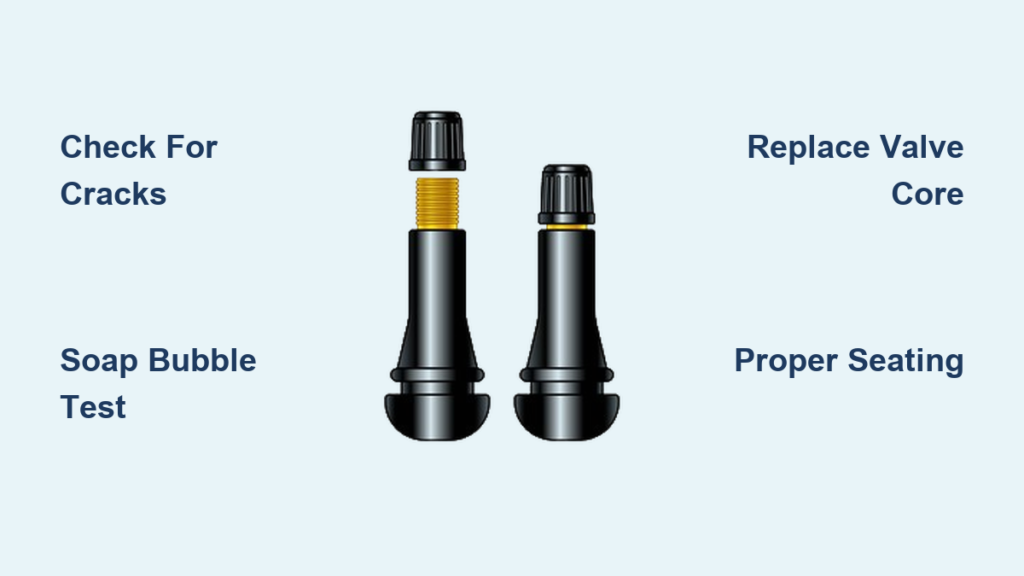
Examine your valve stem while the tire is properly inflated. Look for cracks, cuts, or splits in rubber stems, especially near the base where it meets the wheel. On metal stems, watch for corrosion, rust, or greenish buildup around the mounting point. The valve cap should screw on smoothly and create a tight seal—if it feels loose or won’t stay on, the threads may be damaged. Press gently around the stem base; any softness or visible separation between the rubber and wheel indicates deterioration requiring immediate attention.
Confirm Leaks with the Soap Test
When visual inspection isn’t conclusive, the soap bubble test provides definitive proof of a leaking stem. Mix dish soap with water in a spray bottle and apply generously around the entire valve stem assembly. Watch carefully for 15-30 seconds—bubbles that form and grow confirm a leak. This simple test works because escaping air creates pressure that forces the soap solution to bubble up. Don’t skip this verification step; replacing a functioning valve stem wastes time and money.
Select the Correct Replacement Valve Stem
Choosing the wrong valve stem guarantees continued leaks and potential wheel damage. Valve stems come in specific types designed for different wheel configurations and vehicle systems.
Rubber vs. Metal Stems: What You Need
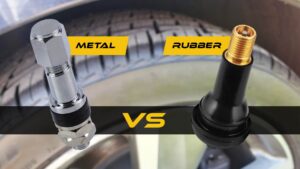
Rubber valve stems work for standard wheels without TPMS sensors but deteriorate over time from ozone and UV exposure. Replace rubber stems every 5-7 years as preventive maintenance, even if they appear intact. Metal valve stems (snap-in or clamp-in types) offer superior durability and are required for vehicles with Tire Pressure Monitoring Systems. Though more expensive, they resist corrosion better and provide a more secure seal. Performance vehicles often use aluminum or nickel-plated stems for maximum strength with minimal weight.
Match Stem Length to Your Wheel Thickness
Using a valve stem that’s too short creates installation difficulties and poor sealing, while an excessively long stem may contact internal wheel components. Standard passenger wheels typically need stems with 1.25 to 1.5 inches of length from the wheel surface to the top. If you have aftermarket wheels, measure the distance from the wheel’s valve stem hole to any internal obstructions before purchasing replacements. Most tire shops stock various lengths specifically for different wheel designs.
Gather Essential Tools for Valve Stem Repair

Having the right tools makes the difference between a successful repair and a frustrating failure. You’ll need specialized equipment even for simple valve stem fixes.
Core Removal Tool and Replacement Cores
The valve core is the small internal component that actually seals air inside your tire. When bubbles form specifically around the core area, you may only need to replace this inexpensive part. A valve core removal tool (costing just a few dollars) grips and extracts the core without damaging the stem. Always buy replacement cores in multi-packs—you’ll likely need several during repairs, and having extras prevents mid-project trips to the store.
Valve Stem Puller and Installation Kit
When replacing an entire valve stem on a mounted tire, you’ll need a valve stem puller tool. This device inserts into the stem and expands to grip the inside, allowing you to pull it through the wheel’s valve hole. Without this specialized tool, removing a mounted stem is nearly impossible. Installation tools work in reverse, helping guide the new stem through the hole while maintaining proper orientation. Quality kits include both removal and installation tools with adapters for different stem sizes.
Execute Quick Fixes for Immediate Relief
Not every valve stem issue requires full replacement. Some problems can be addressed with temporary solutions that get you back on the road safely.
Replace a Faulty Valve Core in Minutes
If your leak test showed bubbles specifically around the valve core, this simple fix takes less than 15 minutes. Deflate the tire completely by removing the old core with your tool. Spray soapy solution around the valve hole again to confirm the core was the only leak source. Screw in a new valve core firmly but avoid overtightening—inflation will seat it properly. Inflate to recommended pressure and re-test with soapy water. This process costs pennies compared to full stem replacement.
Emergency Roadside Solutions
When stranded far from help, temporary fixes can get you to a repair facility. For rubber stems pulled partially out, deflate the tire completely and push the stem back into position (though this presents significant risk). Some drivers carry emergency valve stem plugs—small rubber inserts that stop major leaks temporarily. These solutions are genuinely temporary and should never replace proper repair. Remember: a failed valve stem at highway speeds can cause rapid deflation leading to loss of vehicle control.
Replace Valve Stem on a Mounted Tire Properly
When the stem itself is damaged, you can often replace it without removing the tire from the wheel—a process that saves significant time but requires careful execution.
Remove the Old Valve Stem Safely
Deflate the tire completely through the valve core. Insert your valve stem puller tool according to instructions, expanding the collar inside the stem. Apply steady, even pressure while pulling—sudden jerking motions can damage the wheel’s valve hole. If the stem breaks during removal, you’ll need a specialized extraction tool. Once removed, clean the valve hole thoroughly, removing any old sealant or debris that might interfere with the new seal.
Install the New Valve Stem Correctly
Apply soapy water or lubricant to the new stem’s base before installation. Insert from the inside of the wheel, pushing through until the base flange seats against the inner surface. Pull gently from outside to ensure full seating, then verify the stem stands straight and perpendicular to the wheel. A tilted stem will leak immediately. Once satisfied with installation, reinstall the valve core and begin inflating slowly while checking for proper seating.
Prevent Future Valve Stem Failures
Proper maintenance extends valve stem life significantly while catching problems before they cause roadside emergencies. A few minutes of attention during regular tire checks prevents most failures.
Monthly Inspection Routine
Incorporate valve stem checks into your monthly tire pressure inspections. Look for cracks, deterioration, or corrosion—especially if your vehicle sits for extended periods. Vehicles in coastal areas need more frequent checks due to salt air accelerating corrosion. Replace any stem showing early wear signs proactively rather than waiting for complete failure.
Never Skip the Valve Cap
Valve caps serve a critical protective function many drivers ignore. They keep dirt, moisture, and debris from contaminating the valve core. Always replace missing or damaged caps immediately—never drive without them. Choose caps that create a tight seal but avoid over-tightening, which damages valve threads. Some caps include built-in pressure indicators for quick visual confirmation of proper inflation.
Avoid Costly Repair Mistakes

Even experienced DIYers make errors during valve stem repairs that lead to continued leaks or safety hazards. Learning these common mistakes ensures professional-quality results.
Don’t Overtighten Valve Components
Valve cores should be snug but not forced—hand-tight plus a quarter turn provides adequate sealing. Valve caps should screw on smoothly until they contact the sealing washer, requiring no additional force. Damaged threads often can’t seal properly, creating the exact leaks you’re trying to fix. If you encounter resistance, check for cross-threading before applying more pressure.
Verify Proper Stem Seating
A valve stem that isn’t fully seated creates immediate leaks. Always confirm the stem stands perpendicular to the wheel surface after installation with no tilting. On rubber stems, ensure the entire base flange contacts the wheel evenly without folds. Taking an extra moment to verify proper installation prevents the frustration of discovering leaks after reassembly.
Know When to Call a Professional
Some valve stem situations exceed DIY capabilities. Recognizing when to seek professional help prevents further damage and ensures your safety.
Wheel Damage Requires Expert Assessment
If your valve stem leak accompanies damage to the wheel’s valve hole—enlarged holes, deformed edges, or severe corrosion—you likely need wheel repair or replacement. Bent wheels often have valve stem problems because the hole is no longer round. These issues require professional assessment rather than simple valve stem service.
TPMS Systems Need Specialized Tools
Modern vehicles with tire pressure monitoring systems sometimes require more than mechanical repair. Sensor programming, system initialization, and diagnostic code clearing need specialized tools most DIYers lack. If your warning light remains on after valve stem replacement, a professional shop can diagnose and resolve the issue quickly.
A properly functioning valve stem is essential for maintaining safe tire pressure. Addressing problems promptly keeps you safe while preventing expensive tire damage. Whether you choose a simple core replacement or complete stem upgrade, these procedures empower you to handle most situations confidently. Regular inspections catch issues early, while proper repair technique ensures lasting results. When situations exceed your capabilities, professional tire shops provide peace of mind. Keep your valve stems in good condition, address leaks immediately, and enjoy the confidence of knowing your tires will maintain pressure reliably mile after mile.