
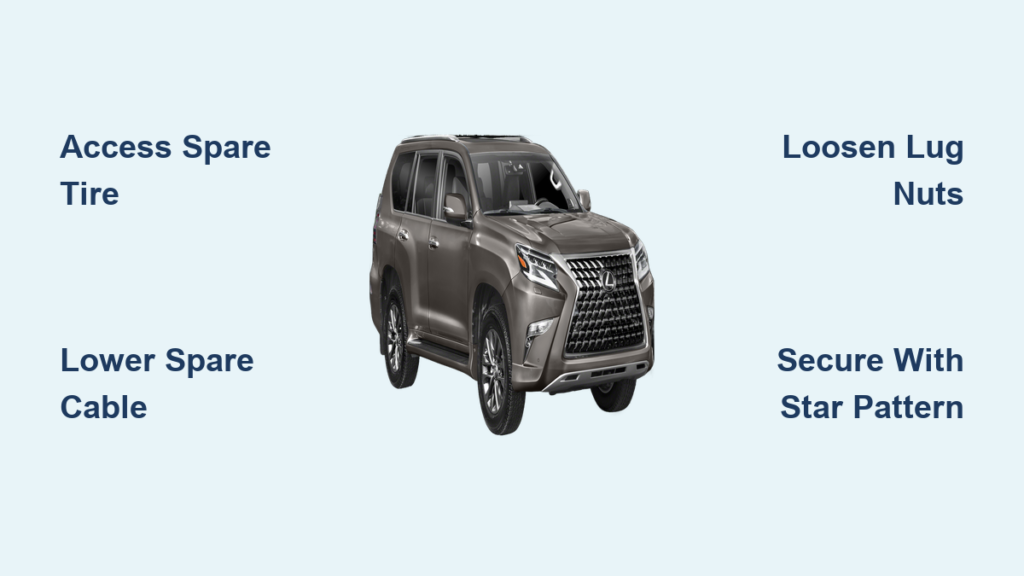
Finding yourself with a flat tire on your Lexus GX 460 can quickly derail your day, but knowing exactly how to change a tire on this specific luxury SUV puts you in control. Unlike many vehicles, the GX 460 stores its spare tire underneath the rear of the vehicle using a cable-operated lowering system, making the process unique compared to other cars. This specialized access method combined with proper tire-changing techniques ensures you can safely handle this common roadside emergency without waiting for assistance. The entire process typically takes 20-30 minutes once you’re familiar with the GX 460’s specific requirements.
Before attempting to change a tire on your Lexus GX 460, understand that this procedure requires two distinct phases: accessing the under-vehicle spare tire and then performing the actual wheel replacement. Most drivers encounter their first challenge when trying to retrieve the spare, as many aren’t familiar with the GX 460’s unique storage system. By following this guide precisely, you’ll avoid common mistakes that could leave you stranded or compromise your safety during the tire-changing process.
Access the Under-Vehicle Spare Tire
The Lexus GX 460 stores its spare tire underneath the rear of the vehicle, suspended from the chassis by a cable-operated lowering system. This differs from vehicles with spare tires mounted on rear doors or in cargo areas, requiring specific knowledge to access properly when you need it most.
Locate the Tailgate Storage Compartment
Open your GX 460’s rear tailgate and examine the inside surface where you’ll find a specialized retrieval rod securely stored in a dedicated compartment. Never substitute other objects like screwdrivers or random tools for this rod, as they can damage the mechanism or fail to engage properly. The factory-designed rod has the exact dimensions needed to operate the GX 460’s unique lowering system without causing damage.
Remove the Bumper Access Cover
On the exterior rear bumper cover near the bottom edge, locate the small access hole covered by a removable plastic tab. Use a flathead screwdriver to gently pry out this protective tab without scratching your bumper finish. The hole sits on the top surface of the rear bumper cover, directly below where the spare tire hangs when lowered. Take care during this step—forcing the tab can cause it to break, rendering your spare tire inaccessible during future emergencies.
Lower the Spare Tire

Insert the retrieval rod from the tailgate into the exposed access hole on the bumper cover. Turn the rod gently in the appropriate direction—typically counterclockwise, though verify this in your owner’s manual. Avoid forcing or thrusting the rod, as the mechanism requires controlled, steady lowering. Continue turning until the spare tire fully descends and rests on the ground beneath your GX 460. If the rod won’t insert or turn properly, double-check that you’ve completely removed the protective tab covering the access hole.
Release the Spare from Mounting Bracket
Once the tire touches the ground, locate the strap, hook, or bracket securing it to the cable assembly. Carefully unhook or release this fastener to completely detach the spare tire. Some GX 460 models have a safety strap that must be unhooked before the tire can be fully separated from the lowering mechanism. If the tire won’t release, check for an additional latch or lever you may have missed—never force the tire free as this could damage the mounting hardware.
Gather Essential Tools and Equipment
Before beginning any tire change, ensure you have all necessary tools readily available. Being properly equipped eliminates frustrating interruptions during an already stressful situation and keeps you safe throughout the process.
Required Tools for GX 460 Tire Changes
Your GX 460 should come with a scissor jack and lug wrench stored in the cargo area or under the cargo floor panel. The spare tire itself is obviously essential, while wheel wedges or heavy objects like bricks prevent the vehicle from rolling during the change. Without these securing objects, the vehicle could shift dangerously while you’re working underneath it. Check that your jack is in good condition with no bent parts or leaking hydraulic fluid before you need it.
Recommended Additional Items
Beyond the essentials, several additional items make tire changes safer and more comfortable. A flashlight with working batteries proves invaluable for nighttime emergencies, while work gloves protect your hands from dirt and rust while improving your grip. A knee pad provides comfort during ground-level work, and your owner’s manual contains critical information about specific jacking points. Keep a tire pressure gauge in your emergency kit to verify your spare is properly inflated before mounting it—a flat spare tire offers no solution to your problem.
Prepare and Secure Your Vehicle
Proper preparation and vehicle security are critical safety steps that many drivers overlook. Taking just a few minutes to secure your GX 460 properly prevents accidents and ensures a smooth tire-changing experience.
Select a Safe Location
When you discover a flat tire, immediately find a safe location away from traffic. Pull over to a flat, stable surface with level ground and firm surface—avoid soft surfaces like dirt, gravel, or grass where jacks can sink or tip. If you must change a tire on a highway shoulder, position your vehicle as far from moving traffic as possible. Never attempt a tire change on an incline or unstable surface—continue driving slowly on the flat tire to reach a safer location if necessary.
Engage Safety Precautions
Once parked, activate your hazard lights immediately to alert approaching drivers. Engage the parking brake fully and place wheel wedges against the tires opposite the one being changed—if replacing a rear tire, wedge the front tires, and vice versa. Never skip this step, as even a slight vehicle movement while jacked up can cause serious injury. If you’re on a slight incline, position the wedges downhill from the wheels to prevent rolling.
Loosen Lug Nuts Before Raising
Loosening lug nuts while the vehicle is still on the ground is critical—it prevents the wheel from spinning when you attempt to remove the nuts after raising the vehicle.
Remove Wheel Cover or Hubcap
If your GX 460 has a hubcap concealing the lug nuts, remove it using the flat end of your lug wrench. Apply steady pressure around the circumference until it pops free, then place it in a clean location. Some GX 460 models have plastic hubcaps that require careful leverage to remove without breaking the clips that hold them in place.
Loosen Nuts in Star Pattern
Using your lug wrench, loosen each lug nut by turning counterclockwise about a quarter to half turn—do not remove them completely while the tire is still on the ground. Work in a crisscross or star pattern (1-3-5-2-4 for 5-lug wheels), ensuring even pressure distribution. This pattern prevents the wheel from warping and makes removal easier once the vehicle is raised. If lug nuts won’t loosen, apply penetrating oil and wait several minutes before trying again.
Raise the GX 460 Correctly
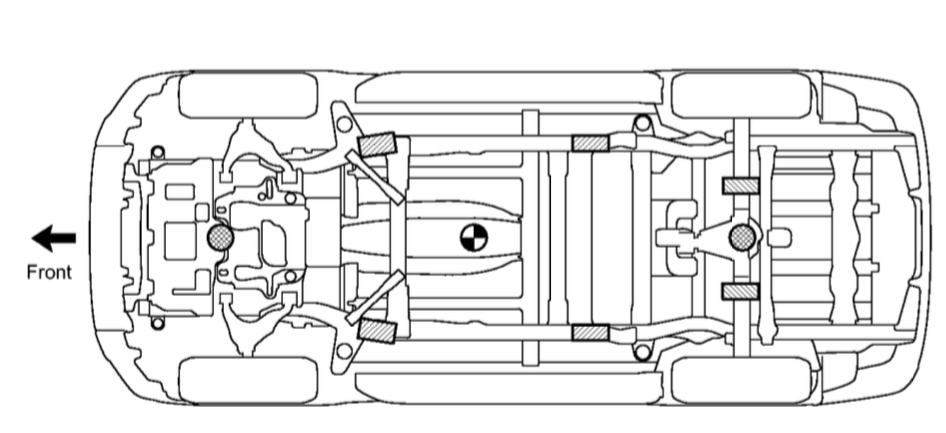
Proper jacking prevents vehicle damage and ensures your safety throughout the tire change process. The GX 460 has specific reinforced jacking points designed to safely support the vehicle’s weight.
Locate Designated Jacking Points
Consult your owner’s manual to identify the specific jacking points for your GX 460 model. These reinforced areas are typically located behind the front wheel wells and ahead of the rear wheel wells along the rocker panels. Never place the jack under the exhaust system, suspension components, or the differential—these areas can be damaged or cause the jack to slip, potentially crushing your hand or causing the vehicle to fall.
Remove the Flat Tire
With the vehicle properly raised, you can now remove the flat tire completely. Lower the vehicle until the spare tire contacts the ground but the vehicle’s weight remains partially supported by the jack.
Pull Off the Wheel
Carefully pull the flat tire straight off the wheel studs. If the wheel resists removal due to rust, avoid using excessive force. Instead, tap the tire gently from the inside using a rubber mallet around the outer edge. Never strike wheel studs directly, as this can damage critical components. Once removed, place the flat tire on its side to prevent rolling and keep it out of your work area.
Mount and Secure the Spare Tire

Mounting the spare tire correctly ensures safe operation until you can have your original tire professionally serviced.
Align and Seat the Spare
Align the spare tire’s mounting holes with the wheel studs on the hub. The tire should slide on smoothly with minimal effort—if it doesn’t align easily, remove and recheck the positioning rather than forcing it. Once seated against the hub, hand-tighten the lug nuts as much as possible to secure the wheel before lowering the vehicle completely.
Finalize Wheel Installation
Completing the tire change properly ensures your safety on the road after leaving the roadside emergency.
Fully Lower and Final Tighten
Lower the vehicle completely to the ground and remove the jack. With the full weight of the vehicle now on the tires, give each lug nut one final tightening with the lug wrench in the star pattern. Proper lug nut torque for the GX 460 typically ranges from 76-83 ft-lbs—over-tightening can warp brake rotors, while under-tightening can allow wheels to loosen during driving.
Stow All Equipment
Place the flat tire, jack, lug wrench, and all other equipment back in your GX 460’s cargo area. Ensure the spare tire retrieval rod is returned to its storage compartment in the tailgate. Organize your cargo area so tools remain easily accessible for future emergencies.
Follow Spare Tire Limitations
After changing to your spare tire, understanding and respecting its limitations is crucial for your safety.
Observe Speed and Distance Restrictions
Most donut-style spare tires on the GX 460 are designed for temporary use only. Never exceed 50 mph and limit driving to 50-70 miles on the spare tire. These restrictions exist because spare tires have less tread depth and aren’t designed for regular tire performance demands. Full-size spares allow more extensive use, but you should still have the original tire repaired promptly.
Check Spare Tire Pressure Regularly
Inspect your spare tire’s inflation pressure monthly when the tire is cold. An underinflated spare provides no value during an emergency. The recommended pressure is listed in your owner’s manual or on the tire information placard—typically higher than standard tires since spares sit unused for long periods.
Perform Post-Change Checks
After completing your tire change, taking a few additional steps ensures your ongoing safety and helps prevent future emergencies.
Schedule Professional Inspection
Contact a qualified mechanic or Lexus dealer as soon as possible after using your spare tire. Professionals can assess whether your flat tire can be repaired or requires replacement. Most tire repairs cost significantly less than replacement when damage qualifies for repair.
Maintain Tire Readiness
Perform regular visual inspections of all tires, including the spare, at least monthly. Look for uneven wear, cuts, bulges, and proper inflation. Test your spare tire lowering mechanism periodically in a safe location to ensure it functions properly before an actual emergency requires its use.
Changing a tire on a Lexus GX 460 combines standard tire-changing procedures with the unique step of accessing the under-vehicle spare tire. By following these steps carefully—preparing your vehicle properly, using the correct tools, and following safety protocols at every stage—you can handle a flat tire situation confidently and safely. Always respect spare tire limitations, maintain your equipment in ready condition, and don’t hesitate to call professional roadside assistance if you encounter difficulties beyond your comfort level.


